Wednesday, April 30, 2014

Challenge for SVG Attic and Guest Designer

Today I have used one of the newest files from the SVG Attic line titled SDS Home Tweet Home. The bird houses in this set are adorable and come in three different sizes. I made the tallest and the smallest ones for this month's SVG Attic Challenge

We would love to have you join the challenge and you can do so by clicking on the SVG Attic May Challenge. This month's challenge is anything goes and prizes include a $25, $15 and $10 gift certificates to SVG Attic. Requirements are simple: use a file from SVG Attic and link up before May 31st.

Home Tweet Home

I used double sided paper for both these bird houses and I went with a rustic look for these. On this first birdhouse I used Tim Holtz distress ink on the front and side panels and I used a dark blue chalk ink for the edges. The texture on the birdhouse is actually the paper design itself.


I used double sided paper on this birdhouse too but I used a Tim Holtz embossing folder for the roof sections and the sides. After I dry embossed the sides, I gently rubbing soft brown chalk ink over the raised embossed make them more visible. 

The cute little bird is from the Birds and Bees Collection.


I just love the way these turned out and they were very easy and quick to put together and they are so cute sitting on my shelf now. 

Enjoy and good luck with the challenge.

Saturday, April 19, 2014

Easter Window

Easter 2014 is almost upon us and I think I am finally ready. No, really I'm not. I never am ready for any of the holidays that come and go so fast but I'm as ready as I will be and at least my kitchen window is decorated.

The sun was just coming up in the morning as I turned around from pouring a cup of joe (to get my day going) and I saw the beautiful way the light played on the objects in the window so I had to grab my camera and start snapping away.

You couldn't even begin to know how many different places I went searching for the branches with flowers on them for my hanging Easter egg tree but I finally found what I was looking for so persistence does pay off or at least it did for this.


Here is a close up of the pinwheels I made. I have three of them in the foreground of the window along with my paper rabbit.The pinwheels are from the cutting file Spring Fling from SVG Attic


A good friend was here a few weeks ago and I got out yarn, glue and water and we tried (notice the word TRIED) to make those yarn egg baskets. One fall apart because it wasn't stiff enough but I found out that one made great Easter grass for my paper basket. The other two are stiff enough to use but look more sphere shaped than egged shaped. I was thinking where I was going to put them and then this idea (look at pictures below) came about.

The pastel colors fit right in with my Easter theme and other Easter projects in the window so this proves that sometimes flops are special creations in disguise. 

Stop by tomorrow for one more Easter project and so I can wish you a Happy Easter.

Friday, April 18, 2014

More Cards and More Eggs

I am starting to wind down on my Easter journey of creativeness and today I am showing more cards I made and some more paper mache eggs.

I'll start with the cards. I made these cards to send to the Saginaw Veteran's Home. I decided at the beginning of the new year that each month I would make as many cards as I could and I would send them to someplace where people need a little pick me up such as a Veteran's home or an elderly care facility. I try to make each card a little or a lot different with a special message written inside. 

The stamp I used is one of those out of the Dollar bin at either Michael's or Joann's. I bought it a few years back so I can't remember which place. 

I used different embossing folders and did some chalk inking on this card. I prefer using chalk ink over regular ink pads now because I like the softer look and the way it glides on better.


This card was made out of scraps. I save every little scrap of paper. Do you?


The Easter paper with the words is double sided so the pink with yellow flower above is on one side and the words are on another. Sad to say, but the company that made this wonderful paper has gone out of business. I picked it up at Tuesday Mornings a year or so ago.


The pink background behind the stamp and green background behind the words of the stamp was colored with chalk (not chalk ink). I love to fill my white backgrounds with chalk. 


I used two colors of chalk for coloring the background on the stamp for this one. I used a green on the edges and then filled the rest in with a golden yellow color of chalk.


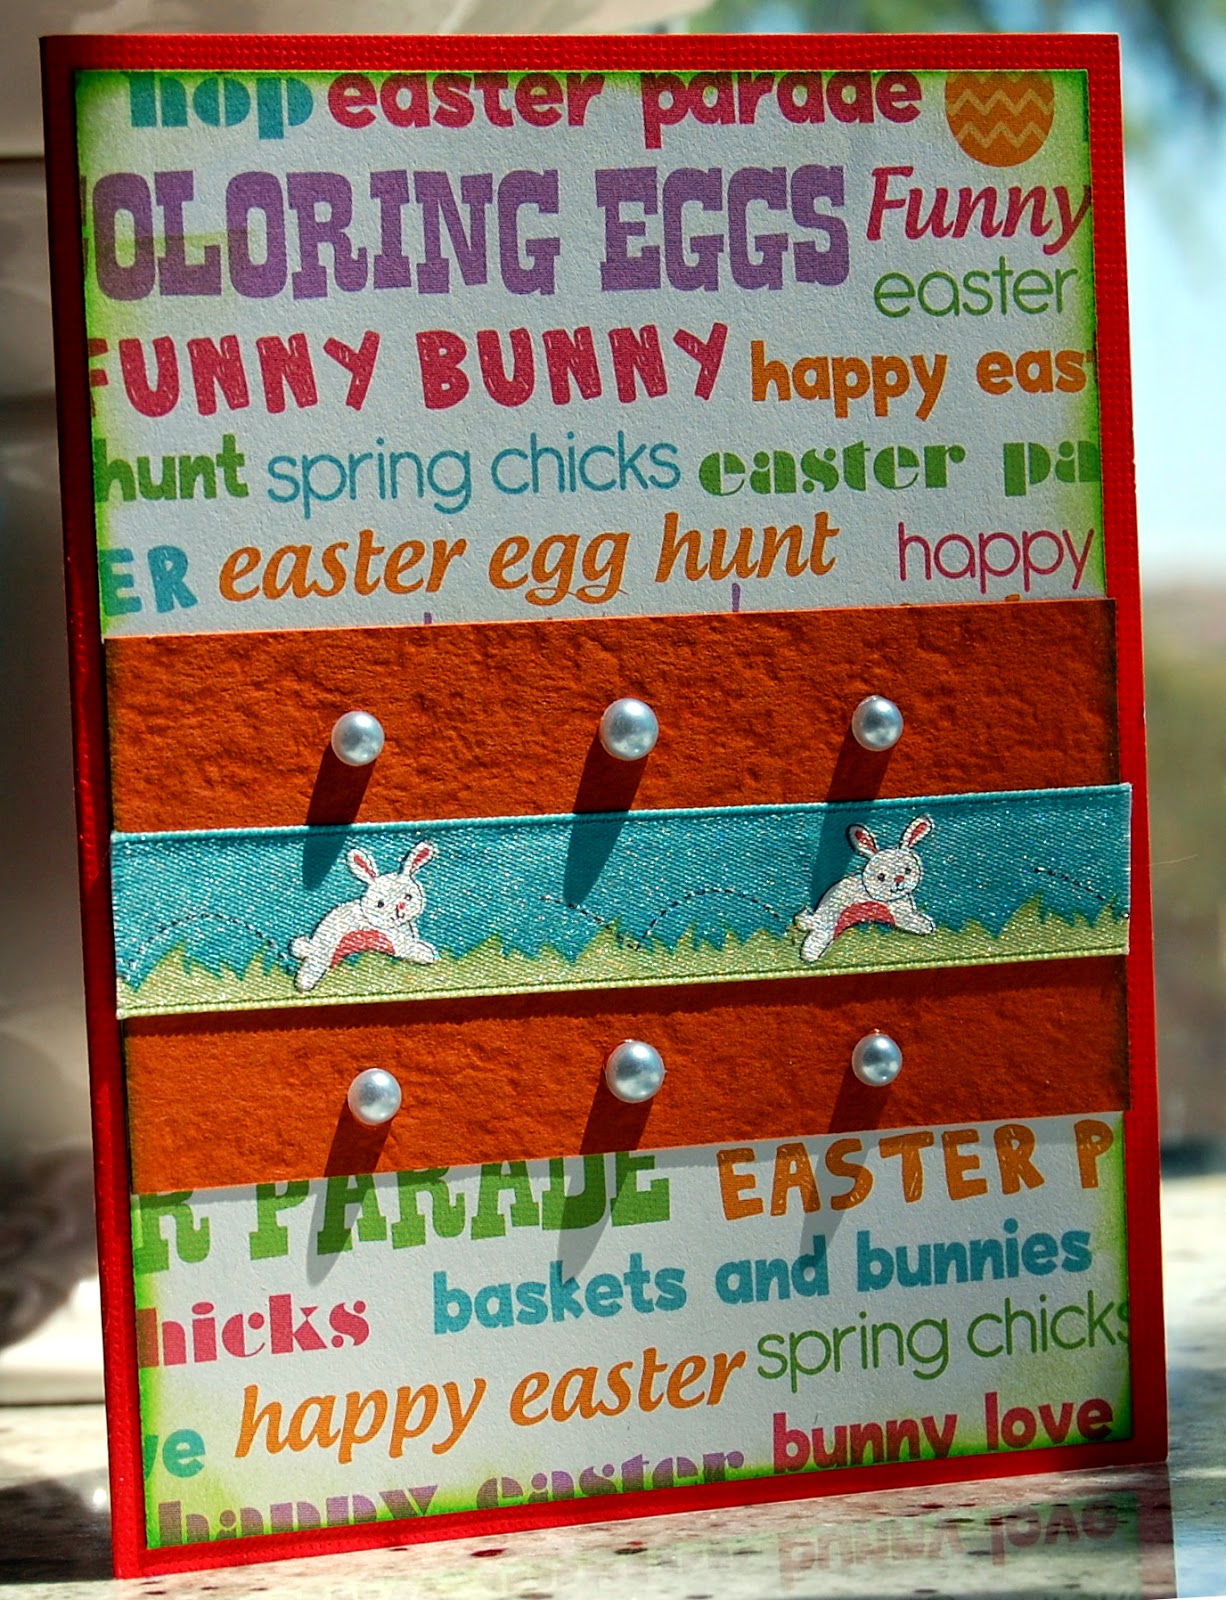
This one came together while going through my scraps of paper and piles of ribbon.  The half pearls come from Miriam's Crafting Supplies.


I used pieces of scrap paper to cover my paper mache egg. I just had to try it. Mod Podge to the rescue to do it and then a coat of glitter Mod Podge to finish the job.


You have to click on this egg to see more of the detail and what I did with it. I dabbed it with acrylic silver paint and then took Ice Stickles in purple to make a squiggly pattern on it. I love the way it looks up close.


This is re-purposing something...I made this little basket for Valentine's Day and then decided it would be cute in my bay window for Easter too so here it is with it's one lonely egg. :)

I hope you'll come back tomorrow to see something I made that turned out totally wrong but yet was perfect. Also, I have some beautiful pictures of my kitchen window as the sun is breaking the dawn.

Challenges Entered:

Chalk-Ah-Lot Challenge 59 - Easter

Craftin Desert Divas - Linky Party 29

Thursday, April 17, 2014

YES! More Eggs

Before I had the paper mache eggs for hanging and then I decided to make some eggs for scattering. Here are few I put in my Easter basket I designed and cut out using my eClips.


Here are the close ups of the eggs.


Simple Directions:

1. Dab sections of the paper mache egg with  Adirondack Acrylic Paint Dabbers
 in solid colors. I used purple, gold and white.

2. Do a second coat if needed or just dab areas that need more paint once paint has dried and let the second coat dry before moving onto step 3.

3. Paint over egg using glitter Mod Podge. Yes, they make Mod Podge with glitter in it. I LOVE the stuff. I have tried adding glitter to Mod Podge but it just doesn't have as nice a look as the Mod Podge that already comes with the glitter in it.

4. For an extra touch, I spritzed Forever Red glitter mist on the white egg and let it pool in areas while it dried.

Challenges I entered:

DL. ART THANKFUL THURSDAY Challenge #130 Easter

Craftin Desert Divas - Craft It Up & Link It Up Linky Party #29

Wednesday, April 16, 2014

Chalk that Bunny

I'm back today to show some cards I made with the digital stamps I colored yesterday. Yesterday's post was a kind of tutorial on how to make multiple cards from a page of digital stamps. The digital stamps I used were all from Bugaboo Digital Stamps and these three cards I made are for my DT project for this month's challenge at CHALK N STOCK. If you use chalk on any of your projects, please link up for this month's challenge which, as always, is anything goes.

After I had my three bunnies ready to go and cut out. I went back and chalked them using either dry chalk or chalk ink and then from there I made these three cards.


The above card I used a combination of chalk in in a bright green and yellow. I first did the yellow and inked in farther on the paper and then went back around the edges with the green.

 This card I just inked the edges with a light yellow chalk ink.

This card I tried something different and used a terracotta colored chalk ink and instead of just inking the very edges of the card, I also dabbed the ink pad on the digital stamp to give it a textured look.

Thanks for stopping buy and tomorrow I'll have more of the paper mache eggs to share with some fun and easy ways to decorate them in a hurry.


Challenged entered:

Chalk-Ah-Lot Cafe challenge #59

Craftin Desert Divas Linky party #29

Tuesday, April 15, 2014

Chalk, Printers and Multi- Cards

I am on the design team for Chalk N Stock and we use Bugaboo digital stamps for our cards each month. This month there were so many that I wanted to work with that I picked a few to run off and color. I decided that I liked them so much that I wanted to make more then one card with them so that's where my colored printer/scanner come in...

Here are the digital stamps after I colored them using colored pencils.

Here they are the first time I printed them out.

My printer cartridge was running out of ink so the second time I printed them out, I got this color variation which I really like and had to share.
The area that doesn't have an image on the two printed out sheets, I used to stamp a sentiment to put on my cards. 

A friend mentioned to me awhile ago about downloading a bunch of images and then coloring them all and scanning and printing them or saving them. This is a great idea for doing multi cards with the same theme such as invitation or thank you's.

Please stop back tomorrow where I will show what I did with the cute little bunny and chalks.

Monday, April 14, 2014

Back to my Easter Egg Creations

I told you I really liked making these Easter eggs out of paper mache and you might say I've gotten carried away with them but there are so many different possibilities that I just can't stop.

This is my last hanging egg for this year and I got a little bumpy with it but I like the way it turned out.


There are only three steps to making this egg:

1. Use Adirondack dabber to dab on the paint color of your choice. I used wild plum from Cutters Creek.

2. Spray with gloss acrylic spray to give a shine and seal the egg.

3. Add half pearls in various colors and sizes. I used half pearls in shades of purple from Miriam's Crafting Supplies.

Leave the ribbon on or hot glue ribbon on for looks or hanging and you're done!

Hope you enjoyed this quick step by step tutorial and I look forward to showing you more of my creations in the near future.


I have entered this in this challenge:

Miriam's Crafting Blog - 11th monthly challenge


Craftin Desert Divas Linky Party 29 - color inspiration

Sunday, April 13, 2014

Krazy Crafting Crew - Frames

Welcome to the Krazy Crafting Crew's April challenge - Frames. We are an independent hop team that enjoys sharing out work with everyone and hope to inspire you with new ideas for you own
creativity. We are a team who loves to do all different themes, such as cards, layouts, 3D
projects and so much more. We do all the paper crafting from traditional to digital.

Our hostess this month is Cicily so please make sure you make it over to her blog to see what wonderful creations she has made and to find out what blog candy she has this month.

I made a frame for my daughter and let her help me decide what color the butterfly should be. Below the pictures is posted what I used and how I made it.


I bought those cute little Christmas tree picture frame ornaments after Christmas for next to nothing and new they would come in handy some day.

1. Lay your frame upside down on any paper you like and trace around it. I also did the insert for the pictures backing. Then cut your design out. It is better to have a little overhang around your frame than none at all.

2. Slather on Mod Podge and adhere your paper to the frame. Use a bray to roll out any air bubbles or press down hard on a flat surface. This star frame was small enough I could just press down but for bigger projects I use my bray.

3. Once it's dry, trim the outside and inside paper with an Exacto knife.

4. Add ink to edges and let that dry

5. Use glitter Mod Podge on top of paper and let dry.

6. Butterfly: I cut the butterfly out of the music paper which is from Graphic 45 and then I used glitter Mod Podge on the butter fly and when it was almost dry, I spritzed on Forever Red Glimmer Mist.

* I have found that if you put the spritz on first and then Mod Podge, the glimmer mist comes off since it's water soluble.

See how easy this is and it turns out so darn cute! Thanks for stopping by and now onto Robin's Blog

 Cicily - http://www.pinkdalmatianscrapper.com
Lissa Marie - www.somanycrafts.com 
Janet - http://janetscreativeworld.blogspot.com 
Christina ~ http://cema1cema.blogspot.com/
Kathryn ~ http://creationswithkathryn.blogspot.com
Jearise ~ http://lorbysworld.blogspot.com
Robin S ~ www.scrapandchat.blogspot.com
Katina ~ http://lovinglifeslittleblessings.com
Miranda ~ www.nanasscrapspot.com
Lori ~ http://www.scrappinmystressaway.blogspot.com/
Paula ~ www.preciouspagesbyPaula.blogspot.com


Friday, April 11, 2014

Easter Egg post 3

I just love the glitter eggs you find in the store and have always wondered how you get the glitter to stay on. I started playing with ideas and found it! I also discovered some other neat tricks on the way. Here are the glitter eggs I made.


Directions for Making:

1.  I used Adirondack Acrylic Paint Dabbers in white or a color close to the glitter I was using and dabbed a section of the egg.

2.  While the egg was wet, I sprinkled on glitter. I tried different types: very glittery, dull glitter and course glitter to give different looks. This is time consuming since you have to do a section at a time and then let it dry but it's so worth it.

*I found by using the paint under the glitter, the paint fills in spots that the glitter might not adhere to so it gives the illusion that there is more glitter on the egg than there probably really is.

3.  Once your egg is totally covered in glitter and dried, take it outside and spray it with a coat of acrylic in either flat or gloss. I tried both and really couldn't see much of a different but it makes it so the glitter does NOT rub off.

4.  Cut ribbon and hot glue it around the egg to make a ribbon hanger or leave it off and use the eggs in a basket.

Thursday, April 10, 2014

Paper Mache Easter Eggs - Design 2

I'm back today to show some more paper mache eggs I got creative with. 


These were so simple to make and they turned out awesome. I used two colors of Adirondack Acrylic Paint Dabbers. For the top egg, I first dabbed on espresso to cover the whole egg and then when that was dry, I dabbed on gold. For the bottom egg, I first completely covered the egg in pool color and then dabbed on copper. 

Thanks for stopping by again today.

Jearise

Wednesday, April 9, 2014

Hanging Easter Eggs Part 1

I am putting up Easter decoration and thought I would try my hand at decorating my own paper mache eggs. I was at the craft store and looking at how expensive already decorated ones are and I thought that I might as well try it myself and see what happens.

I was so happy with the way these turned out.


I started out by dabbing sections of the egg with Adirondack Acrylic Paint Dabbers. I did a section at a time so that I could turn the egg without getting paint all over me and it was easier to find something to put the egg on to dry. I used a shot glass. Once it was all painted and dried I went back and used Stickles Glitter Glue to create various designs on each egg. Finally, I attached a satin ribbon with hot glue and there ya go. You may want to seal them with acrylic spray paint so they last for years to come. You can use gloss or flat to create different finishes. 

Tomorrow I'll have two more eggs with very different designs from today to show you so please join me again. 


Saturday, April 5, 2014

20 Days of Easter - Day 4 and 5

I missed the day before yesterday and I thought I would get two posts up yesterday but that didn't happen so I'm here today with two similar cards to share so I'll just say they're my projects for day 4 and 5.

I designed this Easter basket card in Inkscape which is a free program you can use to design your own svg files to use with your cutting machines. I have more cartridges then I will ever use because once I learned how to use Inkscape I discovered I could make what I wanted without having to look through cartridge after cartridge for just the right image. I use my cartridges once in awhile and some people prefer them and that's fine. I think if I used them more, I would be familiar with what is one each cartridge and it would be easier for me to find what I was looking for.

I made one side of the basket and then welded it to the other side to make my card edge. I used a square shape with a copy and paste feature to make the lattice work design on the basket. The eggs were just a bunch of ovals that I put together and then welded.
I used my Sizzix Big Shot to give the basket some texture and then I used a chalk ink pad over it to make it stand out.  I have found that chalk ink works better to highlight raised areas.

Here is the second basket card I made but this is a little different.

I used my hot glue gun to make the flower embellishment on this card. I just started gluing and turning and gluing again until I was done with it and then I added a half pearl to the middle. This was my first attempt at making a ribbon flower and I like the way it turned out. I'll have to get a tutorial up on how to make them.

Thanks for stopping by and I'll have more up for you tomorrow.