Friday, July 29, 2011

sunflower shadow box

I just finished my third shadow box. The first one I made went to a dear friend who was expecting and the second one I made went to another dear friend who got married and now I just made another. I'm not for sure if this will go to anyone or hang in my house?

It's a 5x 7 black frame shadow box from Michael's. Here are pictures of the things I used to put it together.

I used the new Cricut Flower Shoppe cartridge for the sunflowers. I wanted something for the summer that was cheerful. I used black glitter glue from the Martha Stewart Halloween collection in the middle of my flowers.


 Then I used paper from The DCSV Celebration stack and embellishments from Studio 112 and Recollections.


Here's a view before I put it in the shadow box.


In case you can't read the sentiment it says, All things grow with love.

Wednesday, July 27, 2011

Chistmas in July 2011

Don't you love the holidays? We have a little break right now but once Labor Day comes we're on a roll through Easter so I guess it's time to start getting ready.  At least for me, I'm a procrastinator and always meet myself coming and going.

This past week I got a message that one of the sites I like to visit was doing a one hour challenge so I thought, what the heck I can do that. Their theme was Christmas cards and you had to use either twine, buttons and something else that I can't remember. Buttons was the only thing that really stuck in my mind because I don't have 3/4 of my crafting stuff in Virginia but I do have buttons that I just bought.  I started working and got one card done.


I had a ready made card  so I cut a tree shape out of and used Mod Podge on the tree and then sprinkled glitter. I love Mod Podge and need a shout out to my friend Ruthie for introducing it to me. The ziz zaz red felt is actually from a Valentine's box kit from Oriental Trading. I used a stamp for the trees in the background and glued my buttons on. The gift and sled are buttons too and I used Mod Podge and gold glitter on a button for the tree topper.  It took me about a half hour to complete and then I was on to the second card or so I thought...


It was children's bedtime and they picked right during the challenge to have melt downs. I tried to talked them out of their tantrums so I could continue but they won in the end or at least they subconsciously thought.

After I got them to bed, I decided even though I couldn't get a second card made for the challenge I still could a second card made for me. 


 I didn't follow the challenge and did my own thing but I like it.  I took a pre-made card again and this time put Mod Podge around the edges and added glitter. When the Mod Podge and glitter dried and I went back over the glitter one more time with Mod Podge to seal it in. I stamped the snowmen on a white card stock and colored them in with colored pencils. I'm too cheap to pay for Copic markers yet. I added Liquid Pearls for the buttons and there, another Christmas card done in time for Christmas. : )

Monday, July 25, 2011

Toilet Paper Roll Vase

What do you do with all those toilet paper rolls? You can put them in the recycle box or you can grab a few to keep your kids busy.


I took a few rolls and cut scrap paper out in 7 x 7 inch squares. I let the kids decorate the paper. Then I laid the roll on the paper and scored it about 1 and 5/8 inches on the bottom end and about 3/4 inch on the other. Cut the ends up to the score lines so they can be folded inside the tube on the 3/4 inch end and overlap and be glued to make a bottom on the 1 and 5/8 inch end.


Take pipe cleans and double them or wind two together to make a stem. You need them thick so they can handle the weight of the paper flowers.  Cut out flower designs in different sizes (I used my Cricut) and let the kids decorate their flowers with markers, crayons or paint and colored pencils. Add a center for your flower. I used a pompom but you can use anything like cotton balls or buttons. Poke a small hole in the center of the flower and poke through a small piece of the pipe cleaner, bend it over and glue down. Then glue your flower center in place and put your flowers in their vase. : )

Sunday, July 24, 2011

Sweet Tweet Cards

I was working on some cards for friends and wanted to share them with you. The first one was a mistake that turned into a great little card. 

 I used the Cricut Cartridge "3 Birds on Parade," for the adorable little bird with umbrella. I free hand cut the clouds and rain drops. The card was pre-decorated card stock so it came with the colored squares and stars.  I wondered how I would incorporate the stars into the theme and that's when I found this stamp in my collection.


Doesn't that just go perfect with the design on the front of the card? Sometimes you just get lucky.


This next card I did for a dear friend that just had a beautiful baby boy.

Again I used "3 Birds on Parade" for the little baby bird. I cut the letters for the word sweet but I found a letter stamps to make the words tweet, tweet.


I like what I did with the ribbon too. I took a plain green ribbon but I spread Stickles glitter on it and let it dry. It really makes the ribbon sparkle.  If you haven't tried Stickles glitters, you need too. When I first bought them, I thought they were no different than the regular crafting glitter glue but I was wrong. The glitter is much more finer so you get more glitter bang!


Ignore the blue gob in front of each card that looks like chewed gum. It's really blue sticky tact because I couldn't find my card stand.

4th of July

Oh My GOSH! It's been over a month since I posted last. Where did the time go and what is my excuse for not posting? I'm trying to think one up but can't.

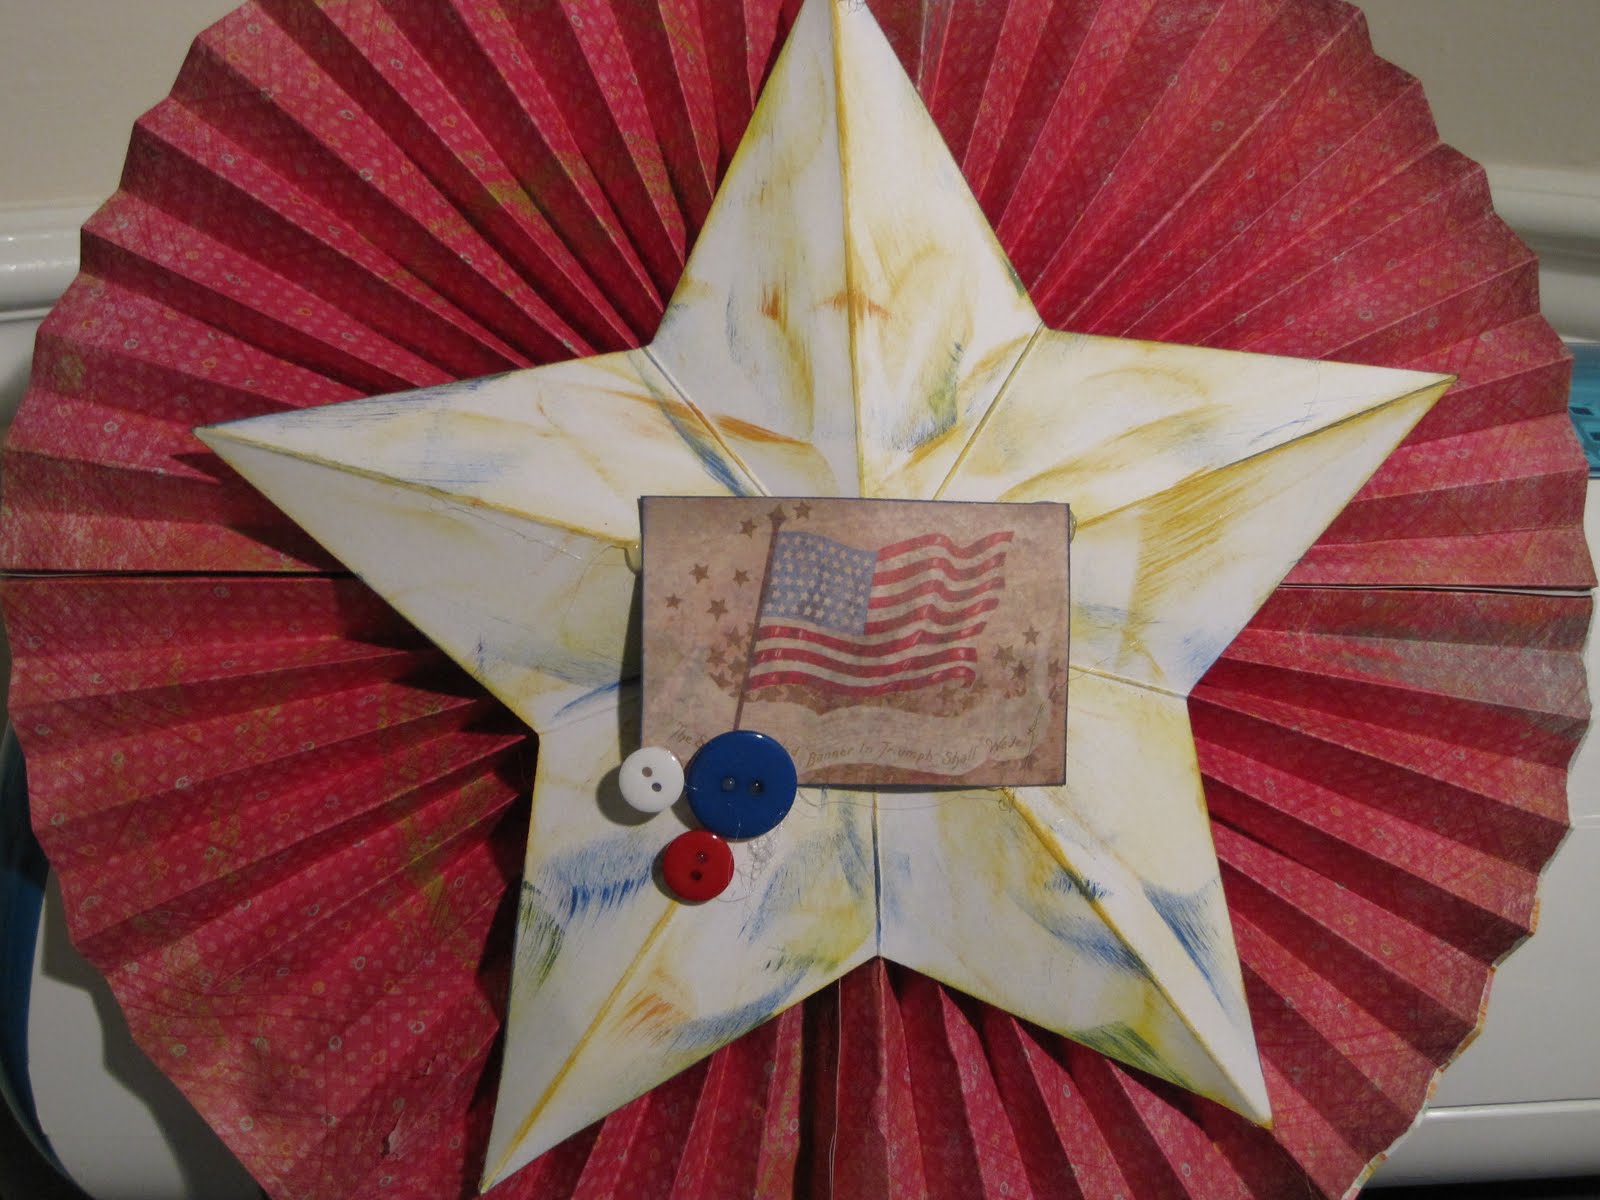
I had some fun making 4th of July decorations. I like to associate rossettes with the 4th for some reason so I had to do some decorations that included those.


Here is a link on how to make the rosettes: Paper Rosettes

I used my Cricut to cut the star out in the middle but you can download a picture off the internet and just cut it out by hand. It's best to use white or beige card stock because you're going to hot glue gun it to the rosette. I got the vintage flag picture out of a pad of card stock but you can go on line and find vintage pictures to use.

Here is a site that I just found: Vintage 4th of July rosette and pictures

Print the pictures off on a color printer or cut them out of a magazine and then use Mod Podge on it to give it an even more vintage look.

Finally add any embellishments that you like and hang it up!

Here is a half rosette decoration I made.

I put hubby to work helping decorate the edges because he said making crafts is easy. Sometimes it is easy and sometimes it's not. Inking edges, at least this time, w easy.


Look what I found on clearance at Hobby Lobby!


I found lots of uses for these fancy prismatic stars. I used them on the half rosette above and I also glued two back to back with a toothpick in the middle and made a great festive cupcake topper. I made cupcakes and used them but forgot to take pictures before they were gone.  All the neighbor children came running when they found out I had them - the cupcakes I mean.


The last fun 4th of July thing I made I found off of Martha Stewart's website. They are paper fireworks/rockets filled with candy. The kids had a blast pulling the flame part and grabbing up their candy.

I got the directions and the print out for the paper from a link a Martha Stewart email. I have looked and looked and cannot find the link. If anyone finds the link, please send it to me so I can add it to this post because if anyone has kids, they are going to want to do this.