our independant hop team is bringing you ideas on how to alter frames, decorate frames or put decor in the frame instead of a standard picture.
If you have just stumbled upon the hop, Robin at Scrap and Chat will be your host today, or if you came from you are in the right spot. Please grab your cup of coffee or favorite drink, relax for awhile while browsing through the projects and get ready to win some blog candy!
One great reason to comment on each blog is so you can also win with
Our sponsor is Scrapbook Stamp Society
They would love to reward one special blog visitor with a prize from their store. To be qualified for their drawing, please comment on all participating blogs and let them know you have.
You can receive extra entries for following them on Facebook Group.
Don’t forget to keep an eye out for more blog candy offered throughout the hop. some blogs are offering extra perks! They all have their own wishes for you to win, so don't forget to read the rules for each one as every blog has different requirements.
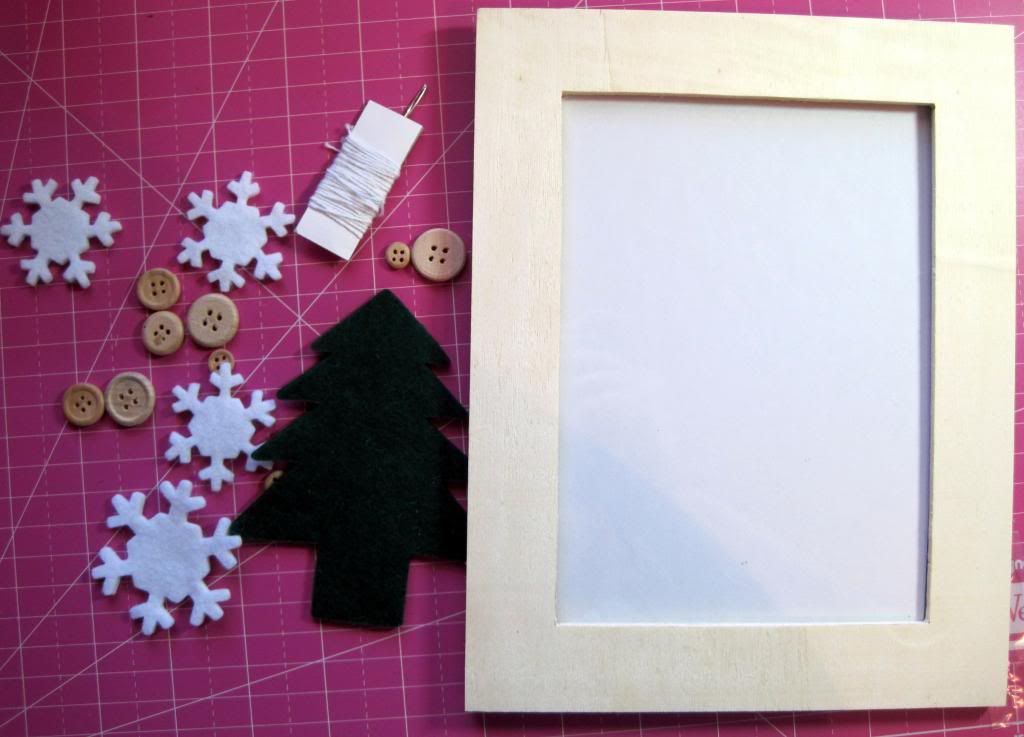
I knew what I was going to do until starting putting paper away today and then I found a frame kit I bought from Oriental Trading a few years back that needed to get done so I totally change what I had planned but I like what I came up in the end.
Here is what came in the frame kit.

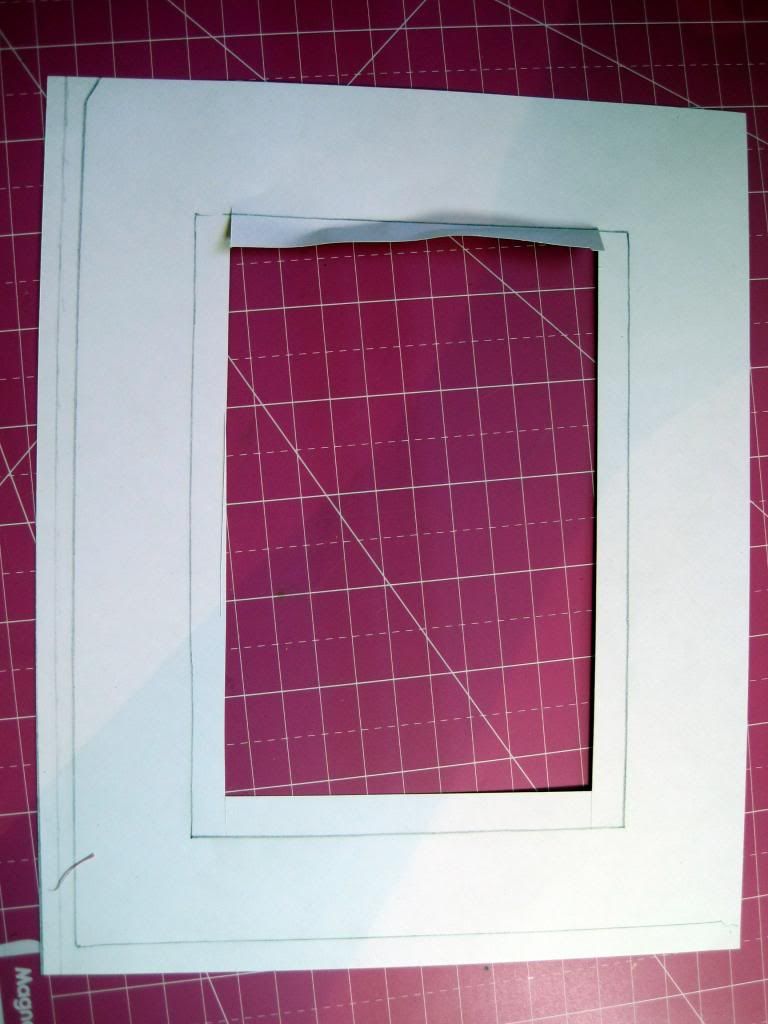
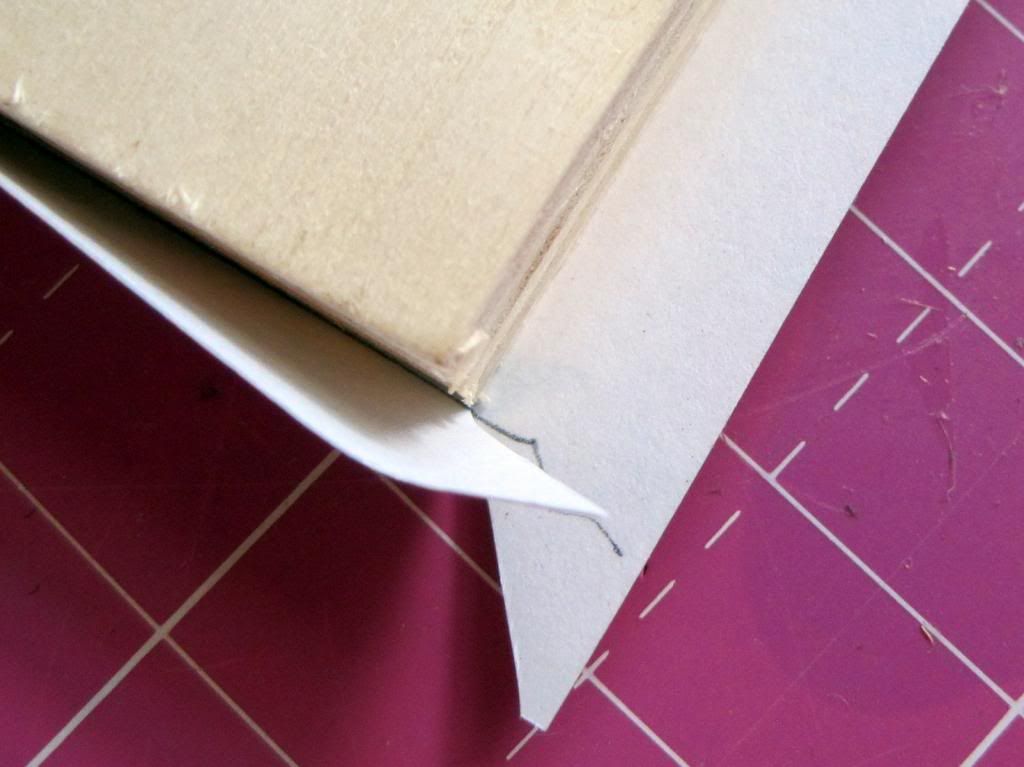
2. Cut the corners like the picture so they wrap around without tearing. I forgot to do that on the inside and had a little rip. I'll show you in a minute.
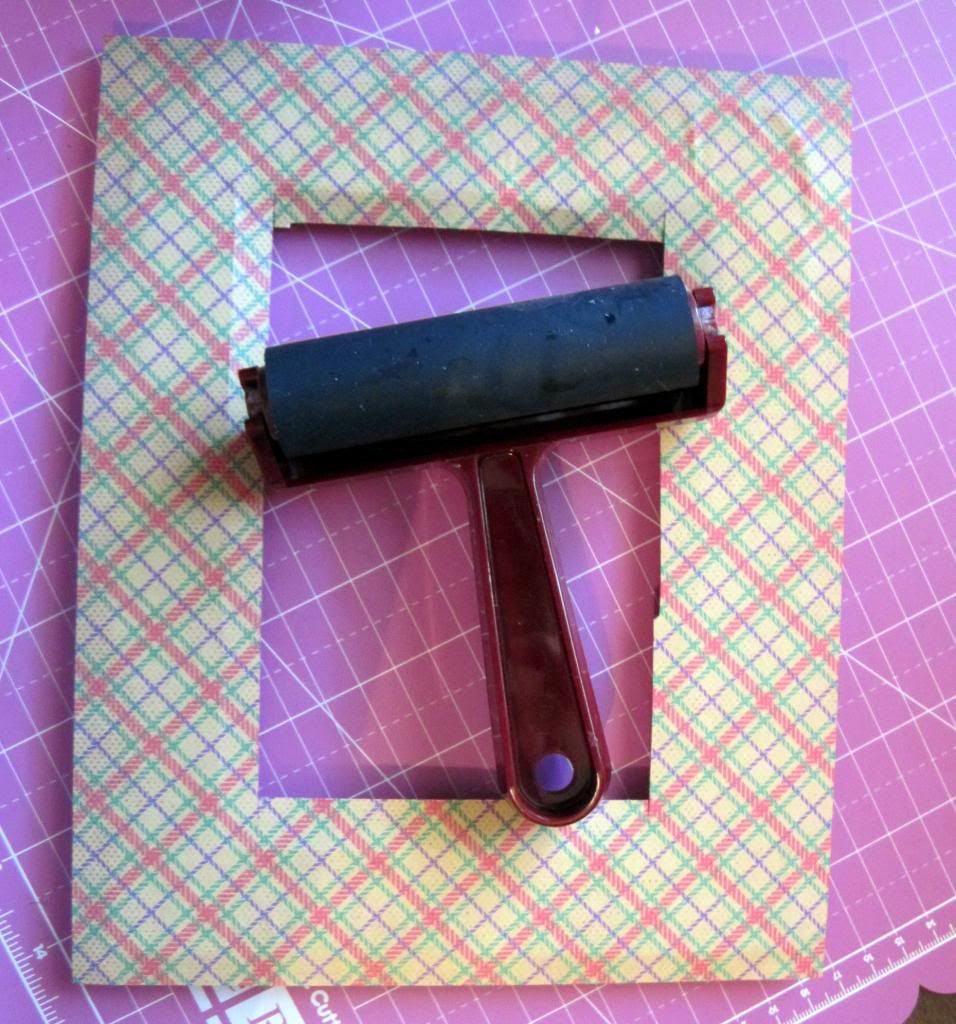
3. Use Mod Podge to glue the paper to the frame and then use a bray to roll out the paper so you get rid of any air bubbles. You can see that I used the bray on the lower part of the frame but hadn't use it on the top yet in this photo.
4. Here is the frame with all the paper glued on. You can see the small tear in the lower left corner. I turned this frame around and that became the top right corner so I could cover it with my embellishments.
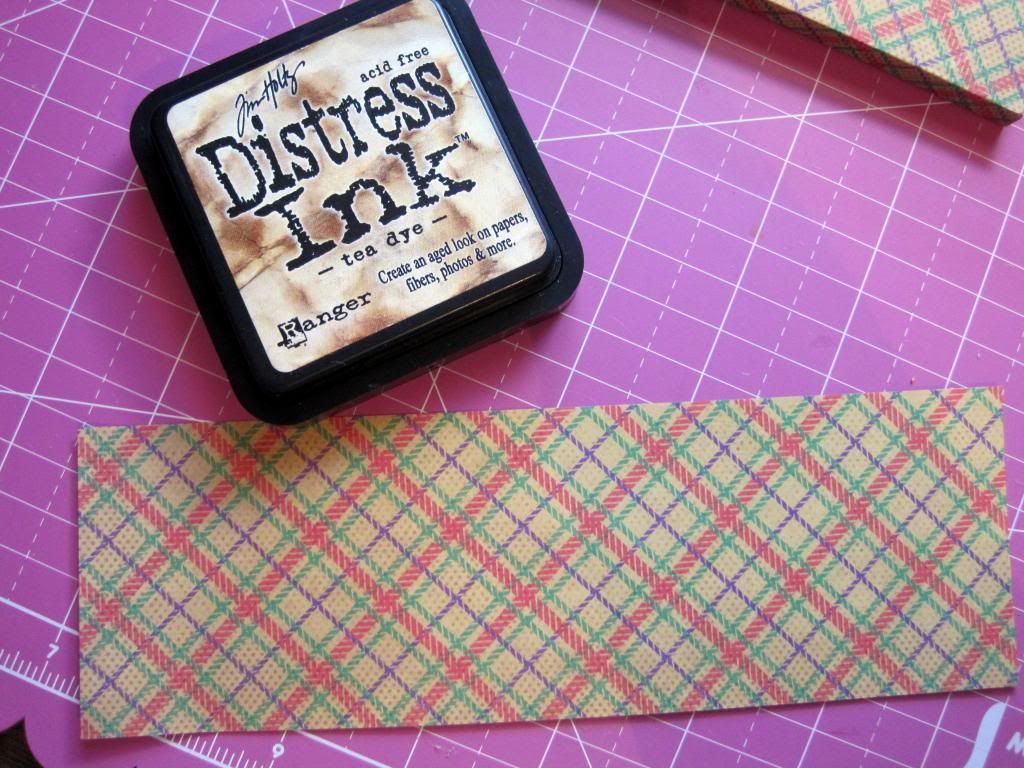
I decided to use Distress Ink on the paper to give it a more rustic look.
Ta Da...The final project with embellishments.

I used green jute from My Life in Arts N Crafts to use in the buttons and the bow.
Thank you for taking the time out to check out my projects, if you like my project and you are not already a follower, you are encouraged to add your email in the subscribe area to get updates right in our inbox! Keep clicking for more Altered frame ideas!
Your next stop is with Lisa.
Thank you for hopping through our Altered Frame Blog hop!
Here is the line up to help you navigate through..
Robin~ www.scrapandchat.blogspot.com
Liz~ www.tryin2craft.blogspot.com
Anita~ www.anitaandbugs.blogspot.com
Ellen~ www.cardmonkeyspaperjungle.com
Janet~ www.janetscreativeworld.blogspot.com
Paula~ www.preciouspagesbypaula.blogspot.com
Cicily~ www.pinkdalmationscrapper.blogspot.com
Katina~ www.twochicsandacricut.blogspot.com
Pam~ www.mzlavr2.blogspot.com
Lissa~ www.somanycrafts.com
Jearise~ www.lorbysworld.blogspot.com
Lisa~ www.handmadewithlove-lisa.blogspot.com
Very nice Jearise! Great job! Thanks for jumping even at the last minute!
ReplyDeleteadorable!
ReplyDeleteturned out really cute. I really like the twine behind the button that looks like a bow, I have never done that but because it looks so cute I will have to try that next time
ReplyDeleteHow cute is this!!? It is always nice hopping with you and the KCC.
ReplyDeleteFondly,
Ellen ♥ CardMonkey
http://cardmonkeyspaperjungle.com
e-mail: cardmonkey@comcast.net
Love it!!
ReplyDeleteas a Girl Scout person.. love the woodsy feel of your frame! great project! TFS Janet Royer
ReplyDeleteLove the frame It looks great and thanks for the tutorial!
ReplyDeleteBig Blog Hugs. Janet
Love your Christmas frame...I am going to remember this for Christmas time when I want something to display our Christmas card photo! Thanks for sharing!
ReplyDeleteThis is a really cute decorated frame! I love OTC and find some of the best stuff there.
ReplyDeleteWhat a great frame!
ReplyDelete<3 Pam
love what you did with your frame!!
ReplyDeleteWhat an adorable frame!
ReplyDeleteSimply amazing! I always enjoy your creative projects and inspiration!
ReplyDeleteThis is so cute - love the buttons.
ReplyDeleteEmma - http://www.creativetimeforme.com
Katie - www.craftingwithkatie.com
Lee-Ann - http://leescraps.blogspot.com/
Lucia - http://www.todoconpapel.com/
Candace - http://www.pcquickutzclub.blogspot.com/
Jessica - http://chick-n-scrap.blogspot.com/
Stacey - http://staceyscreativecorner.blogspot.com/
Nikki - http://scrappinnavywife.blogspot.com/
Cindy - http://www.cindybcreations.blogspot.ca/
Shar - http://scrapendipity.blogspot.com
Micia - http://lilowldesigns.blogspot.com
Leanne - http://createdbyLeanne.blogspot.com
Teri Beri - http://teriberi2.blogspot.com
Ruthie - www.septemberninthdesigns.com
Emily - http://creationsofanarmywife.blogspot.com/
Liz - http://www.lizspaperloft.com/
Cassandra - http://www.Ctimz3.blogspot.com
Kim - http://www.scrapinmomofoneinspiringlittleboy.blogspot.com/
Veronica - http://vkcreate.blogspot.com/
Nancy - http://www.scrappingoutofcontrol.com