Showing posts with label Mod Podge. Show all posts

Sunday, April 13, 2014

Krazy Crafting Crew - Frames

Welcome to the Krazy Crafting Crew's April challenge - Frames. We are an independent hop team that enjoys sharing out work with everyone and hope to inspire you with new ideas for you own
creativity. We are a team who loves to do all different themes, such as cards, layouts, 3D
projects and so much more. We do all the paper crafting from traditional to digital.

Our hostess this month is Cicily so please make sure you make it over to her blog to see what wonderful creations she has made and to find out what blog candy she has this month.

I made a frame for my daughter and let her help me decide what color the butterfly should be. Below the pictures is posted what I used and how I made it.


I bought those cute little Christmas tree picture frame ornaments after Christmas for next to nothing and new they would come in handy some day.

1. Lay your frame upside down on any paper you like and trace around it. I also did the insert for the pictures backing. Then cut your design out. It is better to have a little overhang around your frame than none at all.

2. Slather on Mod Podge and adhere your paper to the frame. Use a bray to roll out any air bubbles or press down hard on a flat surface. This star frame was small enough I could just press down but for bigger projects I use my bray.

3. Once it's dry, trim the outside and inside paper with an Exacto knife.

4. Add ink to edges and let that dry

5. Use glitter Mod Podge on top of paper and let dry.

6. Butterfly: I cut the butterfly out of the music paper which is from Graphic 45 and then I used glitter Mod Podge on the butter fly and when it was almost dry, I spritzed on Forever Red Glimmer Mist.

* I have found that if you put the spritz on first and then Mod Podge, the glimmer mist comes off since it's water soluble.

See how easy this is and it turns out so darn cute! Thanks for stopping by and now onto Robin's Blog

 Cicily - http://www.pinkdalmatianscrapper.com
Lissa Marie - www.somanycrafts.com 
Janet - http://janetscreativeworld.blogspot.com 
Christina ~ http://cema1cema.blogspot.com/
Kathryn ~ http://creationswithkathryn.blogspot.com
Jearise ~ http://lorbysworld.blogspot.com
Robin S ~ www.scrapandchat.blogspot.com
Katina ~ http://lovinglifeslittleblessings.com
Miranda ~ www.nanasscrapspot.com
Lori ~ http://www.scrappinmystressaway.blogspot.com/
Paula ~ www.preciouspagesbyPaula.blogspot.com


Wednesday, December 4, 2013

Elegant Paper Mache' Ornament

I decorated a few paper mache ornaments a few years back and fell in love. Back then, I just painted the ornaments, added some glitter and some stickers and called it finished but over the years I have tried new things and this is one of my favorite ways of decorating them.

 I used Mod Podge to adhere the paper to the ornament after cutting it out. You can trace around your ornament and then cut it out but since I was using a flat round ornament I was able to cut a circle at 3 3/4 inches and that was almost perfect. I just trimmed off the extra. I used a bray to make sure the paper was on flat but it's not necessary. Once the paper was dry, I inked the edges and then added my ribbon going around the front and back and then around the sides. The side view is below. I went back and added the beautiful embellishment from Miriam's Crafting Supplies. The paper, ribbon, and ink came from Cutter's Creek.
Thank you so much for stopping by today and keep coming back because I have more paper mache ornaments with different techniques to share.

Happy Holidays! Jearise


Friday, August 30, 2013

Fussy Cut Tutorial for Miriam's Crafting Supplies

Today I am going to give a tutorial for Miriam's Crafting Supplies on how to fussy cut. If you're new to the crafting world, you might have heard this phrase and wondered what it was or how to people get their stuff to fussy cut? It's actually quite easy but time consuming if you're in a hurry but so worth it when you're done.

I first had to find a pad of paper that I liked with something to cut out. I used g.c.d.'s Antiquities that I bought on clearance.


I decided I wanted to use the flowers on this page for my card so I grabbed my small scissors and my  craft knife and started cutting.

The scissors you are looking for need to have short, sharp blades for detail cutting. There are a few brands out there but one of the ones that most crafters use is by Cutter Bee. Use these to do the main cutting and then use the craft knife to cut the intricate parts once you are done.

This is what the fussy cut looks like when you are done cutting:
Now for my card I decided to use my favorite adhesive and gloss - Mod Podge. I love to Mod Podge things down and this cut is the perfect thing for it. I just Mod Podege the flowers I cut out right to the card stock.
I continued by adding the other flowers and designed and my little fairy to the card - all with Mod Podge.
I coated both sides of the fussy cut images with Mod Podge but I didn't the fairy.
I'm sure you will agree that this card is cute but missing something and that something is some of the different colored and sized half pearls from Miriam's Crafting Supplies.
I sprayed a hint of glimmer mist on the card before adding the half pearls. Click on the link to visit her store and see all her great crafting products at some of the best prices around - Miriam's Crafting Supplies.

And thank you for stopping by and saying HI!

Friday, June 7, 2013

Beautiful Christmas Ornaments

I know it's only June but that does only leave six more months before Christmas time again so it's never too early to get ready by making some simple yet beautiful Christmas ornaments.

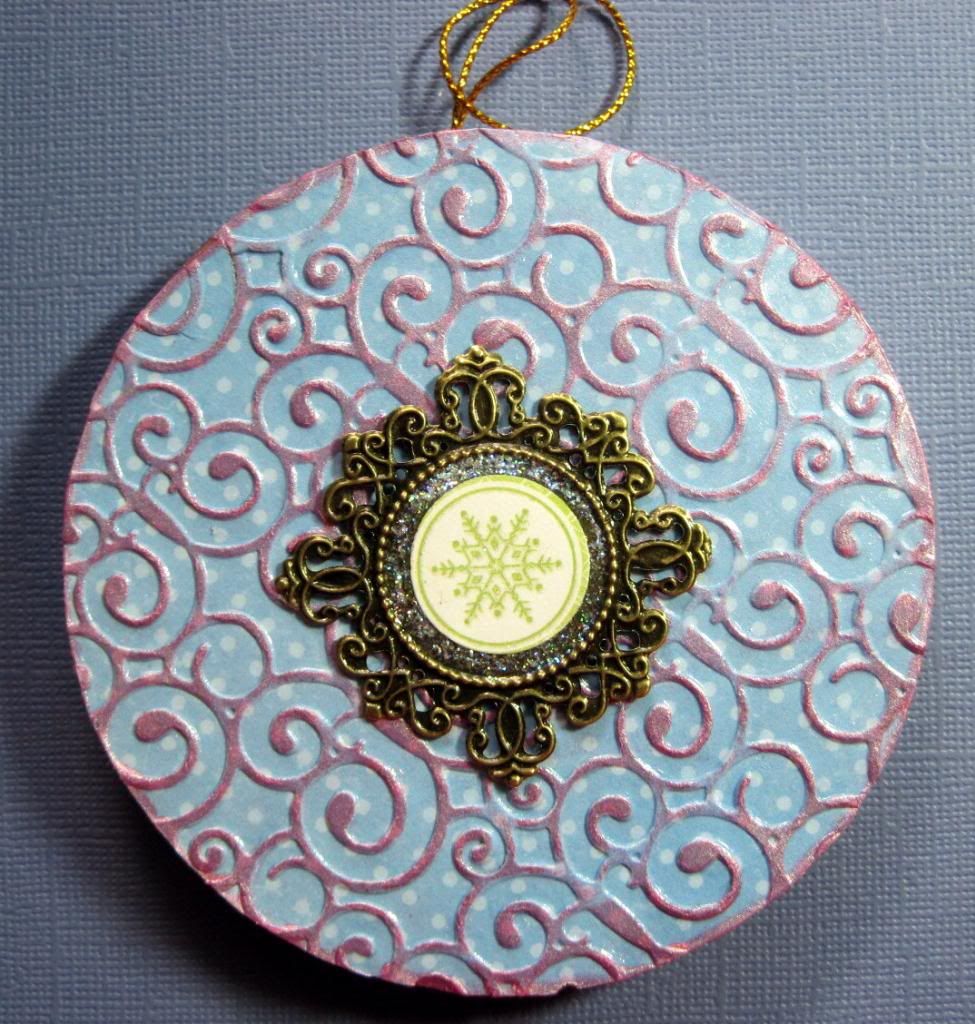
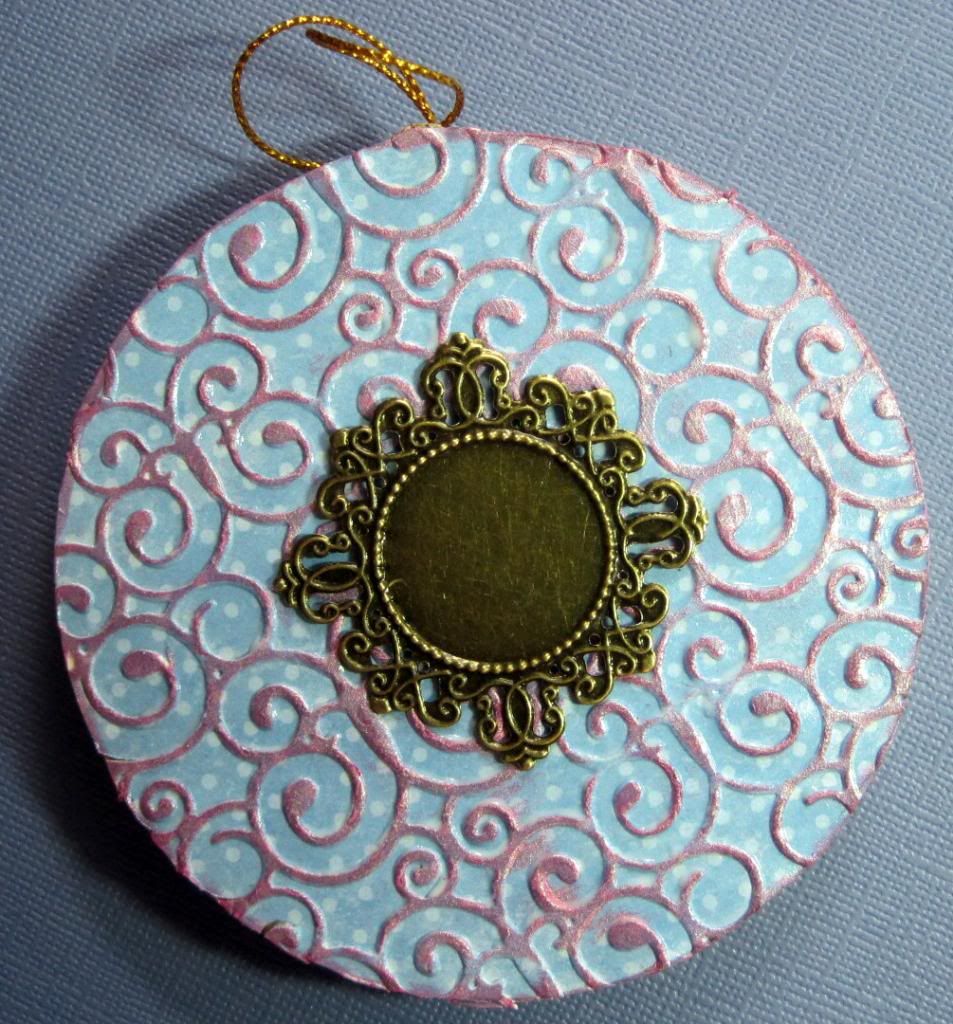
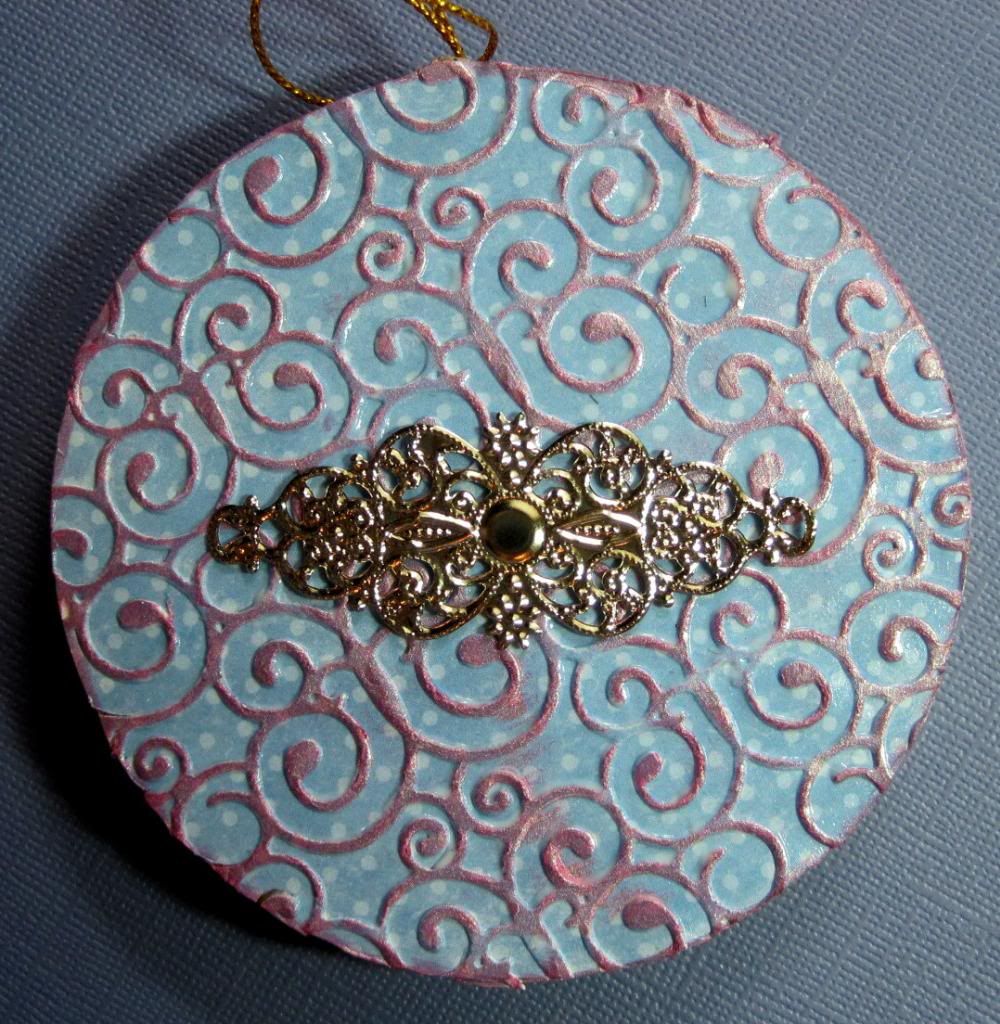
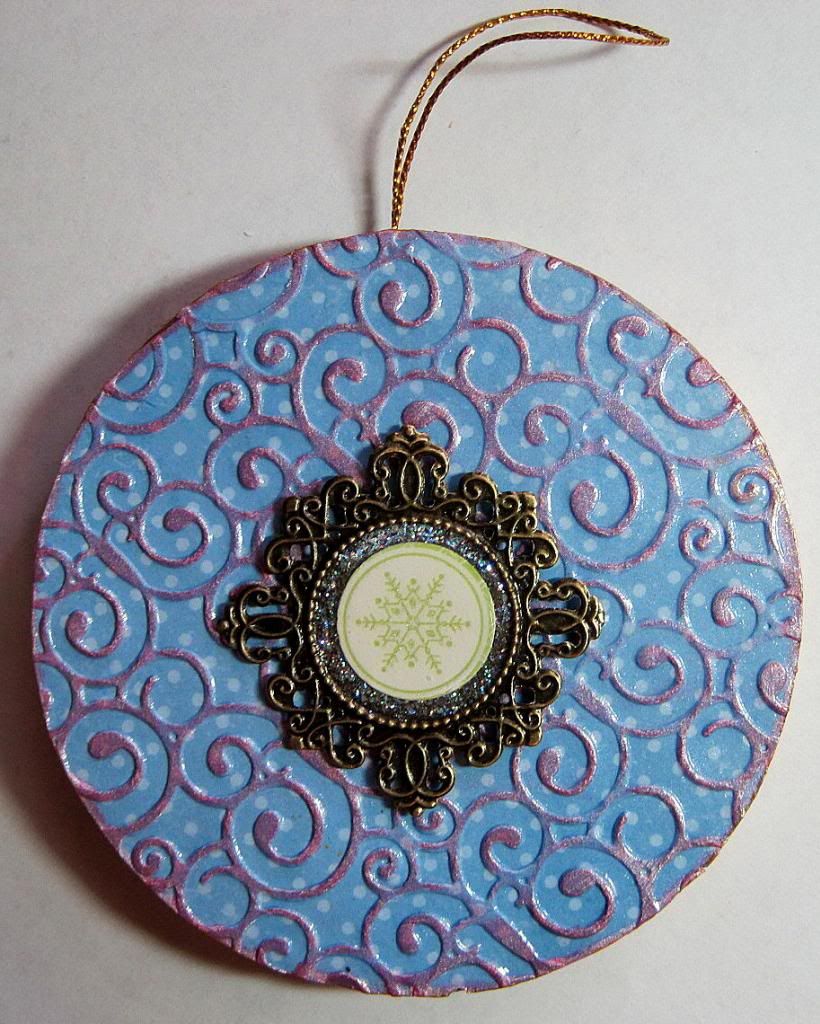
Here is an ornament I just made using one of the beautiful metal embellishments from Miriam's Crafting Supplies.
-----------------------------------------------


Here is the tutorial on how I made it.

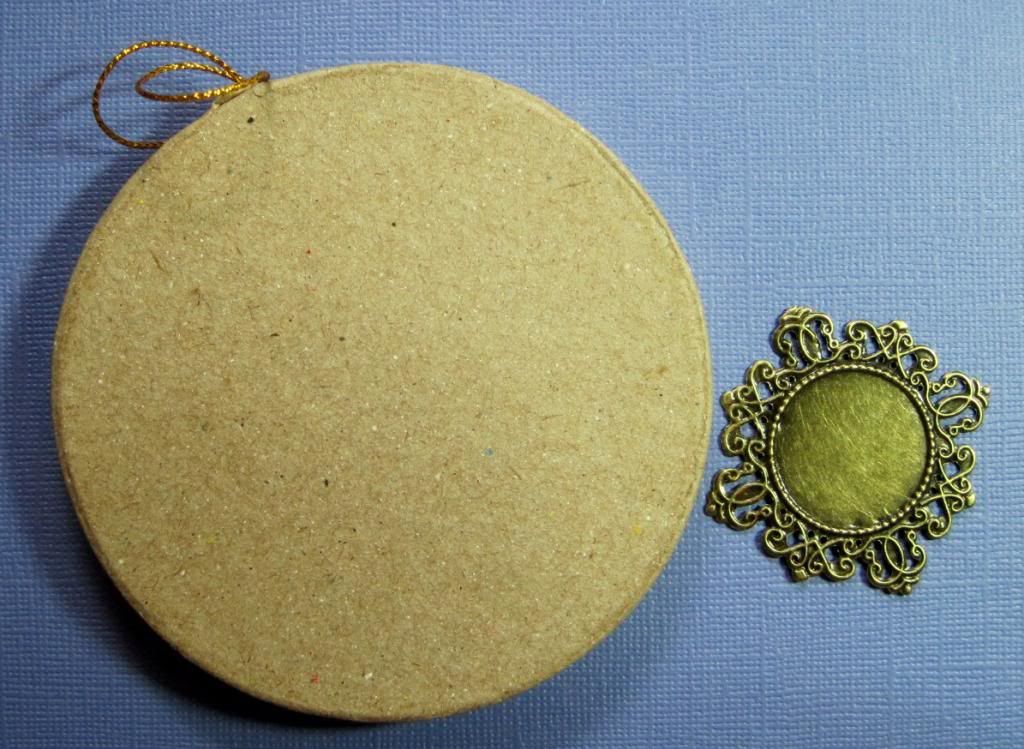
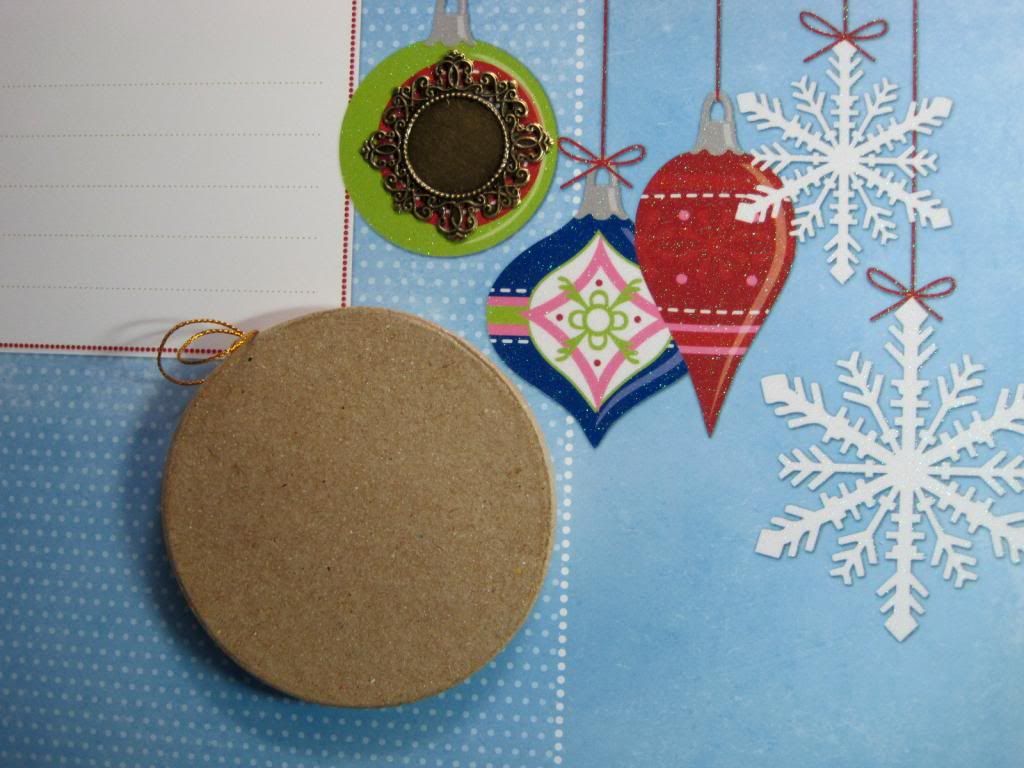
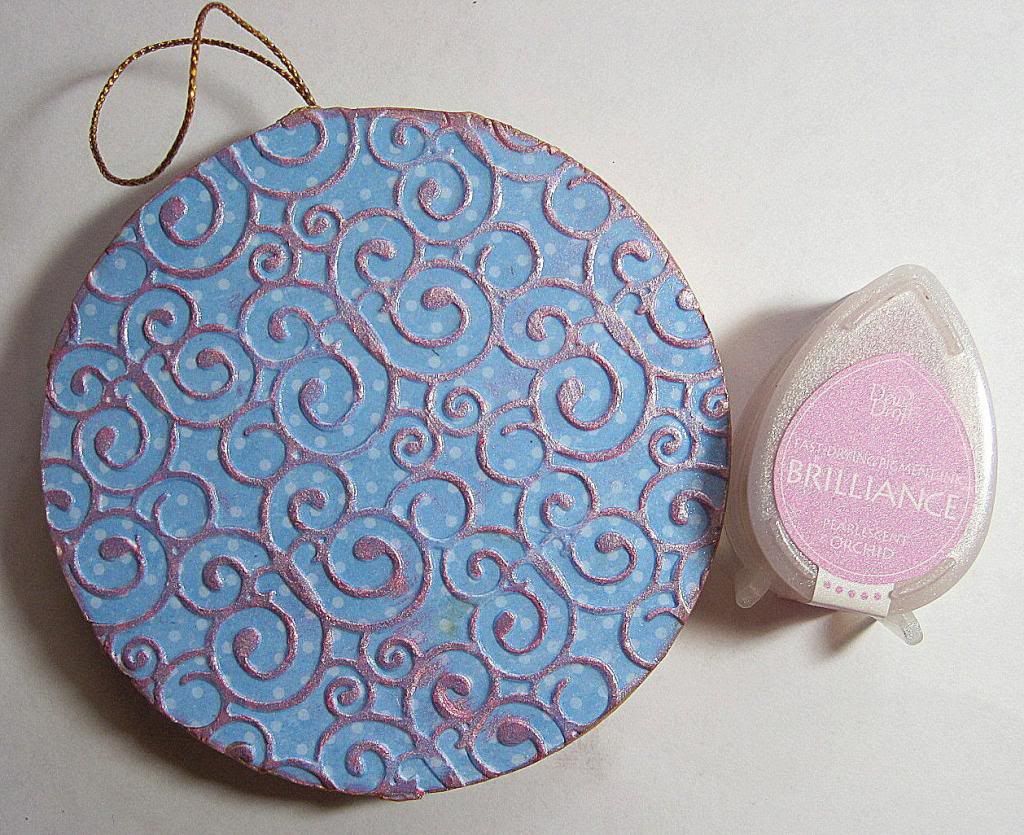
I found this cardboard ornament in the clearance bin at Michaels. I head to the clearance bins now before checking out the sales. I also picked out a metal embellishment I liked from all the pretty metal embellishments that Miriam's Crafting Supplies carries.
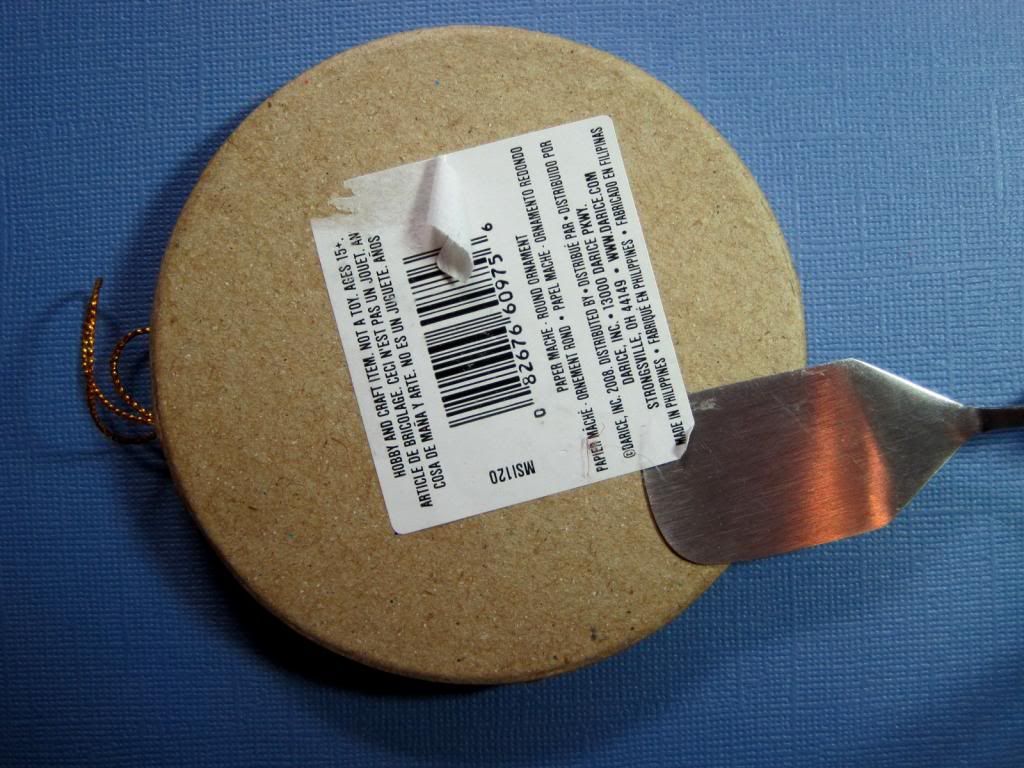
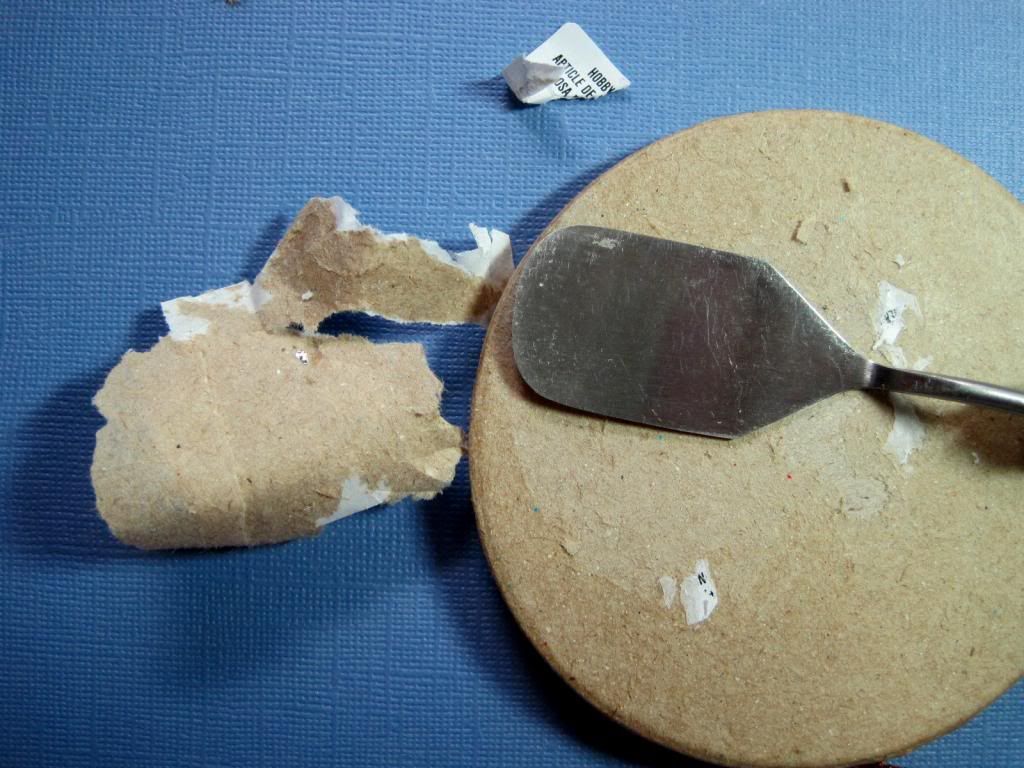
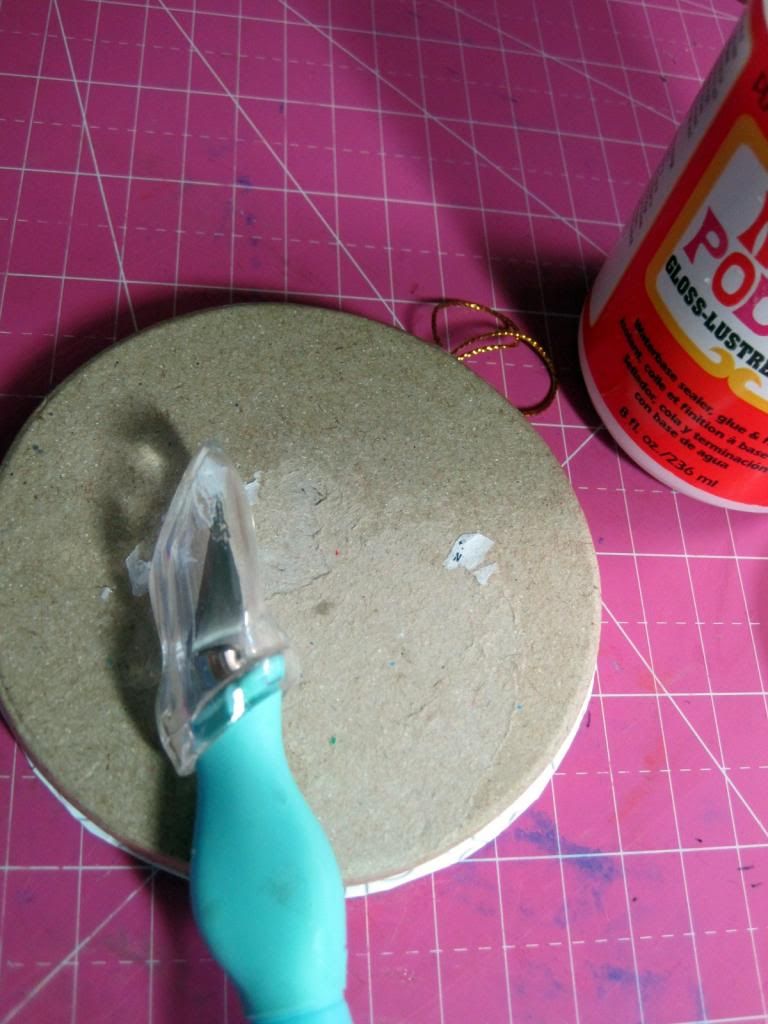
1) Remove the sales tag from the back. The reason being, is that sometimes the tag is so glossy that paper doesn't want to adhere to it. I have found that using the spatula for die cutting mats is helpful.
If you take some of the layers of the cardboard off, don't worry. You'll be covering it and won't notice when you're finished.
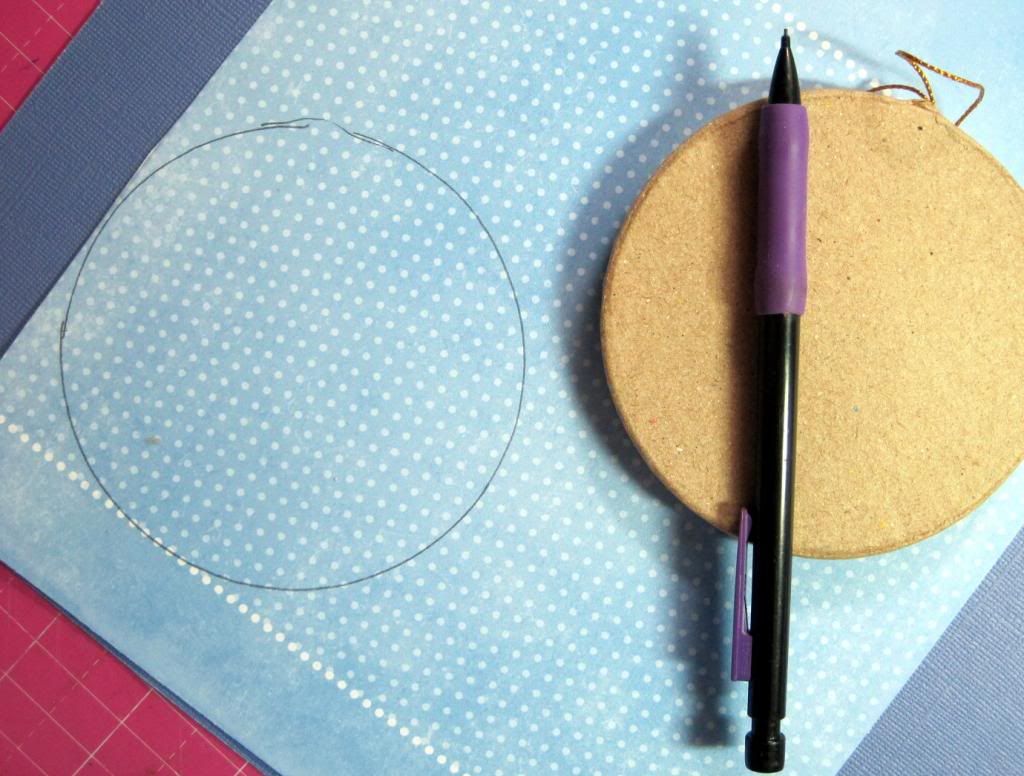
2) Trace around the outside of the shape but leave a little excess to work with. This will be trimmed off after the paper is glued down.

 I picked paper from the

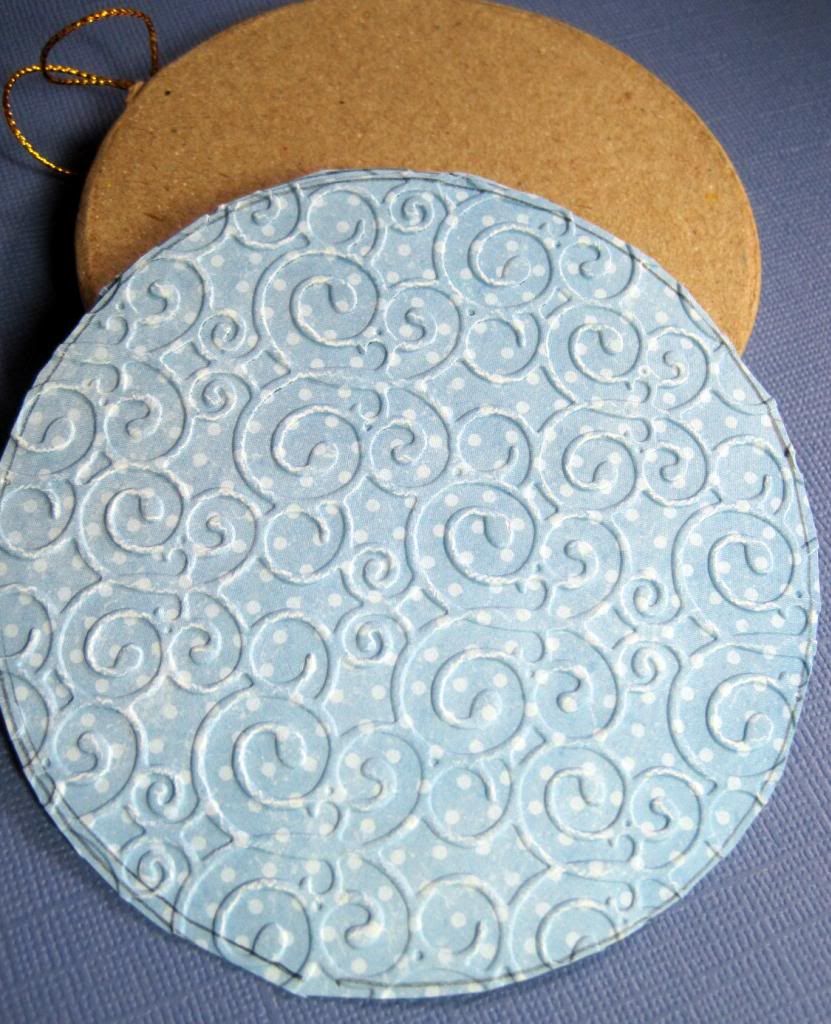
3) Cut around your circle and use your embossing machine and the embossing folder of your choice to add a raised design to the paper.
4) Use Mod Podge to adhere the paper to the ornament and us a utility knife to trim off any excess.
5) Lightly touch the raised embossed design with your ink pad to give color to the raised print. I used a pigment ink in pink. Coat with Mod Podge to seal the ink so it wouldn't smear.
I tried different metal embellishments to see which one I would like best and I went with this one. All the metal embellishments came from Miriam's Crafting Supplies Store and anyone would have been beautiful.

 6) Add Stickles glitter glue to the very outside of the circle and then glue the picture in the middle. I cut a snowflake from the winter pad. There was already glitter on the snowflake. Add Glossy Accents to the snowflake for a nicer look.
7) While everything on the metal embellishment is drying, paint the outside edge of the ornament in gold acrylic paint.

8) Before adding the embellishment take the ornament outside and spray all of it with a clear finish. I used Krylon Low Odar Clear Finish. This will help your ornament last for years to come.
 9) Finally, add the embellishment using a low heat glue gun.

Thanks for stopping by today and please join us at Miriam's Crafting Supplies Blog Challenge. This month's theme is metal which can be one of the beautiful embellishments from above or a metal charm or anything else as long as it is metal or has metal.


Friday, January 6, 2012

Love Bug Banners for Kids Hop

Welcome to the “Love Bugs Banners for Kids” Hop.

Forty very talented crafty people have come together for a two day hop (Friday, January 6th and Saturday, January 7th) to showcase handmade banners that will be donated to the children at Pediatric Specialty Care. The hope of these banners is that they bring smiles to these children's faces and awareness of Pediatric Specialty Care to all those that hop along.

The “Love Bugs Banners for Kids” Hop has some awesome sponsors and prizes to give away to all those that hop along and leave comments. The more blogs you visit and leave comments at, the more chances you have of winning. That means if you hop through all 20 blogs each day and leave a comment on each blog then you are in the drawing 40 times!

Our Generous Sponsors are:

Jellypark Digital Stamps will award 2 free digi-images to one winner.

K Andrews Designs has donated a stamp set to one winner.

Robyn's Fetish will donate FIVE digital images of the winner's choice as a prize!

Now on with the hop....If you have come from Edwina's Creations then you are on the right track but if you have come here by chance – great! but please start from the beginning at Ellen - Card Monkey and continue through from there.


I found my images that I printed off on my color printer at Lettering Delights.


I love using Mod Podge or the Martha Stewart decoupage glue on projects because it makes the colors brighter and bolder and the paper more durable for frequent handling.

I just recently read an article that exclaimed that Doilies are the "in" craft thing right now which is good for me since I have always loved using them and have a box full.

I used glitter Mod Podge for the center of my doilie.


Thank you for joining us today on our “Love Bug Banner for Kids” Hop for the children of Pediatric Specialty Care. Please continue on to Lady Luvbug's Blog blog and have a wonderful day.

Our complete line up for today - January 6th
  1. Ellen ♥ CardMonkey - http://cardmonkey-business.blogspot.com/
  2. Sandie Dunne - http://sandieshores.blogspot.com/
  3. Lori Apgar - http://scrappinmystressaway.blogspot.com/
  4. The Scrapbooking  Queen~ www.thescrapbookingqueen.com/
  5. Linda Simpson - http://lindasimpsoncraftypieceofheaven.blogspot.com/
  6. Lisa Lam- http://craftylam.blogspot.com/
  7. Jenny (Crazy About Cricut) - http://crazyaboutcricut.blogspot.com/
  8. Ashley - http://theglamoroussideofscrapping.blogspot.com/
  9.  Haidee-http://created2bunique.blogspot.com/
  10. Carol - http://cardstockscissorsandglue.blogspot.com/
  11. Edwina - http://edwinascreations.blogspot.com/
  12. Jearise - http://lorbysworld.blogspot.com/
  13. Janet S - http://ladyluvbug.blogspot.com/
  14. Denise - http://vintageheartfeltdesigns.blogspot.com/
  15. Jamie http://craftygirl21.blogspot.com/
  16. Teresa - http://scrappintplace.blogspot.com/
  17. Dena - http://missdjones.blogspot.com/
  18. Martha- http://pattisscrapingtime.blogspot.com/
  19. Erica http://mycricutcraftroom.blogspot.com

Thursday, October 6, 2011

World Card Making Day Blog Hop 6th Oct. - Day 5

Hello crafters and welcome to The World Cardmaking day blog hop DAY 5 on this the 6th October.
This is the last day of this wonderful blog hop and I hope you have enjoyed all the beautiful and cute cards that were made.

 
As it is World Cardmaking Day some of the participants of the hop are donating cards to  charity. Plus in the line up  you will find a UK crafting celebrity taking part among us mere mortal crafters !!!


There is mega blog candy on offer too from the hop sponors:-


 is donating this mega bundle - thats a whopping £145 worth of goodies!!


...............................................................................


 are offering 3 free digis of your choice
Plus 
for the "duration of the blog hop ONLY" 
 get 50% off any digis - just simply quote BB50 at the checkout .
.........................................................................

Amy Shaw - craft presenter on  QVC 


is offering Woodware goodies -pic to follow
-------------------------------------------------

CBGM - thats me !


is offering


Each day remember to leave  comments on ALL the blogs in the hop as you need to comment to be eligible to win the prizes, divided up into a top 3, and Gill will announce the winners  later in the week after the hop closes.


Here are three that I plan on donating...

I am more a paper piecing kind of crafter but I wanted to do something with stamps since I have so many of them.


 Happy fall ya'all! I figured I needed a fall card in the mix so here it is.
 The paper I used to adhere the stamped paper to his homemade paper I made this past spring with my children.
This little girl is colored with Bic markers and Crayola pencils. I dabbed on a layer of Mod Podge to give her and her chicks some texture.


Thank you for looking and now on to Amy Jo's

1. Gill http://creationsbygillm.blogspot.com/
2. Pamela – http://craftycatzpapercraft.blogspot.com/
3. Mindy - http://papercreationsbymindyblog.blogspot.com
4. Debs -  http://debbeescds.blogspot.com/
5. Tanya www.scrappinkymomma.blogspot.com
6. Angela (AJ) http://fistfullofglittercardsbyaj.blogspot.com/
7. Brynn - http://www.flairandfrillscreativity.blogspot.com
8. Haidee http://created2bunique.blogspot.com/
9. Shannon - www.purplelionpaper.com/blog
10. Jearise - http://lorbysworld.blogspot.com/  <---You are here
11. Amy Jo- http://lv2scrapandfibrofacts.blogspot.com<---Please go here 


Tuesday, August 23, 2011

New Card, New Card

I would like to announce the winner of my "29 again" blog hop give away.  Drum roll please...
Janet from http://ladyluvbug.blogspot.com/  Congratulations Janet and check out her site. She is one crafty person. ; )

When I was out here in Virginia from January through April, a good friend send me a lovely little photo card. I'm back out here in Virginia and I found that card and thought it would be nice to change it and send it back to the person who sent it to me. I cut the front off, sanded it some, added Mod Podge and let it dry, then I rubbed a light reddish brown ink pad on it and rubbed it off. It turned a nice black and white photo into an AGED looking black and white photo.

I also used sandpaper on the edges of the black card stock to given it a worn look as well.

Friday, August 19, 2011

Mod Podge flowers

Good Friday evening. I've been missing in action most of the week due to a sick child and another in afternoon summer camp. Whole day summercamp is a mother's dream but a half day leaves you no time to do much of anything except shop. If you know me, you know I LOVE to shop especially for scrap booking stuff but I had so much to do at home that it was a little of a pain and now the boy wants to go back again next week for half days.  We'll see????

I wanted a layout for our anniversary a year ago (It's taken me that long to scrap the pictures.) that was feminine yet mescaline. I was going to use hearts but thought that was too feminine so I tried the flowers and just kept working with them.

I discovered the other night that when you paint Mod Podge on fabric designed paper, it makes the paper look like real fabric up close. It was hard to get a good picture to prove it but take my word for it, it does.

I used Stickle's glitter glue to outline each flower. I maybe could have added a brad instead of more of the glitter but that great idea came to me after I had put the glitter in the middle and piled it on so it was tough to jam a brad through. Yes, I have a crop-a-dile but that's back in Tucson. It's hard crafting in two different places. haha


I stated earlier that I didn't want it to look too feminine so I added some paper strips I cut up and layered next to my husband's picture. My husband even liked the layout and that's good since he could care less about my passion for scrapbooking. Now if it was computers.....


 I couldn't think of anything romantic to say for my journaling so it is something plain. That's what happens when you wait a year to scrap your photos. The letters are cut out with my Cricut.

 Have a great weekend and I'll see you on the29 again blog hop on Monday. : )Lorby