Saturday, January 23, 2016

Winter Wonderland Blog Hop

Welcome to the....

Today's hop is filled with winter (not holiday) themed projects.

Today's hop sponsored by...

Catherine is giving away a class of the winner's choice from her great offerings 
at Creativity Grows Here. 

To enter the drawing just leave a comment on each of the blogs in today's hop.

Winner will be announced on ScrapsByGracie.blogspot.com on Saturday, 1/30/16. 

Now on with today's projects...

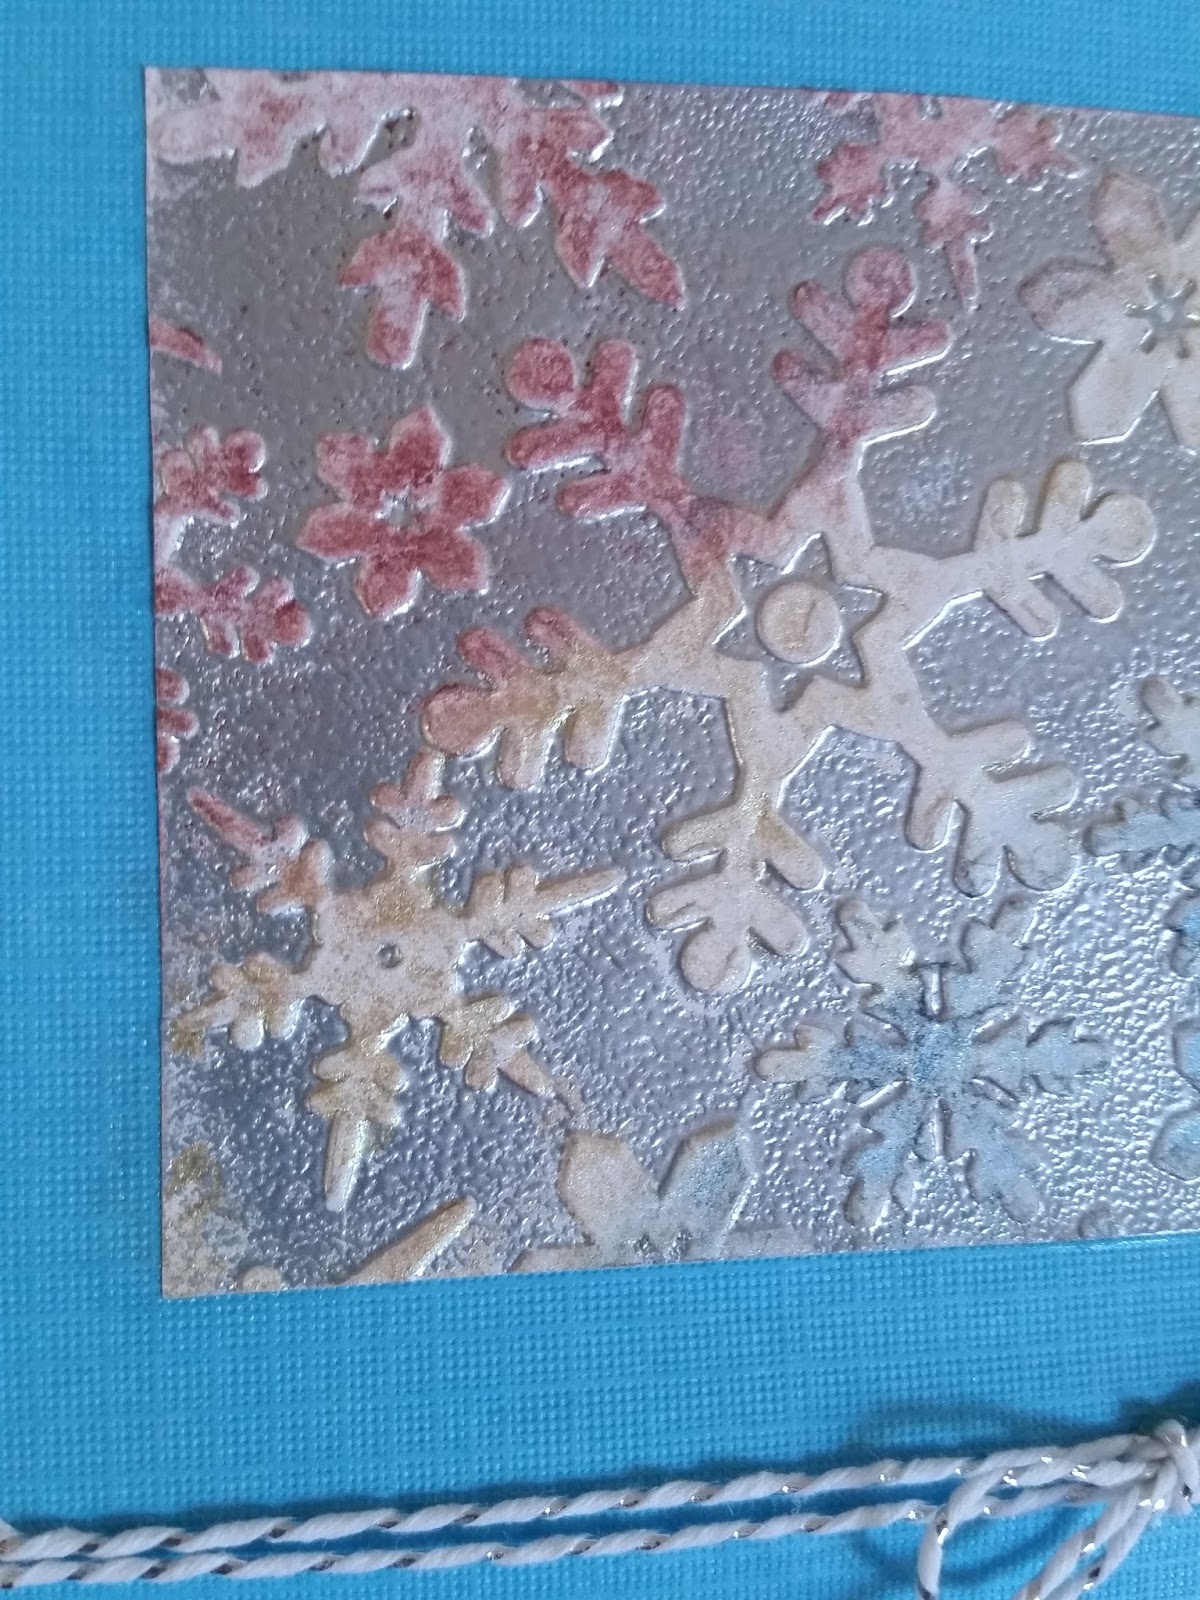
I made this card using pewter embossing powder and an embossing folder. It's a simple technique that leaves beautiful metal like results.


1. In raised area of embossing folder.

2. Run your cardstock through your embossing machine
3. Pour embossing powder over your embossed cardstock
4. Use a small, clean and soft paint brush, brush off any unwanted embossing powder
5. Warm up your heat gun for at least 10 seconds before turning it towards your embossing and then heat up your embossing powder until it melts. Leave on the heat a few extra seconds to give it the uneven metal look


Here is a close up of the area I did. I used colored mist spray to color the snowflakes. I put used cardstock over each area I didn't want spritzed. 


Thanks for stopping by today and since I'm at the end, you need to backtrack and see the other great projects so please start at Theresa's blog here.

Here is the full lineup in case you need to go back and see some of the great projects you missed.

Theresa ~scrapsbygracie.blogspot.com
Connie ~ conniecancrop.blogspot.com
Jessica ~ craftinandstampin.blogspot.com

Alicia ~ goldengoddessdesigns.blogspot.com
Sarah ~ http://sarahbiswabic.blogspot.com/
Anita ~ Scrappyhappymommy.blogspot.ca
Angela ~ crazy3monkeys.blogspot.com
Miranda ~ nanasscrapspot.com
Haidee ~ created2bunique.blogspot.com
Kim ~ katydidcards.com
Lisa F ~ lisaslittlerascals.blogspot.com
Jearise ~ lorbysworld.blogspot.com
Holli ~ sunflowerholli.blogspot.com
Card A Day Challenge DT ~ cardadaychallenge.blogspot.com

Friday, January 8, 2016

A Year of Card Techniques - January


This is the first in a year long series of monthly blog hops focusing on techniques for card makers.
Each month we'll feature a different technique or fold or product.
We've assembled a team of card makers who range from new to advanced so you'll get a great variety of cards and ideas.


This month we will be focusing on emboss resist techniques and WOW have we got
some cool cards for you today. We really love feedback so please leave a comment on each of the blogs in today's hop. Each comment on the 12 hops throughout the year will be entered into a prize drawing for a $25 Blitsy.com gift certificate at the end of the year.
Now on with the projects.


First off, I have to say that I love to heat emboss and have been doing it since I started scrapbooking and card about 10 years ago. I have a draw full of different types of embossing powders and inks. Yes, there are many different embossing powders and they all play an intricate part in making your project beautiful. 

Here is a link to a wonderful page that describes different powders and inks and will help you get started on this new adventure or branch out and try something new. 

(I found this site and it says that I may not reproduce or distribute the information so I am just putting the link for you to go to since it states it is for personal use only.)
http://www.scrapbook.com/classes/stvol1/lessons/print/23.html

My first project takes two types of embossing and combines them. I use an embossing folder and then heat embossing. 


I used Glitter Mist Spray over the top once I was done with the heat embossing to add color to the keys.


I start by putting ink on my embossing folder. Do it lightly so you only get the raised area. I have found that it works best on the background and not the design but you can play with it and hopefully it'll work perfectly for you. :)  

Once I've inked my folder, I slip in my paper and send it through my embossing machine. As soon as I take it out, I add my heat embossing powder. I brush off any powder that might have gotten on the design itself. Then I add my heat and presto!  


Now for my second type of heat of embossing, I used clear embossing powder over words.


I used chalks to add color to the embossing and surrounding area. I just used my finger and rubbed the chalk on and then used a soft cloth to wipe off the excess.


Directions for this:

1. Print out the saying you like
2. Use your heat gun to dry the ink from your printer
3. Use your powder bag to go over the printed words before heat embossing
4.Use a clear ink pad such as an embossing pad or a watermark embossing pad to stamp your image
5. Stamp your image over the printed words
6. Sprinkle on clear embossing powder
7. Clean off excess powder and use a clean soft brush to sweep away any embossing powder not wanted on surface
8. Warm up heat gun and then heat up embossing powder until it melts. Do NOT overheat. Yes, embossing powder will burn or melt into a bubbly mess.


This last card above was done by just stamping a heart image and using clear embossing powder. Once I had heat set it, I went back over the whole area using a Tim Holz ink pad.

I'm the last person in today's line up and I am so happy you have joined us and hopped all the way through. I hope you have learned some new techniques along the way.

If you've happened to start at my blog, you just have to start at the beginning and see all the great cards and ways heat embossing was done.  Click on this link to get you going:

Scrapes by Grace