I would like to announce the winner of the White on White Blog Hop. I used random.org to pick my lucky winner out of 18 comments. The winner will receive a $10 gift card to Michaels.
The winner is #3 - Amanda who wrote:
I love your card! I'm a new follower. I'm looking forward to the rest of the hop!
Thank you all for participating in the hop and leaving comments. It was a great hop with wonderful projects to share.
Thursday, May 30, 2013
Wednesday, May 29, 2013
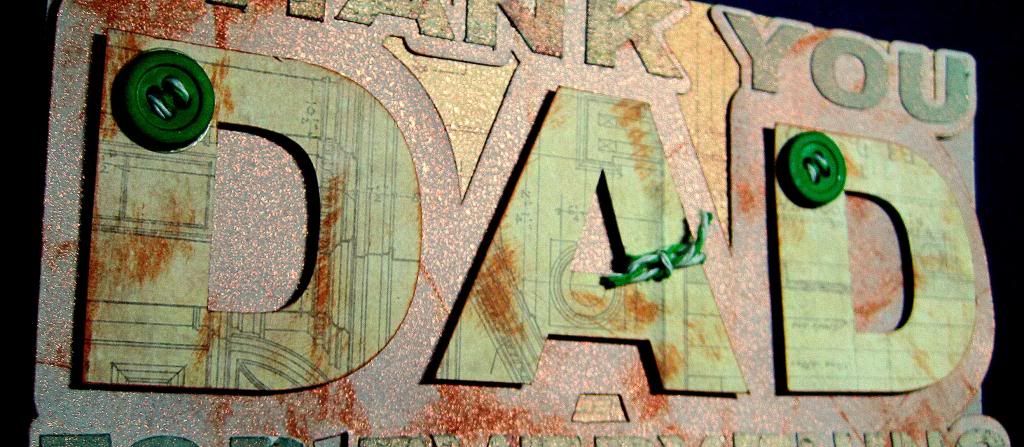
Thank You Dad Card
Father's Day is a special time to say thank you dad for all you do and that is why I put together this special Father's Day card.

The file to make this card came from SVG Attic's Cards for Dad cutting file set.
I used the Tim Holtz Idea-Ology Paper Stash Paper Pad-Kraft Resist to make the card. This paper is great for making masculine projects.
I have to show you a close up side view so you can see the Glimmer Mist I used. I just love this stuff and find I spray it on almost all my projects now just to give them that little extra touch. Also, these mist that add a touch of glimmer and glitz to your projects come in almost every and any color you can think of.
 (I must add that my letters are more of the yellowish color like in the first picture but every time I tried to get a good picture of the Glimmer Mist, the letters would turn out more green in color.)
Here's a close up of the "D" and the "A." You can see how I used Tim Holtz Distress ink pad in Tea Dye to give them a distressed look.

My final touch came with the buttons and twine. I used Doodle Twine in the Primary Colors Pack - green.
I used my go to glue - Scotch Quick-Dry Adhesive and my go to tape gun - Scotch Advance Tape Glidder to hold it all together.
Thanks for taking a peek today and I hope I've given you some Father's Day inspiration.
Jearise from Lorby's World saying so long for now and looking forward to next time.

The file to make this card came from SVG Attic's Cards for Dad cutting file set.
I used the Tim Holtz Idea-Ology Paper Stash Paper Pad-Kraft Resist to make the card. This paper is great for making masculine projects.
I have to show you a close up side view so you can see the Glimmer Mist I used. I just love this stuff and find I spray it on almost all my projects now just to give them that little extra touch. Also, these mist that add a touch of glimmer and glitz to your projects come in almost every and any color you can think of.
Here's a close up of the "D" and the "A." You can see how I used Tim Holtz Distress ink pad in Tea Dye to give them a distressed look.

My final touch came with the buttons and twine. I used Doodle Twine in the Primary Colors Pack - green.
I used my go to glue - Scotch Quick-Dry Adhesive and my go to tape gun - Scotch Advance Tape Glidder to hold it all together.
I linked up at the Desert Diva's Challenge using ribbon or twine - Craft It Up & Link It Up Party # 7
Thanks for taking a peek today and I hope I've given you some Father's Day inspiration.
Jearise from Lorby's World saying so long for now and looking forward to next time.
Tuesday, May 28, 2013
Schools Out Blog Hop for My LIfe in Arts N Crafts
Welcome to the SCHOOLS OUT FOR SUMMER blog hop being hosted by My Life in Arts N Crafts. The "My Life in Arts N Crafts" design team willing be sharing projects they made for the end of the school year. Please join us to see what they've created and to be inspired.
Jessi, the owner of My Life in Arts N Crafts store, will be having a drawing for a special gift from her store so please make sure you visit her blog and the store blog.
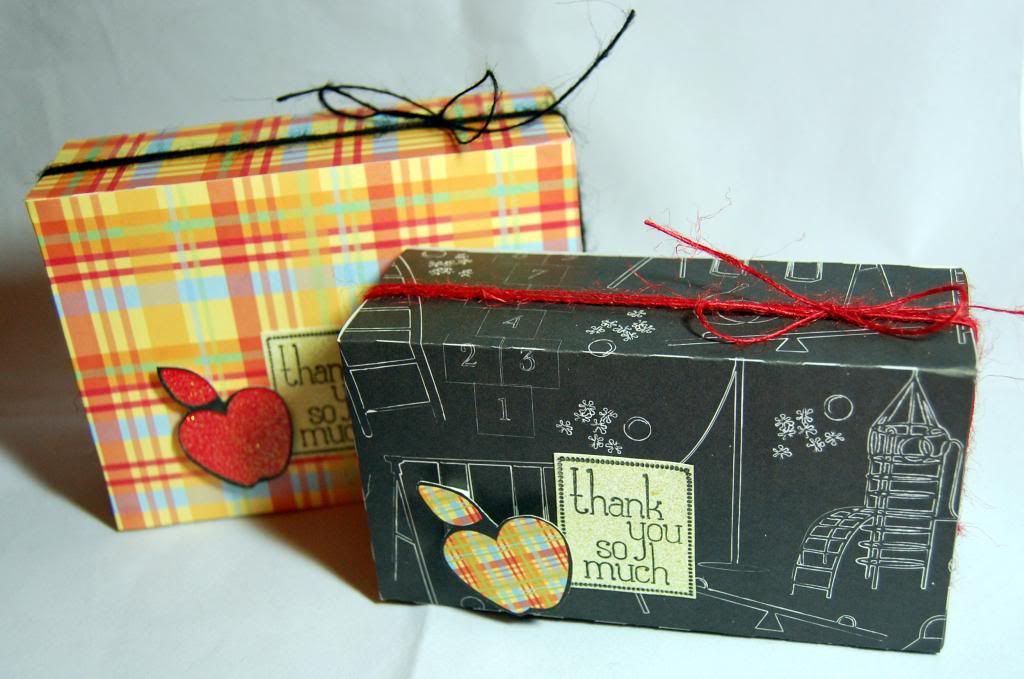
 I made these cute little treat boxes to put some goodies in for the teachers. The bigger box was big enough to hold three multi-packs of gum and the smaller box held a bag of Dove chocolates perfectly.
I used the Back to School stack from DCWV to make the boxes and there is a cute page in the stack that is all apples so I just fussy cut some of the apples out. I stamped by tag and then used some pearl mist on it.
 Finally, after filling the boxes, I used red and black jute from My Life in Arts N Crafts store to secure the box ends to give the boxes some extra cuteness.
 Thank you on and continue on to...Robin.
Jessi, the owner of My Life in Arts N Crafts store, will be having a drawing for a special gift from her store so please make sure you visit her blog and the store blog.
I used the Back to School stack from DCWV to make the boxes and there is a cute page in the stack that is all apples so I just fussy cut some of the apples out. I stamped by tag and then used some pearl mist on it.


Blog Line up
Thursday, May 23, 2013
White on White Hop
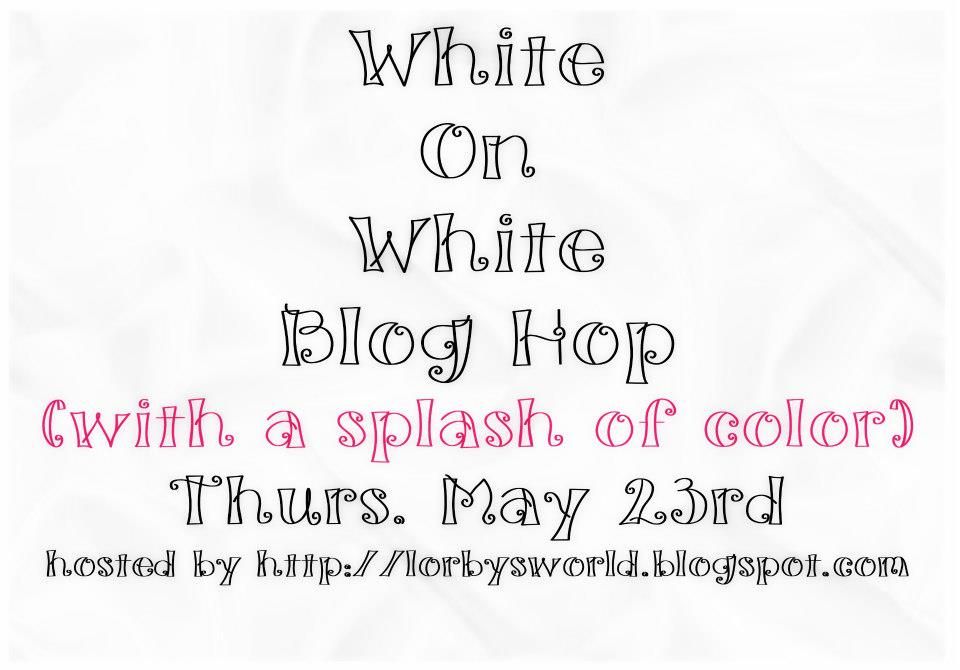
Hi there! This month at Lorby's World of Hops on Facebook where everyone's welcome, I have asked these talented ladies to create anything they want as long as it involves white on white and a splash of color. They were will to take on the challenge and have come up with some wonderful projects to share with you today so please join us and see all the white on white creations.
As hostess of this hop, I will be giving away a $10.00 gift card to Michaels to one lucky winner. Just comment below and become a follower if you're not one already.
Our guest hostess is Tee and she is offering a give away from The Cutting Cafe who is our sponsor this month.
Please visit The Cutting Cafe to see all their beautiful printable and cutting files.
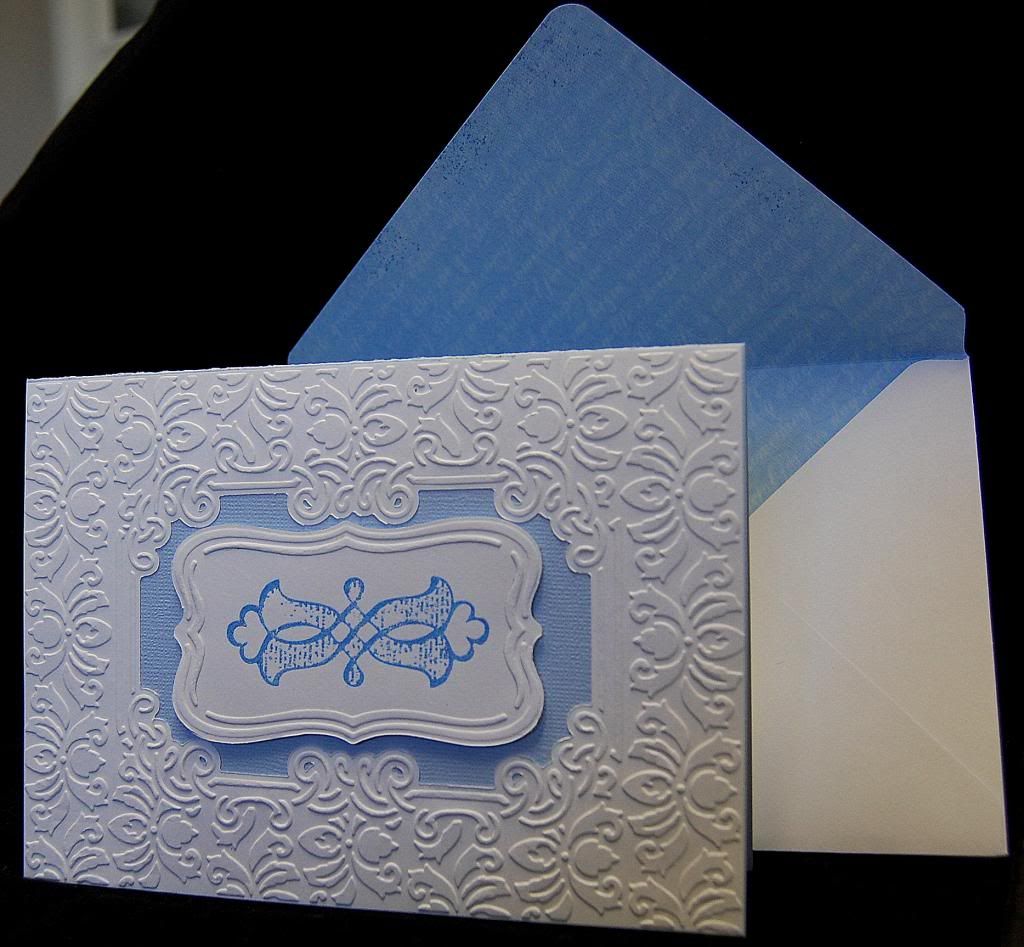
Now let's begin this hop. Here is my project to share.
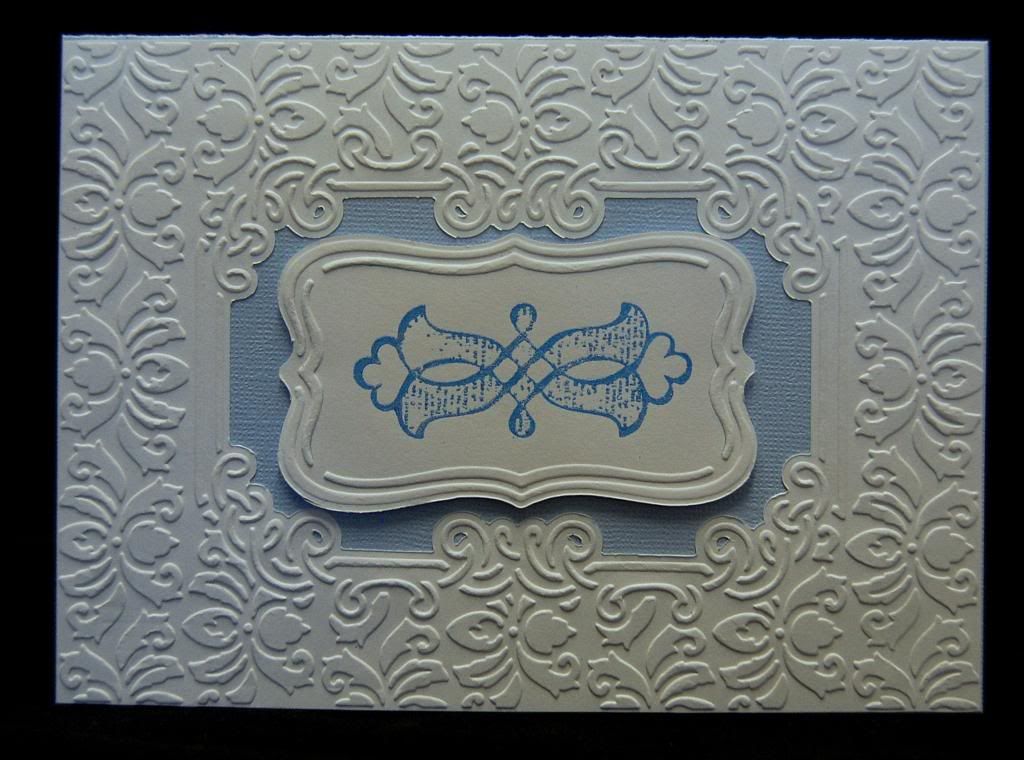
The background was an embossing folder from Cricut and the inner design is one of the green emboss and cut folders from Cricut to use in your Cuddlebug. I wish I could tell you the name but I can't remember. Sorry. The design in the middle comes from a wedding stamp set from Fiskers. I was going to stamp a fancy Mr. & Mrs. from the stamp set but I realized there aren't a lot of people I know getting married anymore. Once you hit my age, everyone that's going to get married is married so I thought the design would go better because now I can use it for different special occasions.
I also made an envelope with my envelope punch board from We are Memory Keepers. I just got this board the other day and am lovin' it!
I have entered my card in the white on white challenge at Creative Cards.
Thank you for stopping by today and now your next blog to visit is Tee my co-host.
Jearise - http://lorbysworld.blogspot.com
(Co-Hostess) Tee - http://tee-myspot.blogspot.com/2013/05/white-on-white.html
Jamie - http://craftygirl21.blogspot.com/
Deborah ~ http://www.scrappingmamma.net
Edwina - http://edwinascreations.blogspot.com/
Lynne ~ http://slasewcraftiness.blogspot.com/
Mayra - http://themaddscrapper.blogspot.com/
Camille - http://shortonideasaz.blogspot.com/
Miriam - http://miriamscreations.blogspot.com/
Janet - http://ladyluvbug.blogspot.com/
Anita - http://www.anitaandbugs.blogspot.com/
This is Isabella, she was a classmate and friend of my daughter's when they were in kindergarten together. Isa was snatched out of her bedroom a year ago this past April. We are still keeping the candles burning for her safe return. We know it is possible but we know we need to get the word out. Here is one of her school pictures.

Wednesday, May 22, 2013
The Stamping Chef (May 22) Challenge - Metal
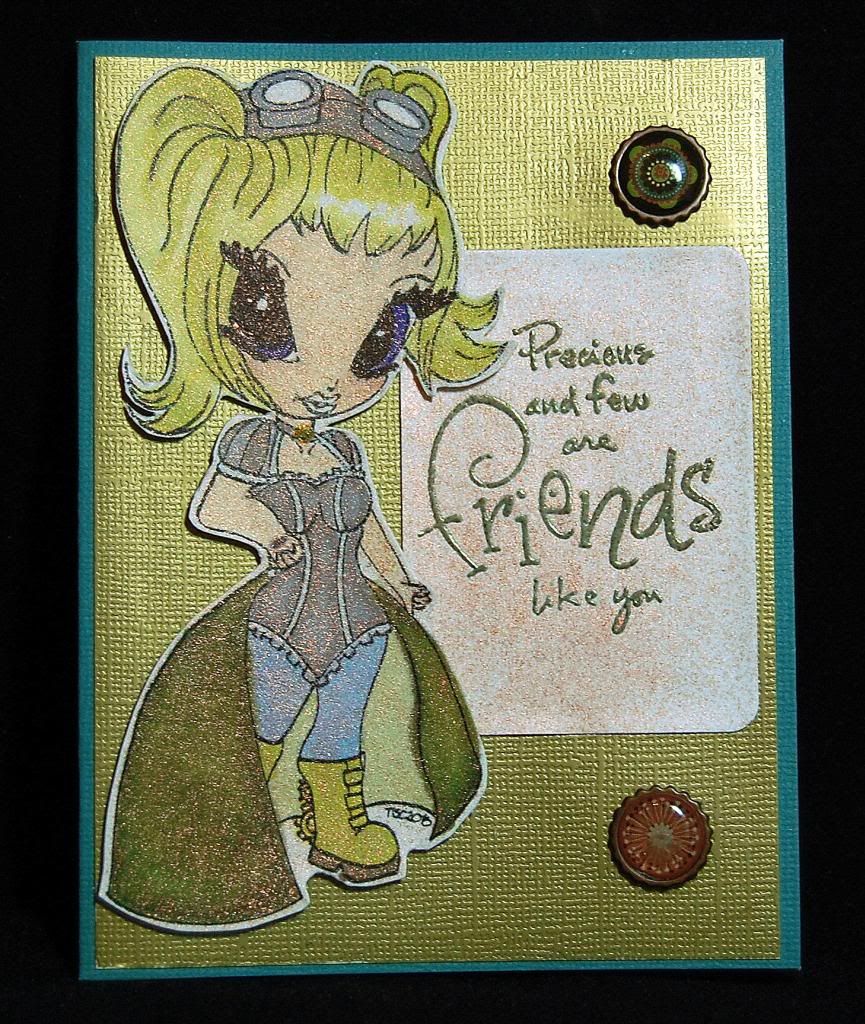
The design team was asked to use one of The Stamping Chef's unique digital stamps to create a card that had something metal on it or about it. I went with the about it.
I used silver color pencil to color some of my digital stamp - Abigale. Then I used gold cardstock from DCWV and sprayed the digital stamp and sentiment with Perfect Pearls Copper Mist and finally used gun metal embossing powder from Stampendous! for the saying. Now that's a lot of metal!
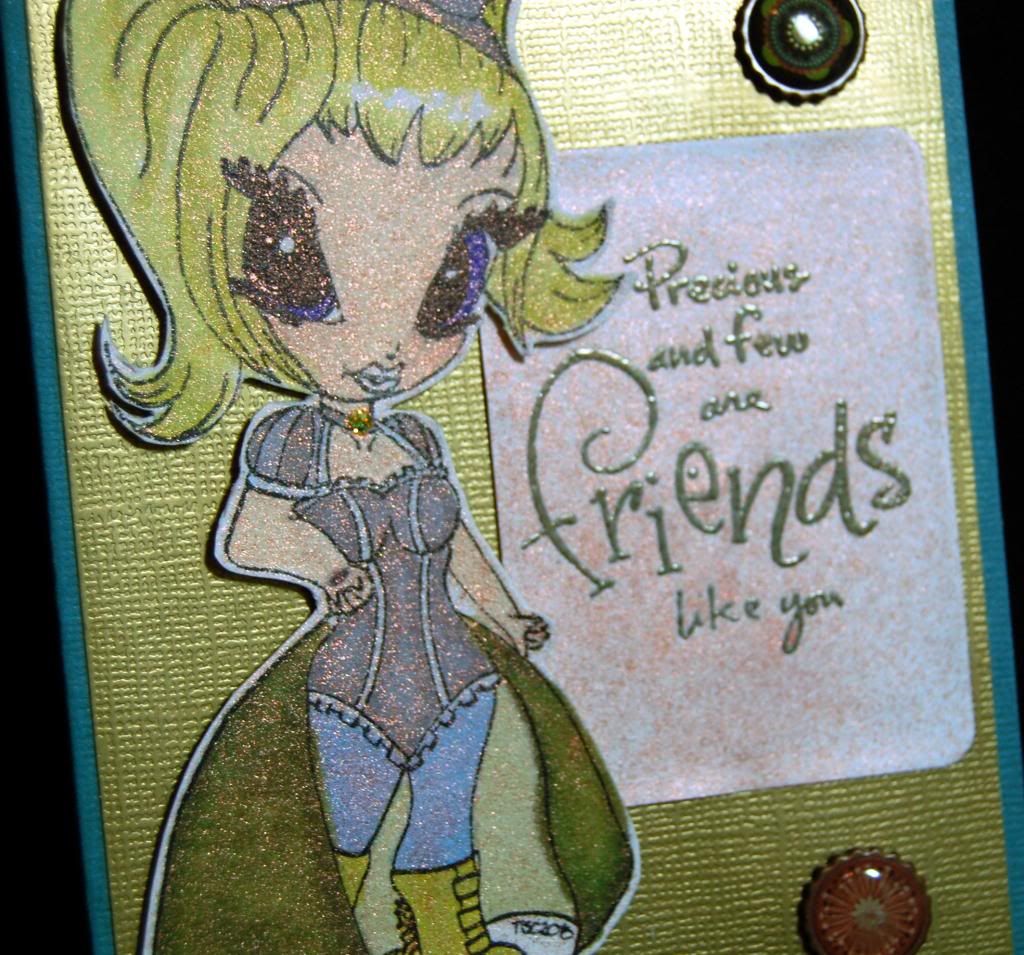
 Close up time...

I used silver color pencil to color some of my digital stamp - Abigale. Then I used gold cardstock from DCWV and sprayed the digital stamp and sentiment with Perfect Pearls Copper Mist and finally used gun metal embossing powder from Stampendous! for the saying. Now that's a lot of metal!
You can check out all the great digital stamps at The Stamping Chef and thanks for stopping by today and hugs from Lorby's World.
Monday, May 20, 2013
Chalk N Stock Challenge Post - May half way mark
Welcome to my half way through the month of May Chalk N Stock Challenge post. Now that's a mouth full to say.
This post is to keep you going and motivated for the rest of the month. We love the projects we've seen and we're looking forward to seeing more. You people have been awesome with your use of chalks in your projects.
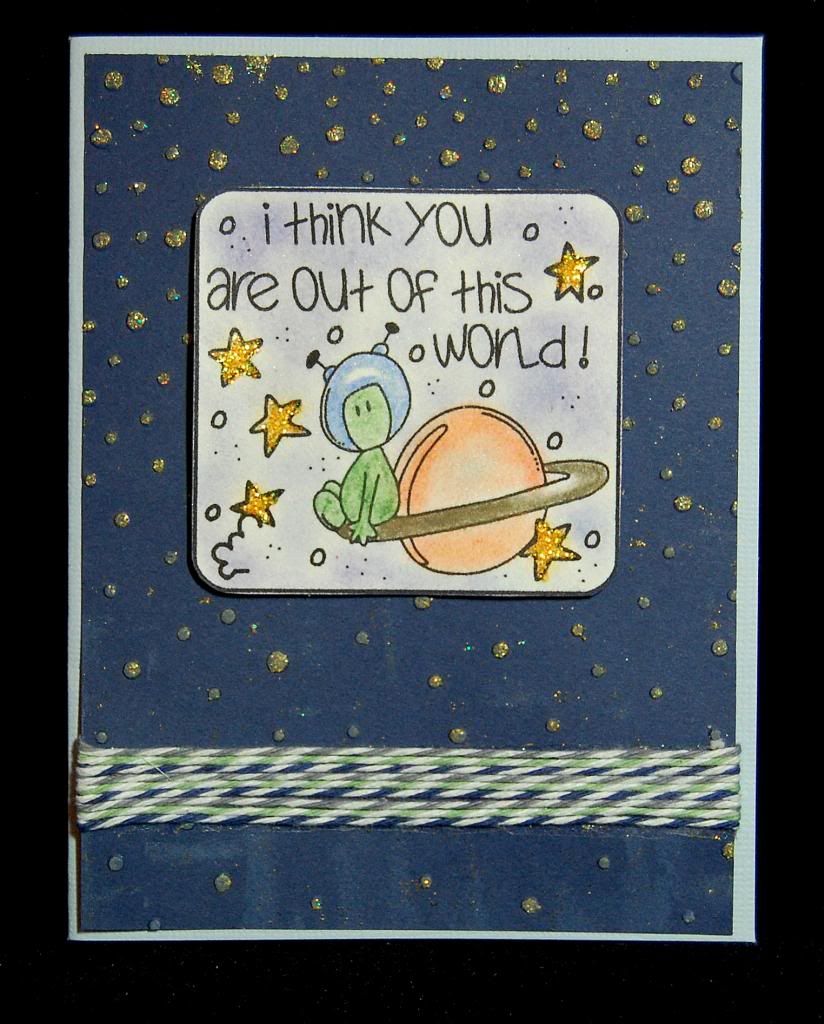
Here is my inspiration for you...
I used chalk to color my adorable little martian and everything else on this digital image from Bugaboo stamps who happens to be our wonderful sponsor for this month.
 To give you some insight into how I made this card, I used an embossing folder and then used by bray to put embossing ink on just the dots. I then sprinkled embossing powder over the background and used my heat gun on it. I thought it gives a great look of outer-space. I used three colors of twine from My Life in Arts N Crafts etsy store instead of ribbon. I think twine looks cuter than ribbon on a card like this.
Thank you so much for visiting today and don't forget the challenge, which runs to the end of May and you're allowed to enter more then on project with the only rule being - You must use chalk!.
This post is to keep you going and motivated for the rest of the month. We love the projects we've seen and we're looking forward to seeing more. You people have been awesome with your use of chalks in your projects.
Here is my inspiration for you...
I used chalk to color my adorable little martian and everything else on this digital image from Bugaboo stamps who happens to be our wonderful sponsor for this month.
Thank you so much for visiting today and don't forget the challenge, which runs to the end of May and you're allowed to enter more then on project with the only rule being - You must use chalk!.
Wednesday, May 15, 2013
Do you need help with photographing subjects for your blog?
This is important if you want to show your best up front to keep your readers interested in what you are posting. The key to blogging is good writing and some “eye candy” (picture). I mean something interesting to look at for your reader to come back and want to see what you have got. Showing your best potential efforts, so the viewer can feel like they are there with you as you write the post, relating to you.
How do you think magazines keep their readers?
I started this tutorial last fall for a friend at Lorby's World to be a guest designer on her blog, as the holidays came fast and it never got published. When she asked, I asked her what she would like me to focus on, and she said something you are best at, a digital layout or my photography. Instantly I was inspired by this because I thought it would be a great idea to focus on how to improve your photographs of your projects for your blog posts. I have a mini tutorial and this extensive one on my blog if you would like to visualize it differently.
1) First of all, I can’t stress enough about the Rule of Thirds. Any camera will do a great job on some of these tips I am going to post and will continue to post as time goes on. They key to a successful photograph starts with the photographer using his/her skill on
2) Know your camera and it's limiations: time to bring out that ole manaul, ughhh... ya it's a photography course in there!
3) Eliminate unwanted backgrounds. Keeping focus on the subject, when you are photographing your family and posting it on Facebook do you want everyone in your Facebook to see the messy kitchen after dinner? Or your messy craft table after finishing your project. You can always use 12x12 papers for your background, zoom in but leave a little crop room too to insure you can crop it level. Many of our projects are very small and this works well. There are many sites out there that you can use if you don’t have a photo editor but even programs like Word will do the job on cropping.
Here is a set up that I drew in Photoshop to help you visualize what I am talking about.

You can imagine this as your sliding glass door or the opening of your garage, or your front windows. If you keep your subject facing beside the light you will start to see it is more 3 dimensional, and molding of the subject, apposed to facing the light, will produce flat results of the subject.
To be a little more technical, your third option for indoor lighting would be to have a camera that has the ability to use a mount flash that can tilt and rotate or able to use it with a sync cord to bounce light off the ceiling to soften it. If you not have that either, there is the light box option as well. Anyone can soften the harshness of a flash is a thin tissue this will eliminate hard shadows. Don't place your subject right up against the back ground, if you are fairly close you can put a thin tissue over your flash to soften in. I personally will wait for the natural light to be able to photograph my subjects because I am a die-hard fan of natural light. With that being said, I am going to stay focused on the natural light.

Can you see where the light source is coming from? It is on the right I may have used a white poster board to boost up the left side so it didn’t get drowned out, but the natural light coming from the side is what gives this project a 3D effect you can look into it, I wish I had of take a photo of it the other direction so you can see the difference. If I had of, there would be no shadows or molding within the subjects, this is very important with photographing people and faces. Faces come alive when photographing in natural light; you want to see them as they are in real life, not flat.


How do you think magazines keep their readers?
Interesting content.
I started this tutorial last fall for a friend at Lorby's World to be a guest designer on her blog, as the holidays came fast and it never got published. When she asked, I asked her what she would like me to focus on, and she said something you are best at, a digital layout or my photography. Instantly I was inspired by this because I thought it would be a great idea to focus on how to improve your photographs of your projects for your blog posts. I have a mini tutorial and this extensive one on my blog if you would like to visualize it differently.
I have many photography tips on my blog (if I was encouraged to do more I would… hint, hint) but this post I will talk about photographing general projects. Some of us have light boxes and some just photograph them in the bathroom, bedroom, kitchen where ever. Either way this tutorial can help you improve your pics for your posts. All these tips are the same tips of getting a great portrait of as well.
1) First of all, I can’t stress enough about the Rule of Thirds. Any camera will do a great job on some of these tips I am going to post and will continue to post as time goes on. They key to a successful photograph starts with the photographer using his/her skill on
Rule of 3rds, lighting , subject matter. and minor photo edits if needed such as contrast, and brightness.
2) Know your camera and it's limiations: time to bring out that ole manaul, ughhh... ya it's a photography course in there!
3) Eliminate unwanted backgrounds. Keeping focus on the subject, when you are photographing your family and posting it on Facebook do you want everyone in your Facebook to see the messy kitchen after dinner? Or your messy craft table after finishing your project. You can always use 12x12 papers for your background, zoom in but leave a little crop room too to insure you can crop it level. Many of our projects are very small and this works well. There are many sites out there that you can use if you don’t have a photo editor but even programs like Word will do the job on cropping.
4) Use natural light if you can. I am not talking full bright sun; I am talking available light in open shade. Open shade is light in a sense like window light or the open shade when you are under a carport or an opened door whether it is a house door or garage. Your camera doesn't know what your subject is nor care what it is, it’s there to photograph light and records what is in it. Harsh lighting can result in blown out image, and harsh shadows give no detail, not enough light can result in grainy or blurry images. Knowing your histogram is important, but you can get buy while learning this. Knowing the limits of your camera and proper settings and maybe sometimes a tripod is very helpful in very low lighting. Using this method I am about to show you, a tripod isn’t necessary. Using available lighting does require a time of day your best light comes in your home, garage or where ever you choose to photograph. None will know it is your laundry room if you are using a simple background. With this kind of light, any point and shoot camera should be able to handle it.
Here is a set up that I drew in Photoshop to help you visualize what I am talking about.
You can imagine this as your sliding glass door or the opening of your garage, or your front windows. If you keep your subject facing beside the light you will start to see it is more 3 dimensional, and molding of the subject, apposed to facing the light, will produce flat results of the subject.
Your second option for indoor lighting would be to have an Ott-light, it produces as close to natural light as one light can get. Why not a regular bulb? If you use regular bulb you may get a green color cast in your subject.
To be a little more technical, your third option for indoor lighting would be to have a camera that has the ability to use a mount flash that can tilt and rotate or able to use it with a sync cord to bounce light off the ceiling to soften it. If you not have that either, there is the light box option as well. Anyone can soften the harshness of a flash is a thin tissue this will eliminate hard shadows. Don't place your subject right up against the back ground, if you are fairly close you can put a thin tissue over your flash to soften in. I personally will wait for the natural light to be able to photograph my subjects because I am a die-hard fan of natural light. With that being said, I am going to stay focused on the natural light.
I recently was doing a project and I wanted to challenge myself. I could have taken all my images in a standard boring sitting like this, as I usually do.
Can you see where the light source is coming from? It is on the right I may have used a white poster board to boost up the left side so it didn’t get drowned out, but the natural light coming from the side is what gives this project a 3D effect you can look into it, I wish I had of take a photo of it the other direction so you can see the difference. If I had of, there would be no shadows or molding within the subjects, this is very important with photographing people and faces. Faces come alive when photographing in natural light; you want to see them as they are in real life, not flat.
It is pretty standard for me to wait for the natural light, using 12x12 papers for a background, keeping focus on the subject, especiall y in the winter I am not much for props but pretty paper is always nice that complements your subject.
Last fall I challenged myself to going out and” making it pretty” using props and had some fun. I know my camera well, using different manual settings will give different results than a point and shoot can do. I then took close ups of each pumpkin to show off the details. So went outside and make a set up. It isn’t well groomed but it worked well for the photo opp.
Another post I decided to spruce up my photography, I set my subject in this dead grass, that photographs wonderful, many many shoots I have done in these fields that I live in. Doing shoots with my kids and doing senior portraits. A popular choice from the seniors as well.
There you have it, the prob and background all in one, great lighting, composition and just basic skill.
Another thing to Add is interesting lines..
I very rarely take photos straight on. I like my subject to lead into the photograph.
Winters are long and hard for me to get as creative, the light is gone by the time I get home from work but hoping that soon enough I will have some great projects to brag upon again in new settings. I have bought some vases and flowers to add as props, hoping this will make my subjects more interesting.
Good photography is as good as a good book, crafters come to our blogs to see projects, and if they are wowed by the “eye candy” maybe they will read a little too if the content is interesting enough. The better the photography is, the more your post will be attractive to the viewer. Then he/she will be more intrigued to read what you have wrote, and good writing, good photography = blog followers. Then you have a reason to keep posting projects you have worked so hard on. Photography isn’t something that just happens; you have to make it happen. I believe in getting it right in camera the first time, because I don’t like to WORK in Photoshop. I like to play in Photoshop. A good photo editor really is a must to know the basics, but in the mean-time if you have nothing for an editor there are online editors and there is also a free download called Gimp. You can find YouTube tutorials on how to use it, I surely would show you but I don’t know how, as many others do. I hear it can do the basic needs you have to have to crop, rotate and maybe even put a logo on it. Most of all using the tips given above and being able to adjust brightness, contrast and color correct. These tips I have provided today are the keys to a successful blog, and pride in your work! I do have a tutorial on Photoshop processing, not in depth but it introduces you to the basics coming up soon, keep an eye out for the YouTube screen cast photo.
More tips? What would you like to know? I would love to talk about it if you are struggling with your photography. I can’t give specifics on any camera, but I can give you general direction in taking better pictures. I hope you have enjoyed this tutorial, and if you would like to see more I will be adding more at the minimum once a month. I am not a fan of flash so you many not get to far, the basic questions will get answers but if you have a set of alien bee's forget it.. lol. It' s only a dream away for me!
Hope to see you again!! Subscribe to my blog via email up at the top right and you will get those updates right into your inbox and won't miss a thing!
CutterCreek DT - Golden Tag
Hello,
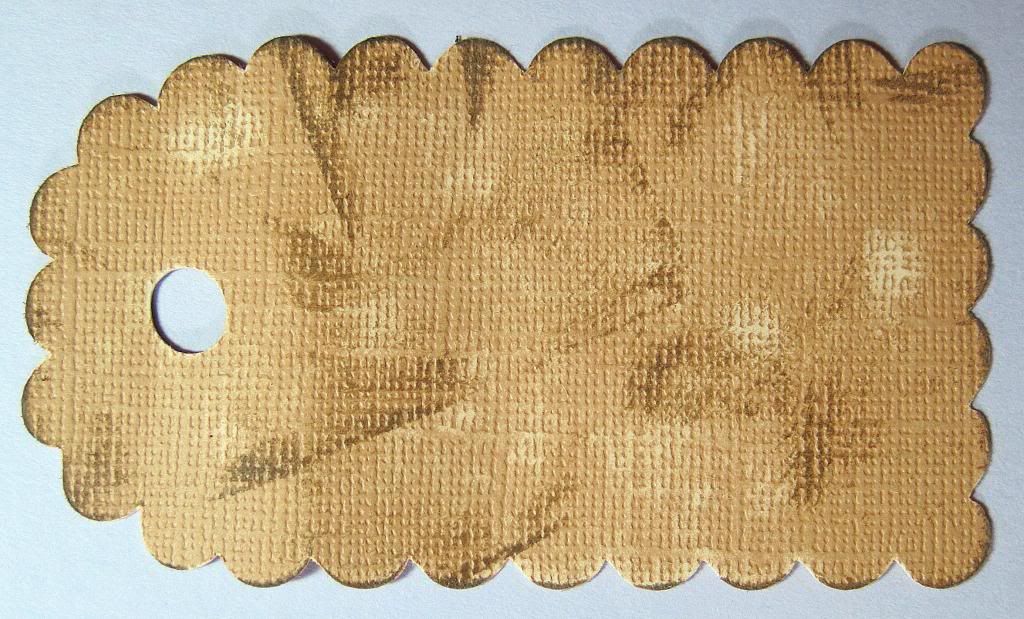
Today I have another tag to show you. I was never one for tags but have started making a few lately and love what I can do with them. I think I like the idea of working on a smaller scale.
This is what I started with...
 I then sanded and used Tim Holtz distress ink (frayed burlap) on the tag.
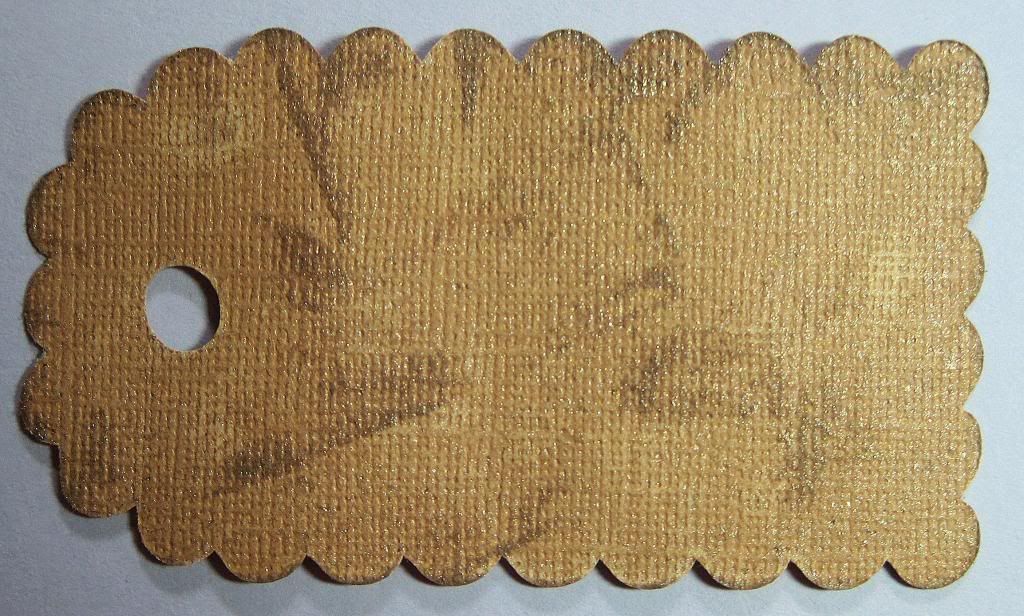
 Next I added Perfect Pearls Mist (heirloom gold). It's hard to see unless you enlarge the pictures.

 Finally I ended up with this...
 The flower is from the Flower Shopped cartridge and I used Tattered Angels (Starfish) for the flower petals and Stickles (yellow) for the center.
Visit CuttersCreek for all the products I listed for my project.
Thanks for stopping by,
Jearise from Lorby's World
Today I have another tag to show you. I was never one for tags but have started making a few lately and love what I can do with them. I think I like the idea of working on a smaller scale.
This is what I started with...


Visit CuttersCreek for all the products I listed for my project.
Thanks for stopping by,
Jearise from Lorby's World
Tuesday, May 14, 2013
A CHANGE OF HEART (My Life in Arts n Crafts DT Post)
Hello Tuesday! and welcome to my DT post for My Life in Arts n Crafts.
Have you ever started making a card or layout and got everything ready to do it and then all of a sudden something totally different looks better? That's what happen with today's card. I had the card stock and background cut and inked and two cute little owls with balloons colored and cut out and when I went to get twine for the background I saw this mint green piece of burlap ribbon and my whole idea changed - totally. No owls as you can see but now a flower will be.
 I love the way the burlap looks in the background and makes this simple card clean and nice. I was going to add a ton of embellishments but I like the simple but pretty way it looks just with the burlap and flower. Sometimes simple is good.
Thanks for stopping by today and head of to My Life in Arts N Crafts to see more types of burlap and also a HUGE variety of bakers twine.
Hugs!
Have you ever started making a card or layout and got everything ready to do it and then all of a sudden something totally different looks better? That's what happen with today's card. I had the card stock and background cut and inked and two cute little owls with balloons colored and cut out and when I went to get twine for the background I saw this mint green piece of burlap ribbon and my whole idea changed - totally. No owls as you can see but now a flower will be.

Thanks for stopping by today and head of to My Life in Arts N Crafts to see more types of burlap and also a HUGE variety of bakers twine.
Hugs!
Monday, May 13, 2013
Teacher Appreciation Week Fun
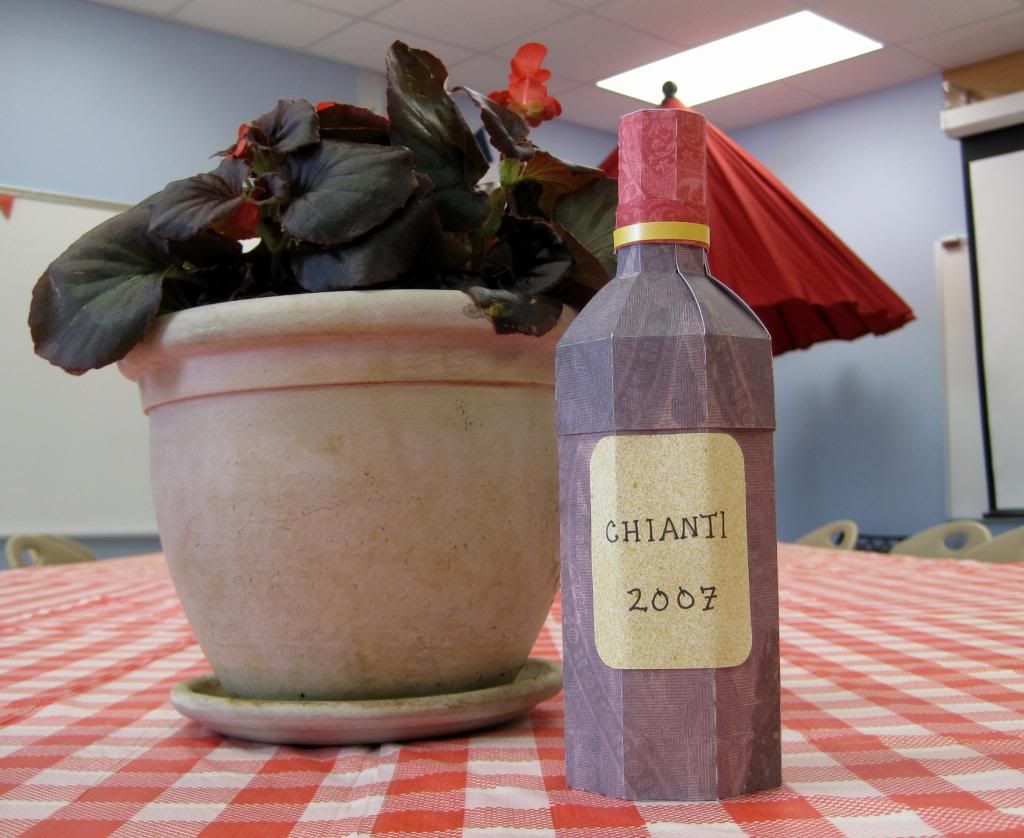
Last week was Teacher Appreciation Week and our elementary and the PTO went all out for the wonderful teachers at our school: Monday - sweets, Tuesday - lunch and neck massages, Wednesday - Italian lunch, Thursday - breakfast, and Friday - flowers.
I used the cute wine bottle from the SVG Attic kit - Perfect Picnic to decorate the tables. I made four of them even though I am only sharing one of them here. They were so easy to cut out and assemble. It was quick and a breeze to have this cute decoration added to the table.


I really like the way the table decorations went together.
Make sure to check out all the wonderful cutting file sets at SVG Attic and here is a peak at their newest release.
I entered this project in...
Challenges for Everyone - Challenge #20
I used the cute wine bottle from the SVG Attic kit - Perfect Picnic to decorate the tables. I made four of them even though I am only sharing one of them here. They were so easy to cut out and assemble. It was quick and a breeze to have this cute decoration added to the table.

I really like the way the table decorations went together.
Make sure to check out all the wonderful cutting file sets at SVG Attic and here is a peak at their newest release.
 |
| Hats Off |
Challenges for Everyone - Challenge #20
Sunday, May 12, 2013
Hug Your Cat Day Blog Hop
Are you a crazy cat lady, but in a good way? I know I am.
Today is purina’s Hug you cat day. There are several hug your cat days and I
would love to hug my cat(s) on each and everyone. Today we are celebrating
cats! Diamonds, dogs’ pft. Cats are a woman’s best friend.
So sit back and lets hang out.
Give away alert…
Jessi is going to give away a bundle of each of the brand-new twine that are available in her etsy shop. rainbow teal and the blossom iridescent.
https://www.etsy.com/listing/130843213/new-shimmer-twine?ref=shop_home_active
I don't have a cat now but I grew up with cats and had cats up till we moved to Tucson, Arizona. I was warned about the danger of a cat getting out into the desert so I opted not to have a cat. We're living in Austin, Texas now and I'm entertaining thoughts of getting another cat but until I make the final decision, I have started volunteering at a local shelter once a week.
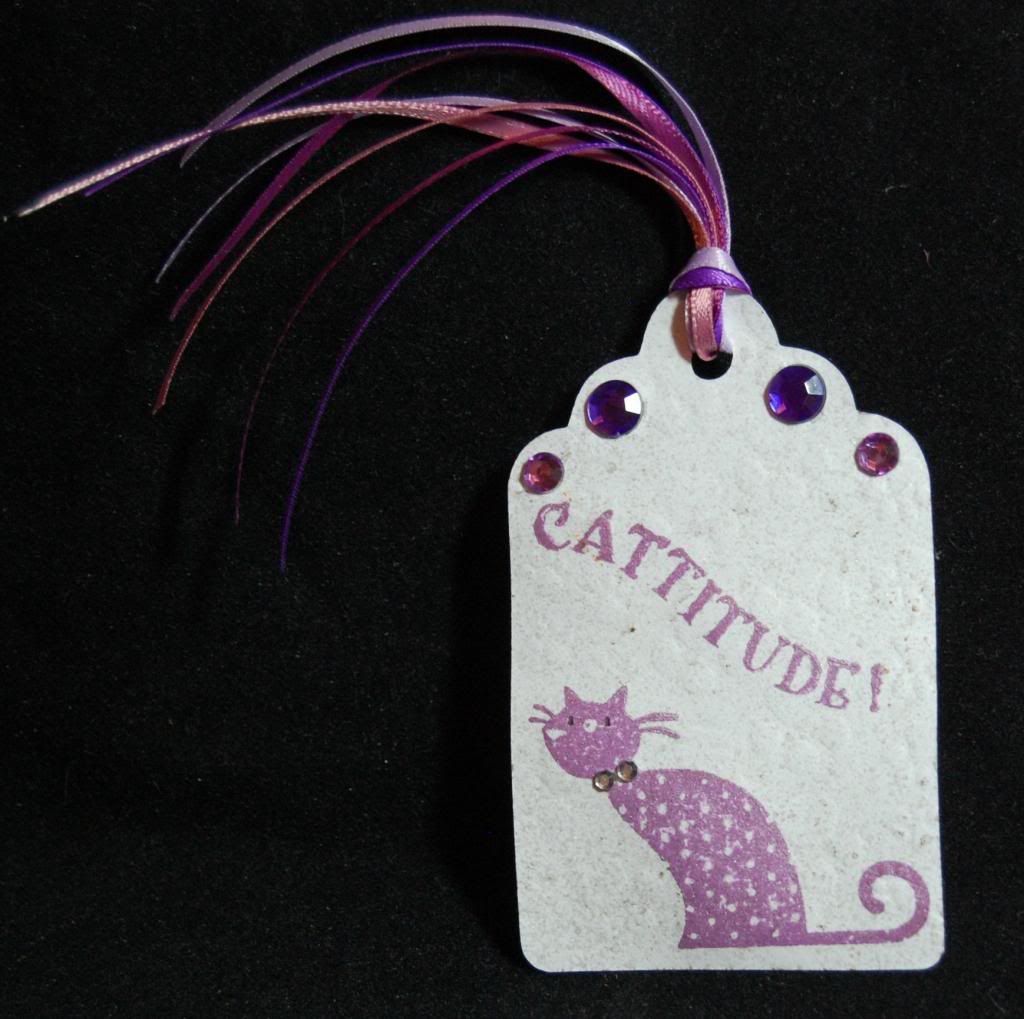
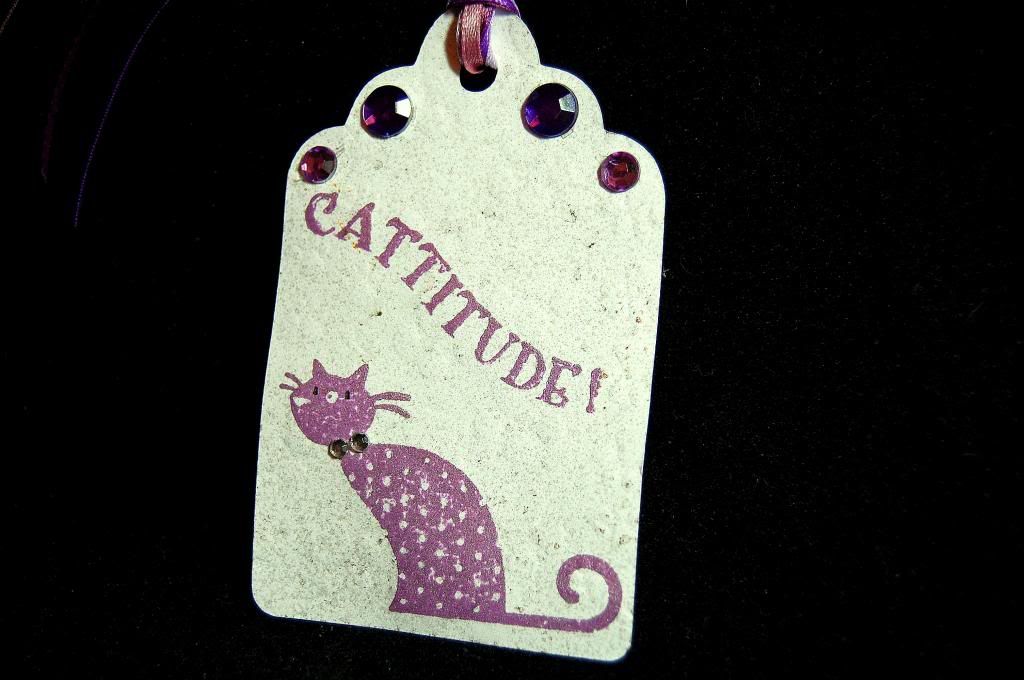
I decided to make a tag. I can see this on a cute little box.

 I have these awesome cat stamps that I just love to use on things. I can't remember who made them. I used Perfect pearls mist to spray the tag first. I used Dew Drop Brilliance Pearlescent Purple chalk ink for the words and image.
I'm the end of the line up so I get to say good bye for now and thank you for taking the time to look at all our creations. Now, go hug your cat.
I have entered my tag in the Craftin Desert Divas link up party #5 - pun.
Line up
Jessi – www.Mylifeinartsncrafts.com
Connie - http://conniecancrop.blogspot.com
Robin - http://littletidsandbits.blogspot.com/
Lynne - http://slasewcraftiness.blogspot.com/
Mayra - http://themaddscrapper.blogspot.com/
Robin http://scrapandchat.blogspot.com
Jearise http://lorbysworld.blogspot.com
So sit back and lets hang out.
Give away alert…
Jessi is going to give away a bundle of each of the brand-new twine that are available in her etsy shop. rainbow teal and the blossom iridescent.
https://www.etsy.com/listing/130843213/new-shimmer-twine?ref=shop_home_active
============================================
I don't have a cat now but I grew up with cats and had cats up till we moved to Tucson, Arizona. I was warned about the danger of a cat getting out into the desert so I opted not to have a cat. We're living in Austin, Texas now and I'm entertaining thoughts of getting another cat but until I make the final decision, I have started volunteering at a local shelter once a week.
I decided to make a tag. I can see this on a cute little box.
I'm the end of the line up so I get to say good bye for now and thank you for taking the time to look at all our creations. Now, go hug your cat.
I have entered my tag in the Craftin Desert Divas link up party #5 - pun.
Line up
Jessi – www.Mylifeinartsncrafts.com
Connie - http://conniecancrop.blogspot.com
Robin - http://littletidsandbits.blogspot.com/
Lynne - http://slasewcraftiness.blogspot.com/
Mayra - http://themaddscrapper.blogspot.com/
Robin http://scrapandchat.blogspot.com
Jearise http://lorbysworld.blogspot.com
Saturday, May 11, 2013
Calendar Girls
Welcome to our May Calendar Girls' Blog Hop. It’s absolutely amazing
when you do a Google search the interesting facts you may find. Such a
find is special and unique occasions throughout the year!!! These unique
holidays are our inspiration. As Neil Sedaka sang in his song "Calendar
Girls" - "May, maybe I’ll ask your mom and dad . . .". Guess, you’ll
have to come back to see what he’s going to ask your mom and dad in June
. . . .LOL!!!
The hop starts with the beautiful and very talented Vicky at http://crafting-vicky.blogspot.ca/.
Holidays, Special and Wacky Days for May are:
National Barbecue Month:
National Hamburger Month: Vicky
1 Mother Goose Day: Jearise
4 Bird Day: Sandy
5 Cinco de Mayo:
6 National Nurses Day: Janet
8 Iris Day: Lynne
8 No Socks Day: Laura
9 Lost Sock Memorial Day: Sandy
9 National Train Day: Lynne
10 Clean up Your Room Day:
11 Eat What You Want Day:
13 Frog Jumping Day: Laura
12 Mother's Day: Kimberly
14 Dance Like a Chicken Day:
15 National Chocolate Chip Day:
16 Love a Tree Day:Anita
20 Pick Strawberries Day: Sandy
23 Lucky Penny Day:
25 National Missing Children's Day: Jearise
26 Sally Ride Day – (Sally Ride Day was created in honor of the birth date of Sally Ride, the first American woman in space. Sally Ride was born on May 26, 1951, in Los Angeles, California.): Anita
27 Memorial Day: Janet
30 Water a Flower Day: Kimberly
31 Save Your Hearing Day:
31 World No Tobacco Day:
National Missing Children Day:
This is a hard but very close to my heart day that Lynn said she knew I would pick.

This beautiful little girl has been missing for a year now. She was snatched from her bedroom while she slept. My daughter and her were friends in kindergarten together and this case has touched all our hearts. Her name is Isabella Celis and she would be 8 years old now. She is from Tucson, Arizona and we all just want her home safe. Here is the facebook page if you would like to check it out and hit "like." https://www.facebook.com/FindIsabel?ref=ts&fref=ts
Mother Goose Day
Okay so we already missed getting to celebrate it but I can still show you what I made. I have a dear friend who is expecting a baby this summer and I thought it might be nice to make her a Mother Goose photo album. I bought this awesome Debbie Mum paper a few years back on clearance and I've been waiting for the perfect time to use it and this is it.


Thank you for stopping by today and not it's time to read the bold print before moving on.
We are offering some fabulous blog candy to 3 lucky winners:
Miriam's Crafting Supplies is offering ten (10) sets of pearls to one lucky winner by becoming a fan on her new blog, Miriams's Crafting Blog, http://miriamscraftingblog.com/,
The Stamping Chef, http://thestampingchef.oo.gd/, is our wonderful sponsor for today's blog hop and has designed at least 4 of the images that have been used in today's hop. She is offering 3 of her wonderful designs, winner's choice to one lucky blog hopper that responds on each of the Calendar Girls along with her facebook page, https://www.facebook.com/groups/TSCRecipes/, commenting that you hopped with the Calendar Girls.
Lynne will be going through her stash and sending one lucky winner a surprise package to someone that remarks and gives bloggie love on each of the participants.
Your next stop along the way of the calendar is http://www.scrapbookblessings.blogspot.com - Sandy. Thanks for stopping by and mark your calendar again next month to see what Holidays to Celebrate on June 8, 2013, for the next Calendar Girls Blog Hop!
The hop starts with the beautiful and very talented Vicky at http://crafting-vicky.blogspot.ca/.
Holidays, Special and Wacky Days for May are:
National Barbecue Month:
National Hamburger Month: Vicky
1 Mother Goose Day: Jearise
4 Bird Day: Sandy
5 Cinco de Mayo:
6 National Nurses Day: Janet
8 Iris Day: Lynne
8 No Socks Day: Laura
9 Lost Sock Memorial Day: Sandy
9 National Train Day: Lynne
10 Clean up Your Room Day:
11 Eat What You Want Day:
13 Frog Jumping Day: Laura
12 Mother's Day: Kimberly
14 Dance Like a Chicken Day:
15 National Chocolate Chip Day:
16 Love a Tree Day:Anita
20 Pick Strawberries Day: Sandy
23 Lucky Penny Day:
25 National Missing Children's Day: Jearise
26 Sally Ride Day – (Sally Ride Day was created in honor of the birth date of Sally Ride, the first American woman in space. Sally Ride was born on May 26, 1951, in Los Angeles, California.): Anita
27 Memorial Day: Janet
30 Water a Flower Day: Kimberly
31 Save Your Hearing Day:
31 World No Tobacco Day:
National Missing Children Day:
This is a hard but very close to my heart day that Lynn said she knew I would pick.
This beautiful little girl has been missing for a year now. She was snatched from her bedroom while she slept. My daughter and her were friends in kindergarten together and this case has touched all our hearts. Her name is Isabella Celis and she would be 8 years old now. She is from Tucson, Arizona and we all just want her home safe. Here is the facebook page if you would like to check it out and hit "like." https://www.facebook.com/FindIsabel?ref=ts&fref=ts
Mother Goose Day
Okay so we already missed getting to celebrate it but I can still show you what I made. I have a dear friend who is expecting a baby this summer and I thought it might be nice to make her a Mother Goose photo album. I bought this awesome Debbie Mum paper a few years back on clearance and I've been waiting for the perfect time to use it and this is it.


Thank you for stopping by today and not it's time to read the bold print before moving on.
We are offering some fabulous blog candy to 3 lucky winners:
Miriam's Crafting Supplies is offering ten (10) sets of pearls to one lucky winner by becoming a fan on her new blog, Miriams's Crafting Blog, http://miriamscraftingblog.com/,
The Stamping Chef, http://thestampingchef.oo.gd/, is our wonderful sponsor for today's blog hop and has designed at least 4 of the images that have been used in today's hop. She is offering 3 of her wonderful designs, winner's choice to one lucky blog hopper that responds on each of the Calendar Girls along with her facebook page, https://www.facebook.com/groups/TSCRecipes/, commenting that you hopped with the Calendar Girls.
Lynne will be going through her stash and sending one lucky winner a surprise package to someone that remarks and gives bloggie love on each of the participants.
Your next stop along the way of the calendar is http://www.scrapbookblessings.blogspot.com - Sandy. Thanks for stopping by and mark your calendar again next month to see what Holidays to Celebrate on June 8, 2013, for the next Calendar Girls Blog Hop!
Wednesday, May 8, 2013
Animal Love Challenge at The Stamping Chef
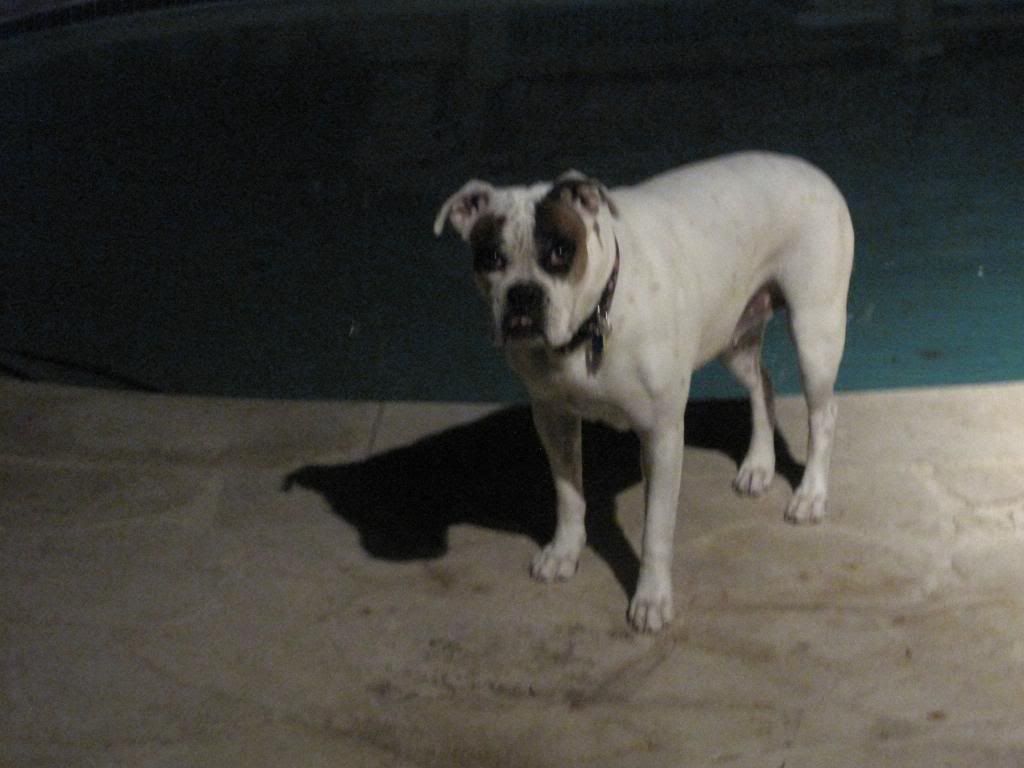
The digital stamp I chose is of this adorable doggie since I made her look similar to my baby - Waggles.
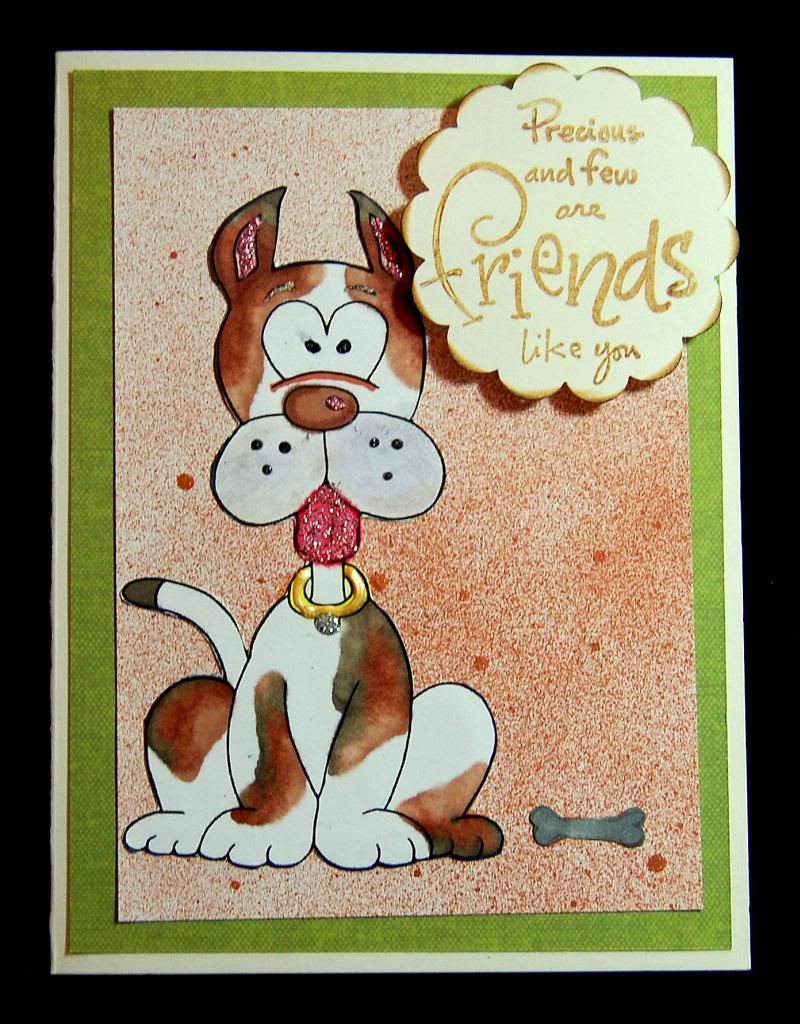
Come join us this week at The Stamping Chef Challenge where one winner will receive 3 digital stamps of his/her choice.
The digital stamp is called Beware of the Dog. I used my alcohol markers to color it and then I used Stickles for the tongue, ears, nose and color. I sprayed the background with Tattered Angels Glitter Mist and I'm not for sure who the stamp is from. Sorry.
Thanks for stopping by today and head on over to The Stamping Chef Blog to enter the challenge.
Tuesday, May 7, 2013
Fairy Gift Tag
Today I decided to showcase a fairy gift tag I made. I rarely ever make a
gift tag but after making this one I want to make more. I love how it
turned out and hope you like it too.

I used my Cricut Expression and the cartridge Plantin School House to cut out the tag. (Ask Kim and she can order the cartridge for you.) The Fairy image is from Graphic 45 - Once upon a Springtime. I then sprayed the tag and the fairy image with Perfect Pearls Mists in Perfect Copper. I found a paper flower I had and also used the Perfect Pearls Mists for that. The fairy wings were outlined in Stickles. Finally, I used Scotch Quick Dry Adhesive to assemble all the pieces except the pearls. I used my glue gun on them.
Here are close ups of the wings and flower.

 I love the way you can change a plain white paper flower into something so beautiful by just spritzing it a few times.
So until next time, I'm sending you some happy fairy wishes.
I used my Cricut Expression and the cartridge Plantin School House to cut out the tag. (Ask Kim and she can order the cartridge for you.) The Fairy image is from Graphic 45 - Once upon a Springtime. I then sprayed the tag and the fairy image with Perfect Pearls Mists in Perfect Copper. I found a paper flower I had and also used the Perfect Pearls Mists for that. The fairy wings were outlined in Stickles. Finally, I used Scotch Quick Dry Adhesive to assemble all the pieces except the pearls. I used my glue gun on them.
Here are close ups of the wings and flower.


So until next time, I'm sending you some happy fairy wishes.
Chalk N Stock Challenge and My LIfe in Arts N Crafts Post
There is a new challenge over at Chalk N Stock and I hope you can join us this month. This is a great challenge that is a month long and the only requirement is that you use chalk somewhere on your project and you can do any project your little heart desires.
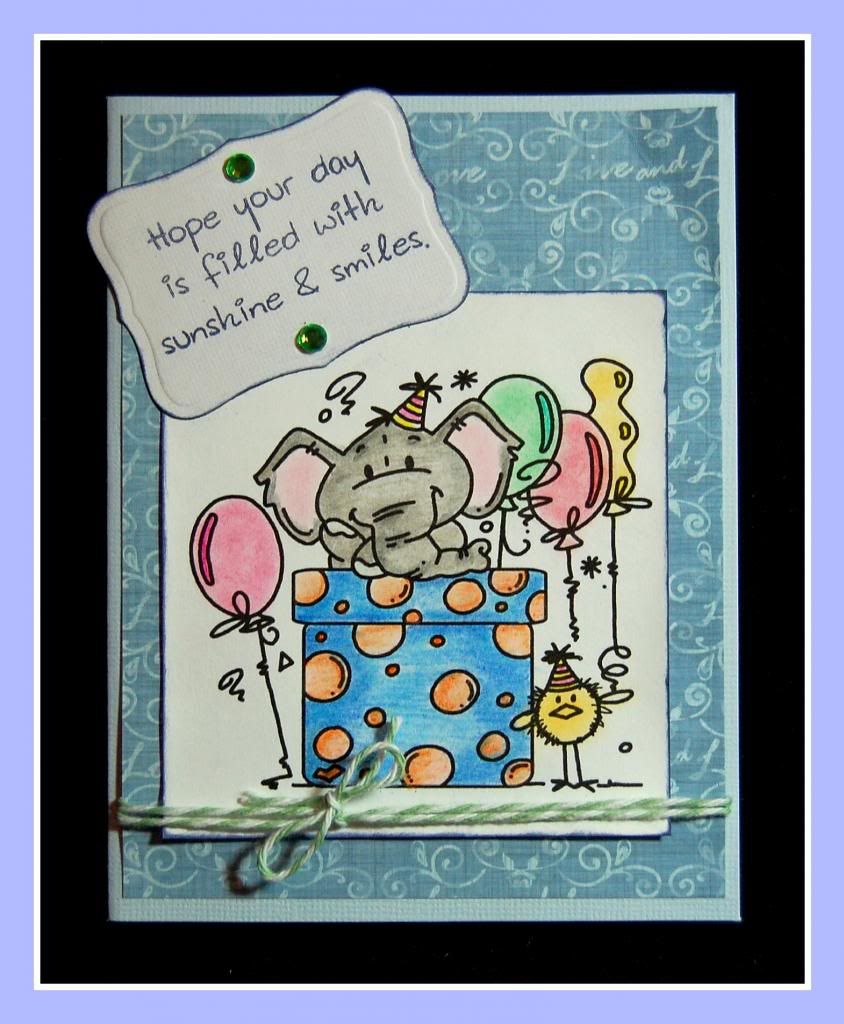
Like the project I did today? I made a cute card that can be used for a birthday or any happy occasion. I colored the balloons, elephant's ears and the cute little chick using chalks. I love the softness you get using chalk. The rest of the picture I used color pencils and I used chalk ink to add a touch of color to the edge of the digital stamp from Bugaboo Stamps.

I love the background paper and thought the green twine from My Life In Arts N Crafts and Etsy store, was the perfect touch to all the blue I have going on on this card. I love using twine on my projects especially birthday cards and kids' cards. It so easy to use and the colors and so bright and cheerful. Check out all the color of twine at My Life in Arts N Crafts.
Thanks for checking out my card and hugs from Jearise in Lorby's World.
Like the project I did today? I made a cute card that can be used for a birthday or any happy occasion. I colored the balloons, elephant's ears and the cute little chick using chalks. I love the softness you get using chalk. The rest of the picture I used color pencils and I used chalk ink to add a touch of color to the edge of the digital stamp from Bugaboo Stamps.
I love the background paper and thought the green twine from My Life In Arts N Crafts and Etsy store, was the perfect touch to all the blue I have going on on this card. I love using twine on my projects especially birthday cards and kids' cards. It so easy to use and the colors and so bright and cheerful. Check out all the color of twine at My Life in Arts N Crafts.
Thanks for checking out my card and hugs from Jearise in Lorby's World.
Monday, May 6, 2013
Scrappy Frogs Challenge - May
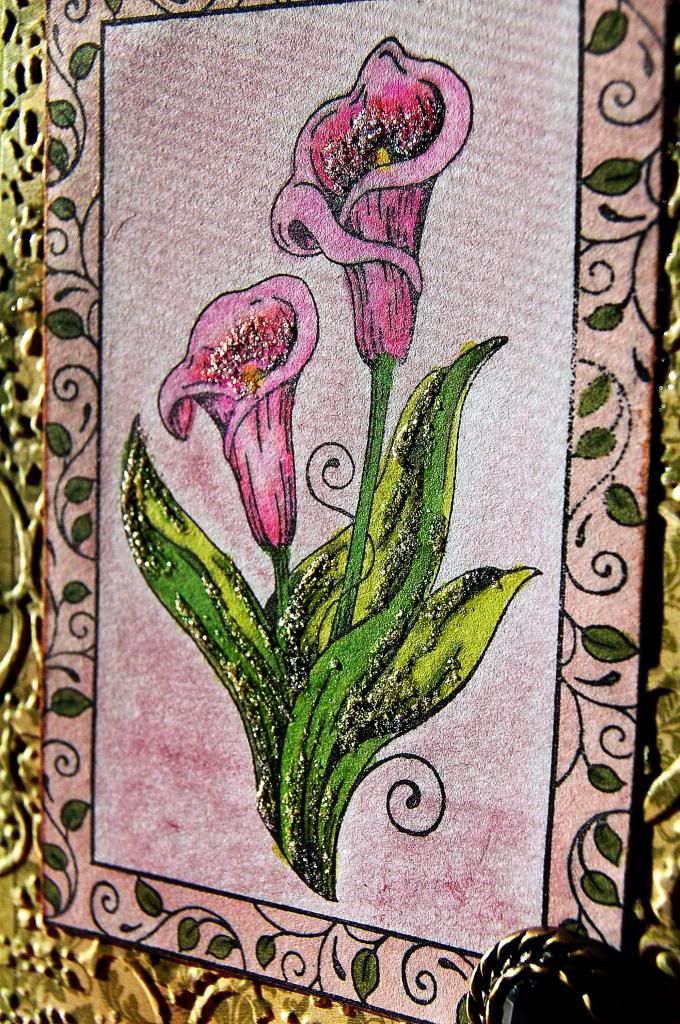
Welcome to Scrappy Frogs Challenge for May. This month's challenge is anything goes. That means you can do whatever your little heart desires. Here is some inspiration from me to you for this month's challenge.

 I stamped the image of the flowers with one of my stamps and then I colored it in using ProMarkers. I added glitter glue to the leaves and middle f the flowers. I embossed the back ground using my Cricut Cuddlebug and I added some beautiful buttons from Miriam's Crafting Supplies.
I hope you hop on over to Scrappy Frogs Challenge to see what the other design members have done for inspiration this month.

I hope you hop on over to Scrappy Frogs Challenge to see what the other design members have done for inspiration this month.
Saturday, May 4, 2013
KCC - Banners

Where ever you go you see a banner weather you are driving down the main street of town and there is some festival going on, or a birthday party or on cards and layouts.
So this month the Krazy Crafting Crew is going to show you all different kinds of banners they have made for fresh ideas, maybe birthdays, weddings and more.
Our hostess today is Liz from
Tryin2Craft
If you have stumbled upon the hop and would like to start from the beginning we have the full line up below to help you navigate through.
So let's get started...


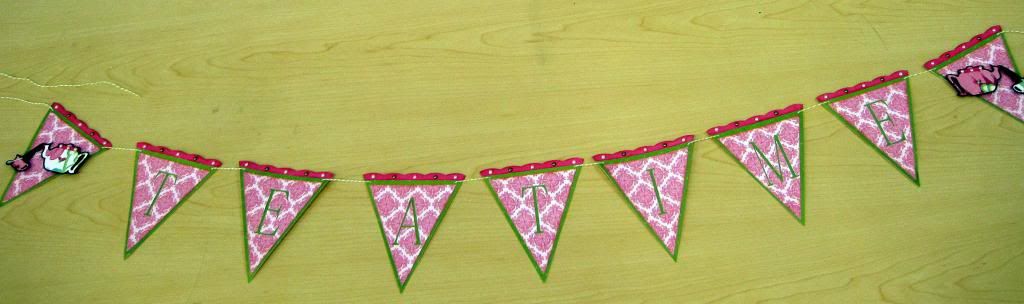
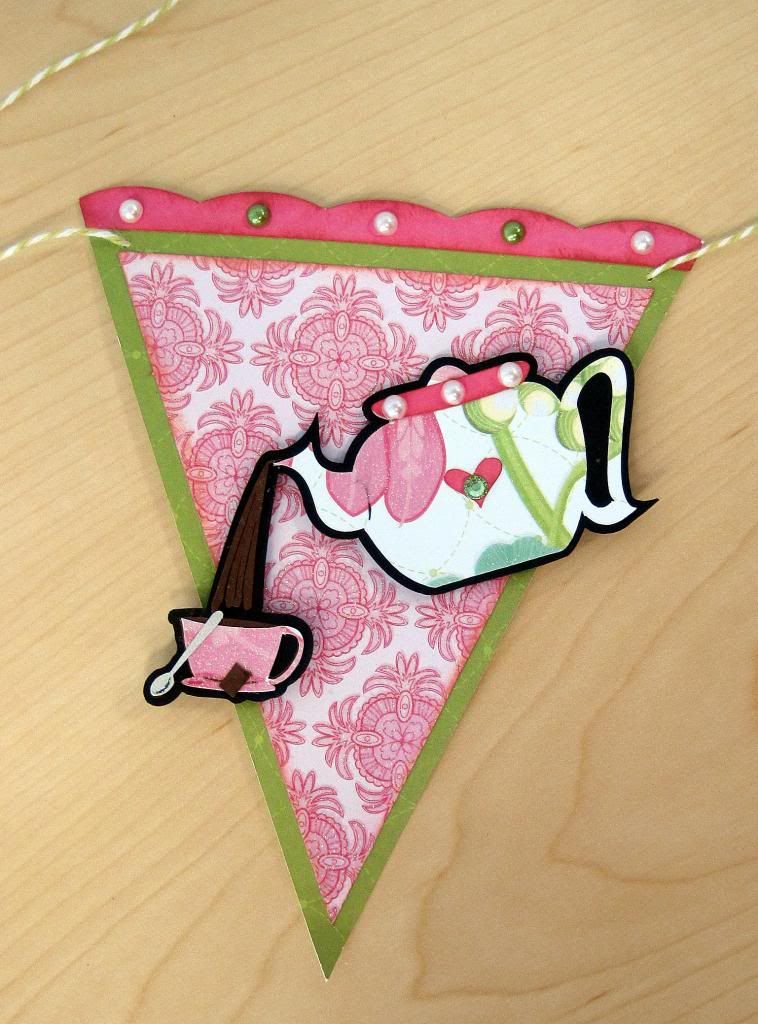
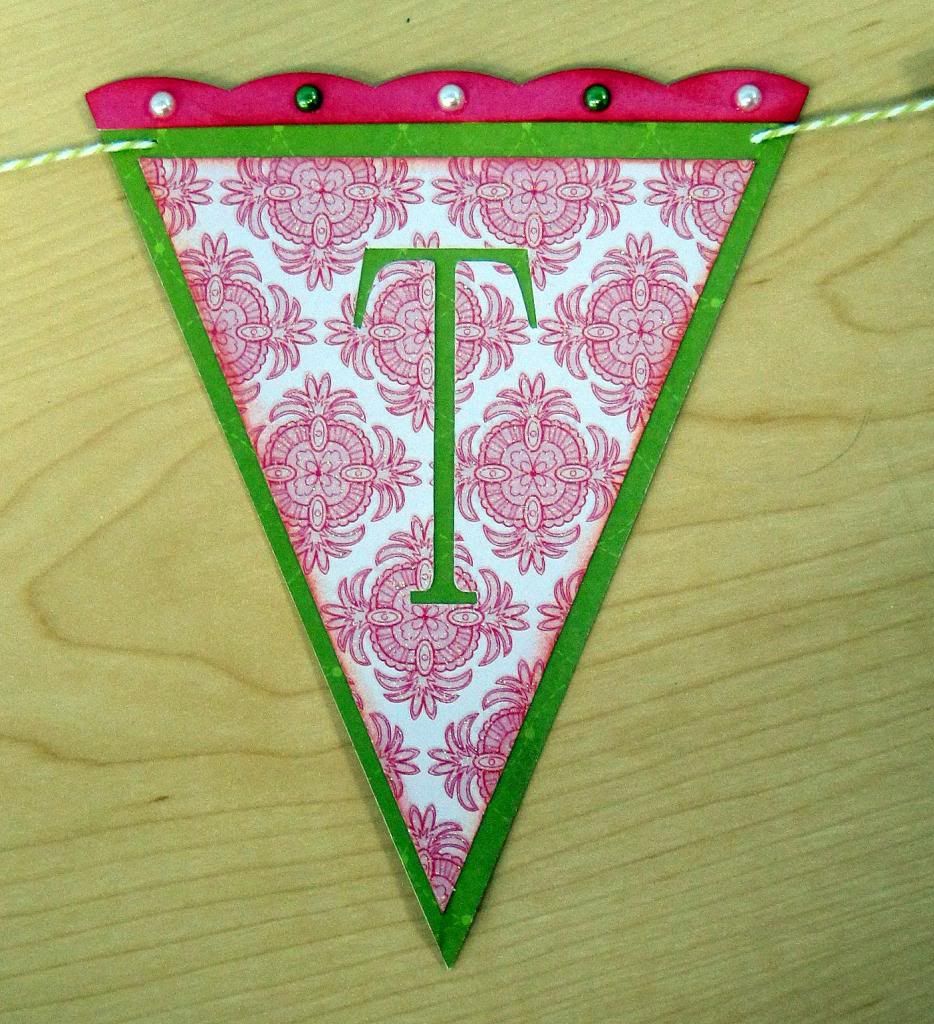
 I made this banner along with other stuff to make a tea party set that was donated to a school for their silent auction. I used the DCWV set "The Blossom Song" cardstock. The design of the teapot and teacup were my own and I used my Eclips to cut it out.
I hope you have enjoyed this post.
Your next stop is with http://somanycrafts.com/
Thanks so much for hopping with us!
Here is your line up for easy navigation…
Your Host
Liz ~ Tryin' to Craft
Jearise ~ Lorby's World
Lissa ~ So Many Crafts, So Little Time
Robin Lane ~ Create-a-Latte
Jessi- My Life in Arts n Crafts
Janet ~ Janet's Creative World
Cicily ~ Pink Dalmation Scrapper
Robin ~ Scrap and Chat
Lucy ~ Love 2 Create it all
Katina ~ Loving Life's Little Blessings
Anita ~ Anita and Bugs
Subscribe to:
Posts (Atom)