Tuesday, April 30, 2013

April 30th New Release for The Stamping Chef

The Stamping Chef has been making drawing magic again for all of us to enjoy. Here are two of her newest releases turned into cards by me.

ROCK MY WORLD

I colored this rock princess using my alcohol markers and then added glitter glue and chalk ink to accent.

THROUGH THE RABBIT HOLE

 I used colored pencils and a blender to color this digital stamp. I then used Tattered Angles glitter mist for the background plus colored rhinestones from Miriam's Crafting Supplies.

Check out the other new releases and all the digital stamps at The Stamping Chef.

Thanks for stopping by today and hugs from Lorby's World.

April Showers Bring May Flowers Blog Hop

Welcome to the My Life in Arts’ n Crafts’ Design team May blog hop.


You should have come from Angela's Blog

Our theme for this month's hop is April Showers bring May Flowers and we were asked to incorporate ribbon and twine from the My Life in Arts N Craft Store.

Today I made ….  A spring card that I designed myself and used my Eclips to cut out.  I used the cream jute from the Christmas combo jute pack.


Jessi is giving away your choice of three bundles of twine so head on over to the shop and pick your favorites. Leave them in the comments at My Life in Arts’ nCrafts’ also with a way of getting hold of you.
Make sure to follow the teams Blogs and head on over to the My Life in Arts’ n Crafts’ Facebook page.


Here is your May laugh to help you get on your way.

If April showers bring May flowers, then what do May flowers bring?

Pilgrims. 

Now please continue onto Robin's Blog

I have entered this card in the following challenges:

ABC Challenge - Mother's Day


Created with Love Challenges - CWLC 39 Spring BLOG HOP!


Critter Sketch Challenge Blog - 162 Flowers


Monday, April 29, 2013

Blog Hop Winners

Butterfly Blog Hop winner is...

Rosalee who wrote...

So excited to be taking part in this blog hop. I love butterflies.
Your project is so beautiful, reminds me of the spring and summer that we've all been waiting so long for, to come.
Hugs, Rosalee

Calendar Girls Blog Hp winner is...

Lucy who wrote...

Love that sentiment - cute, cute card :) Wish I could come up with a saying for you on the second image -- we'll wait to see what you come up with!

By the way, the second card was a submarine and I still haven't come up with a decent saying for it.

Friday, April 26, 2013

Tutorial Friday for Miriam's Crafting Supplies - coloring rhinestones

Today for Miriam's Crafting Supplies, I am going to show you how to use alcohol markers to color rhinestones. With all the different colored rhinestones that Miriam's Crafting Supplies carries, it would be shocker not to have the right colored rhinestones but something you run out and are unable to get your order in on time so you have to improvise.

Here are just a few of the colors that Miriam's Crafting Supplies carries. 
It's always good to have different size clear rhinestones on hand and to have some alcohol markers too. There are many different brands of alcohol markers out there from the expensive Copic to the reasonably priced Promarkers.
I will be using three types of alcohol markers today: Letraset Promarkers (Amethyst -v626), Prismacolor Primere (Dark Purple - PM-168), Spectrum Noir (BP2).

First off, it's best to use clear rhinestones instead of prism colored ones. It's easier to get the color you are going for. I have three sizes here from Miriam's Crafting Supplies.
The pretty colored one in the foreground is the prism colored one. The other three are clear.

All you do is color your rhinestone but make sure you color the top and sides to give it a full color effect. 

How easy is that! Now you know why it's important to keep some alcohol markers and some clear rhinestones on hand and Miriam's Crafting Supplies has a large selection of clear and colored rhinestones in different sizes.

Thanks for stopping by today and hugs from Lorby's World.

Wednesday, April 24, 2013

Butterfly Blog Hop


Thank you for fluttering by today and seeing all the butterflies we have in this hop. I, Jearise from Lorby's World, am your hostess today and I hope you will take time to visit all these wonderful blogs and see how our crafters worked their magic with butterflies.

My wonderful friend and co-host, Lyne from Her Craftiness, as helped me put together a little something for one lucky winner. All was ask is that you hop along today and leave a little love on each of our butterfly bloggers.

Here's what's up for grabs:
The little goodie bag contains some butterfly clips and stickers, a butterfly stamp and Martha Stewart punch, embellishments, and purple glitter heart stick ribbon plus the mesh bag to hold most of it.

Now away we flutter...

I designed my project today and used my eClips to cut it out.

It's a garden fence basket and I used butterflies on my tree. Here is a close up of them.
I added clear glitter glue to the wings.
I really like the way my little spring/summer basket turned out and it looks adorable sitting on my window sill.

Thank you so much for joining us today and please flutter on to Lynne.


COMPLETE LINE  UP:

Jearise - http://lorbysworld.blogspot.com
Lynne ~ http://slasewcraftiness.blogspot.com/
Janet ~ http://ladyluvbug.blogspot.com/
Lissa Marie - www.somanycrafts.com
Anita~  http://www.anitaandbugs.blogspot.com 
Michele - www.scrapytaz.blogspot.com
Miriam - www.miriamscreations.blogspot.com
Ashley - http://thebloghopprincess.blogspot.com
Robin - http://scrapandchat.blogspot.com/
Nancy - http://alwaysastorycreationsbynancy.blogspot.com/
Jessica - http://svgattic.blogspot.com
Sarah W - www.craftingwithsarah.blogspot.com
Camille ~ http://shortonideasaz.blogspot.com/
Pamela - www.scrappletree.com

Tuesday, April 23, 2013

My Life in Arts N Crafts - DT Post

Welcome to my post for My Life in Arts N Crafts today.

I made this child's birthday card. My children have been invited to so many birthday parties this year that I like to stock up on them when I have time to make extras.

I used twine from My Life in Arts N Crafts for the banner and for the candles on the cakes.
The banner is an embossing folder from Darcie that I inked and cut out after embossing it. The background paper is just card stock that I sprayed with Tatter Angels glitter mist. I used Stickles on my banner, the paint, cake and the bear's suite. I hand cut the cake twice so I could layer it. The bear is a retired digital stamp from The Stamping Chef.

Thanks for stopping by today and hugs from Lorby's World.

Monday, April 22, 2013

Upcycling in honor of Earth day

Happy Earth Day!

I decided to take something old and make it new, cute, and usable again. I love to brouse the shelves at local second hand shops like Savers and Goodwill and awhile ago I found a bundle of heart shaped tins for a steal of a deal. I thought boy, these would be nifty for my rhinestones and brads but instead decided to upcycle them as cute little gift boxes.

I used Graphic 45 paper for around the outside and Mod Podged to adhere it. I trimmed it to the size I needed using my Cricut trimmer and blades.
Then I took dollar bin thin ribbon and used crafting adhesive to attach that around the top.
Finally I used more Mod Podge (Kim can order it.) to glue down the Graphic 45 paper to the inside window and then I cut out a flower and Mod Podged it to the outside of the window. I used Stickles Diamond to add a touch of glitter around the outside of the heart top and the middle of the flower. I just couldn't get a glittery picture of the Stickles no matter what I did.

Here is the finished box...
Thanks for stopping by today and hugs from Lorby's World.


Saturday, April 20, 2013

Fancy Fold Card Blog Hop

Here is my very, very late post for the Fancy Fold Card Blog Hop...


This card is part of the SVG Attic set Mom's English Garden.
Rhinestones and half pearl from Mariam's Crafting Supplies
The paper is The Blossom Song stack by SCWV
I used my Tattered Angels glimmer mist to mist the flower and the swirls.

Thank you for stopping by and please continue on to Cicily who is next in line...

Here is the complete line up...

Robin L. - http://create-a-latte.blogspot.com/
Lucy ~ http://love2createitall.com
Pam ~ www.scrappletree.com
Robin S. - http://scrapandchat.blogspot.com/
LissaMarie ~ www.somanycrafts.com
Ellen ♥ Cardmonkey ~ http://cardmonkeyspaperjungle.com/
Camille ~ http://shortonideasaz.blogspot.com/
Kathryn ~ http://www.creationswithkathryn.blogspot.com
Liz - http://tryin2craft.blogspot.com
Jearise - http://lorbysworld.blogspot.com
Cicily - www.pinkdalmationscrapper.blogspot.com
Jessi- www.Mylifeinartsncrafts.com

Tuesday, April 16, 2013

Sweet Shop Box

I am very excited today. This is my first post as part of the Cutters Creek design team. I love to decorate my bay window in my kitchen so when I saw the cute sweet shop box on the Cricut Sweet Tooth Boxes cartridge I knew what I had to make. (Kim can order this cartridge for you.)

I cut the box at the cartridge recommendation of 10 inches.


I had fun making this box with different papers. The roof and accents are My Mind's Eye Nostalgia paper and if you look closely in the windows you'll see a fairy and Mrs. Rabbit and her little ones. These pictures are from Graphic 45.
I used different colored Stickles glitter glue to add bright color, glitter and texture to the grass, windows, and flower. I used Liqued Pearls for the door handle and sweet shop sign.

Before adding on all the pieces and accents, I used Tim Holtz Distress Ink Pad - Tea Dye to smug the edges of the box and the accents I cut out.

I used Scotch quick-dry adhesive to glue the box together. This is my go to glue because it drys quick and is strong.

This is such a fun spring/summer box to make and use as a decoration and it goes so lovely with all my other knick knacks in my window.

Saturday, April 13, 2013

Calendar Girls May Blog Hop

Welcome to our April Calendar Girls' Blog Hop. Its absolutely amazing when you do a google search the interesting facts you may find. Such a find is special and unique occasions throughout the year!!! These unique holidays are our inspiration. As Neil Sedaka sang in his song "Calendar Girls" - "April, you're the Easter bunny when you smile". Yes, I know that Easter came early this year, in March actually, but Neil Sedaka sings with April as the Easter Bunny ...... can't blame the lyrics!!

The hop starts with the beautiful and very talented Kimberly at http://scrappingrookie.blogspot.com. The entire line-up is available just in case you get bogged down with all the holidaze and craziness!!!!

You won't want to miss a single calendar event!!!!

The line-up for April includes:

Kimberly - http://scrappingrookie.blogspot.com
Lucy - http://love2createitall.com
Sandy - http://scrapbookblessings.blogspot.com/
Janet - http://ladyluvbug.blogspot.com/
Vicky - http://crafting-vicky.blogspot.ca/
Jearise - http://lorbysworld.blogspot.com
Lynne -  http://slasewcraftiness.blogspot.com/
Laura -  www.lauraleesdream.blogspot.com
Amanda- http://thescrapoholiccandyshop.blogspot.com
Anita ~ http://www.anitaandbugs.blogspot.com
April Occasions We Wish to Share:
  • National Autism Month Kimberly 
  • Keep America Beautiful Month
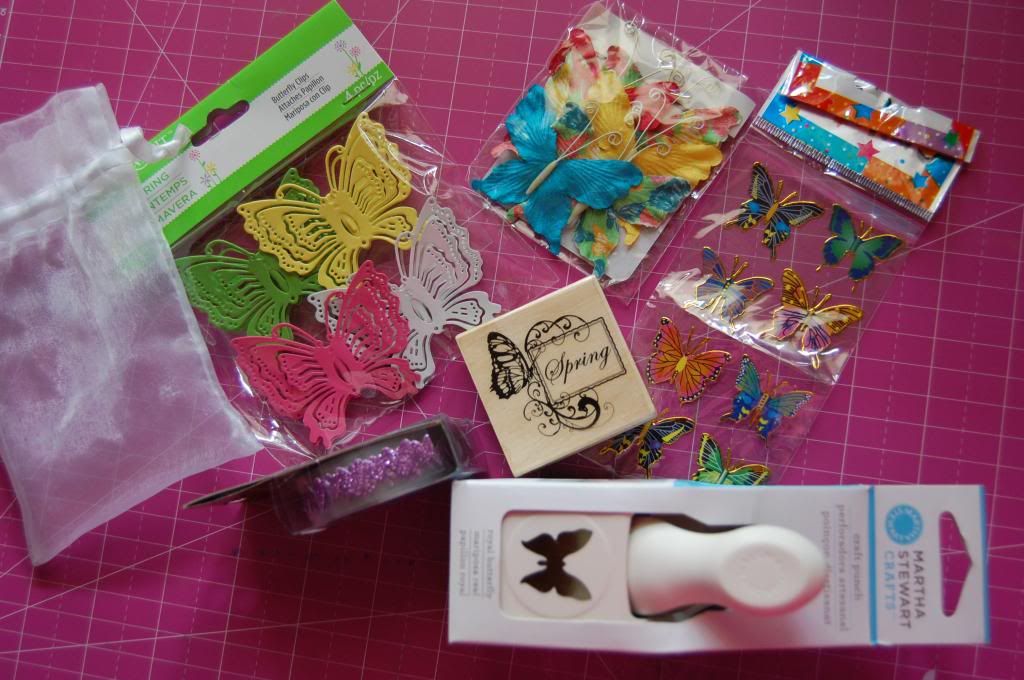
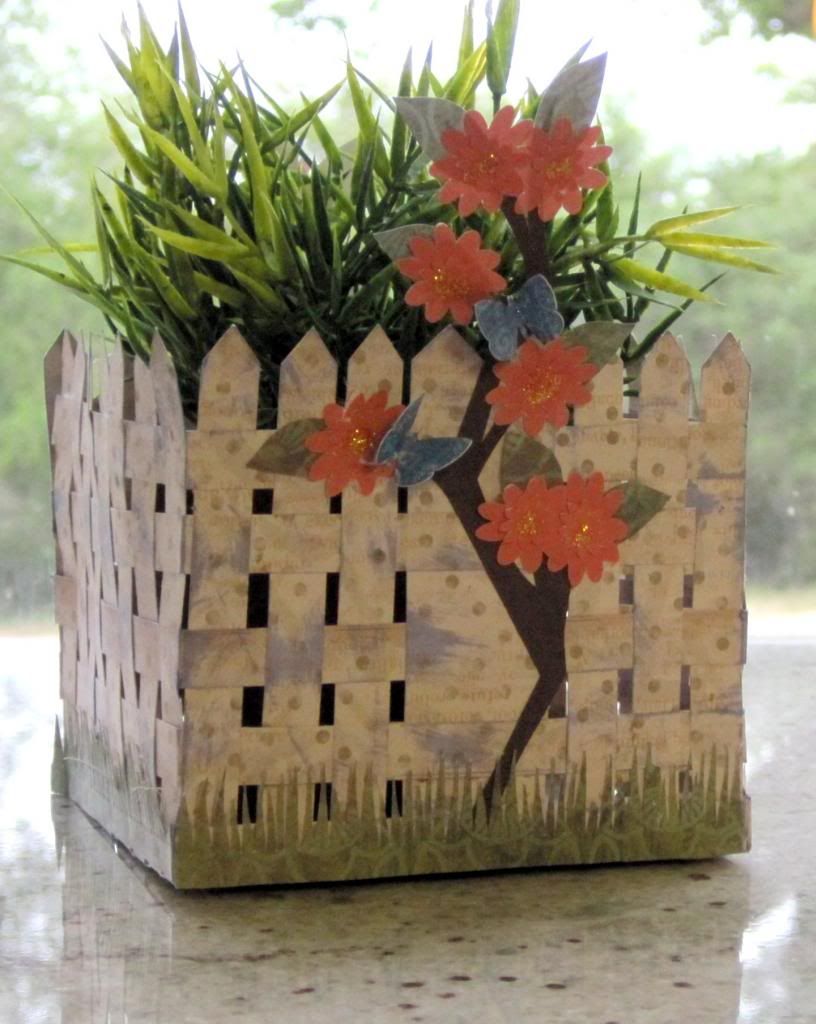
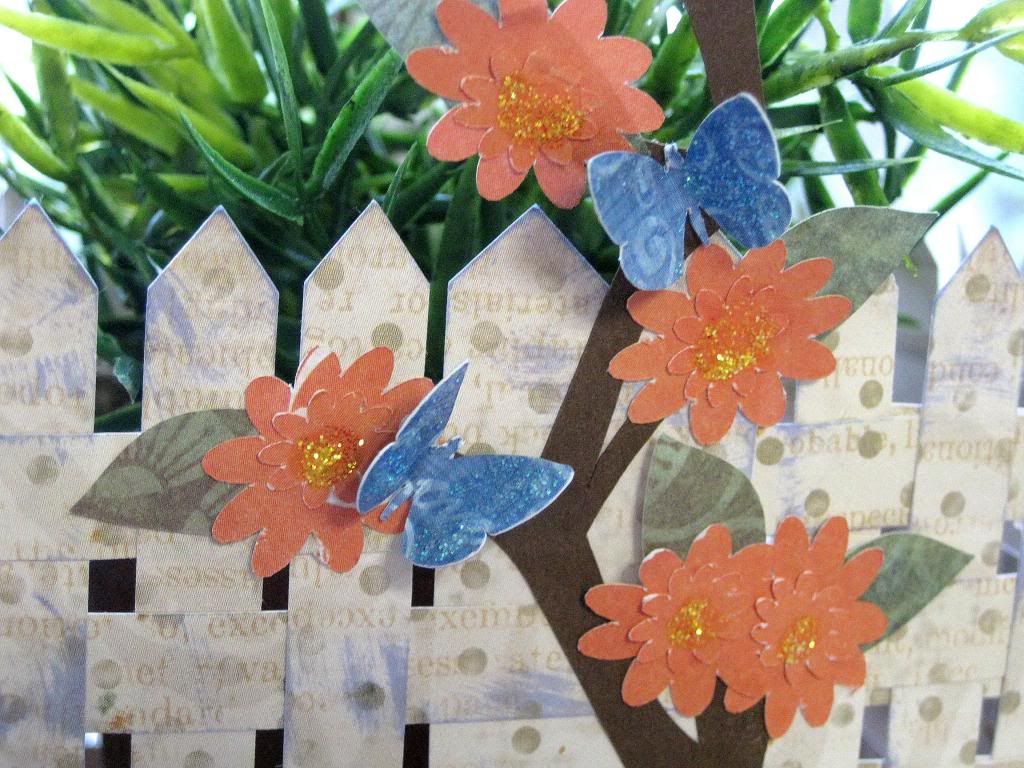
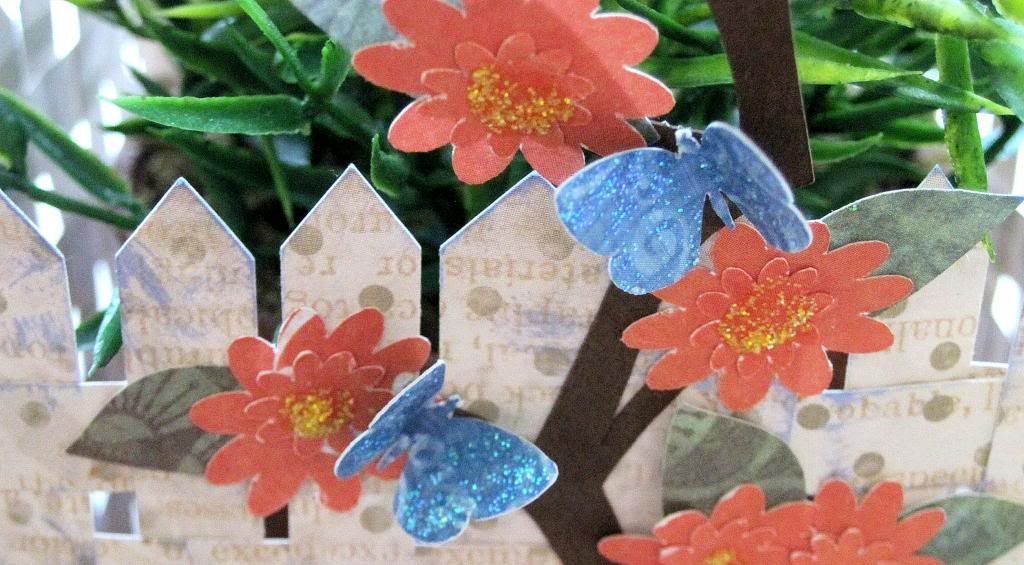
  • Lawn and Garden Month 

1 April Fool's Day - Lucy
1 International Tatting Day
2 Children's Book Day- Sandy, Lucy
2 National Peanut Butter and Jelly Day ~ Janet
3 Tweed Day
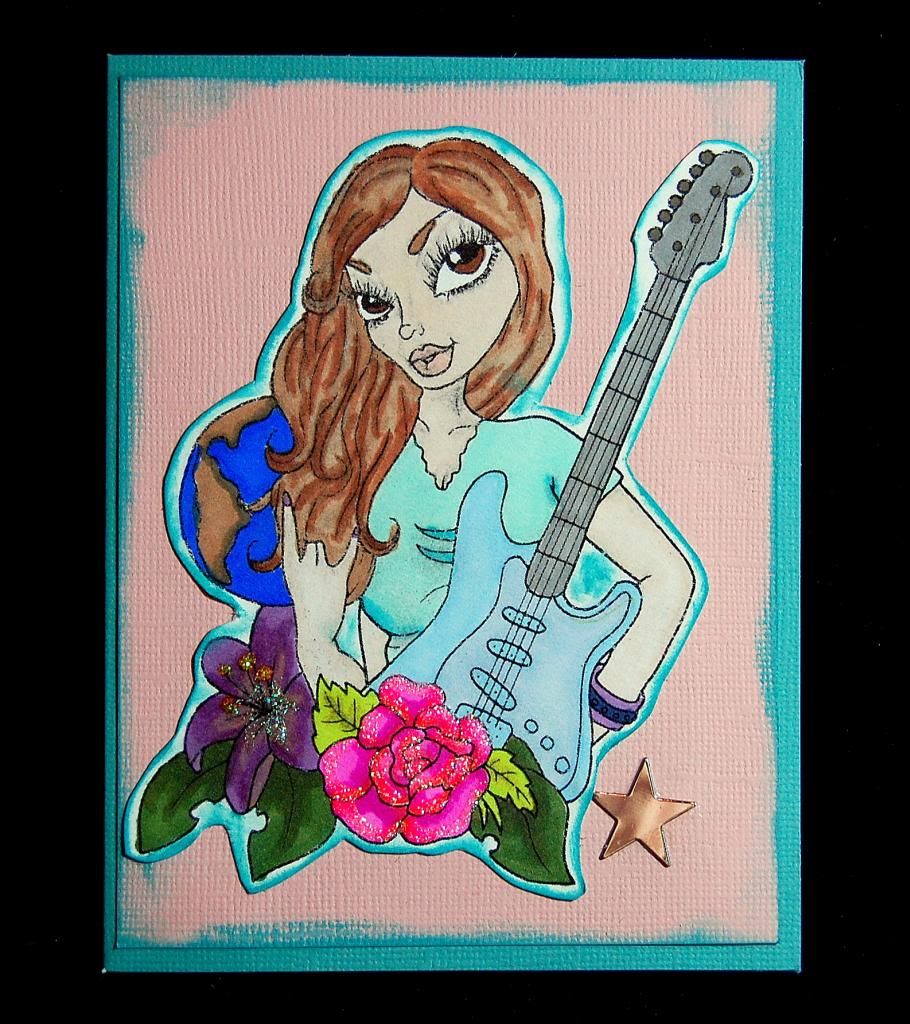
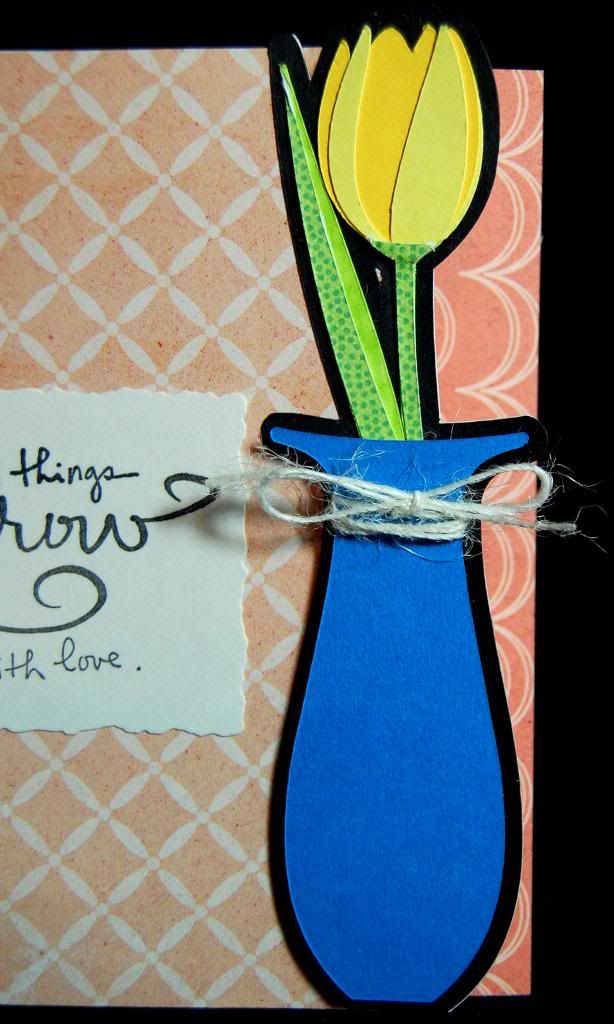
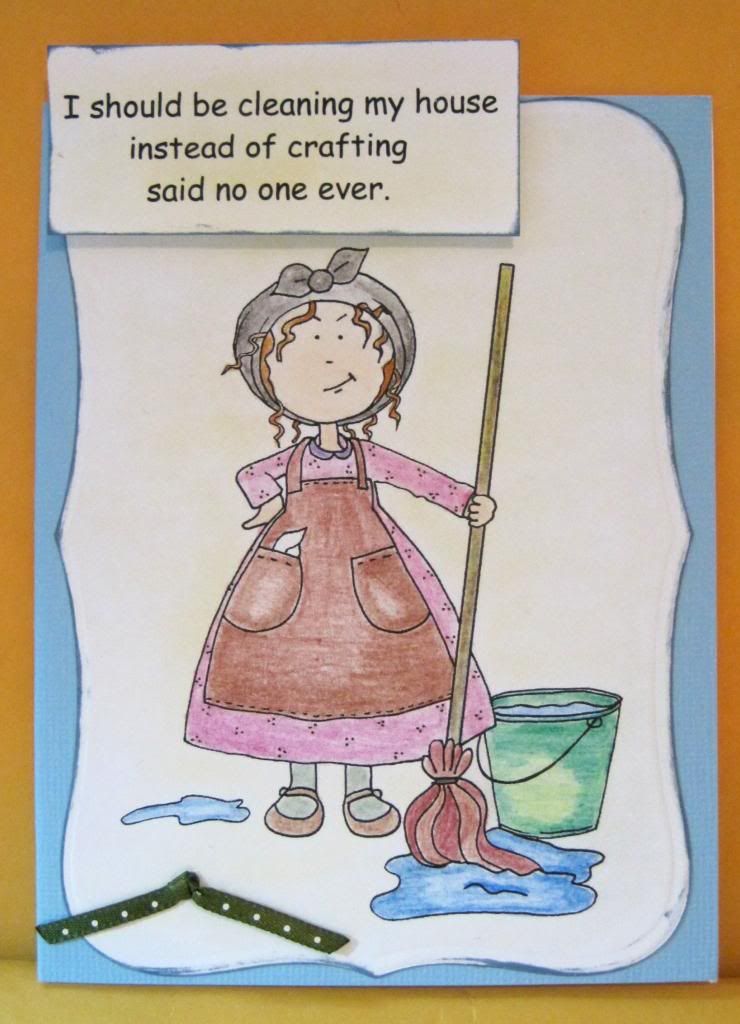
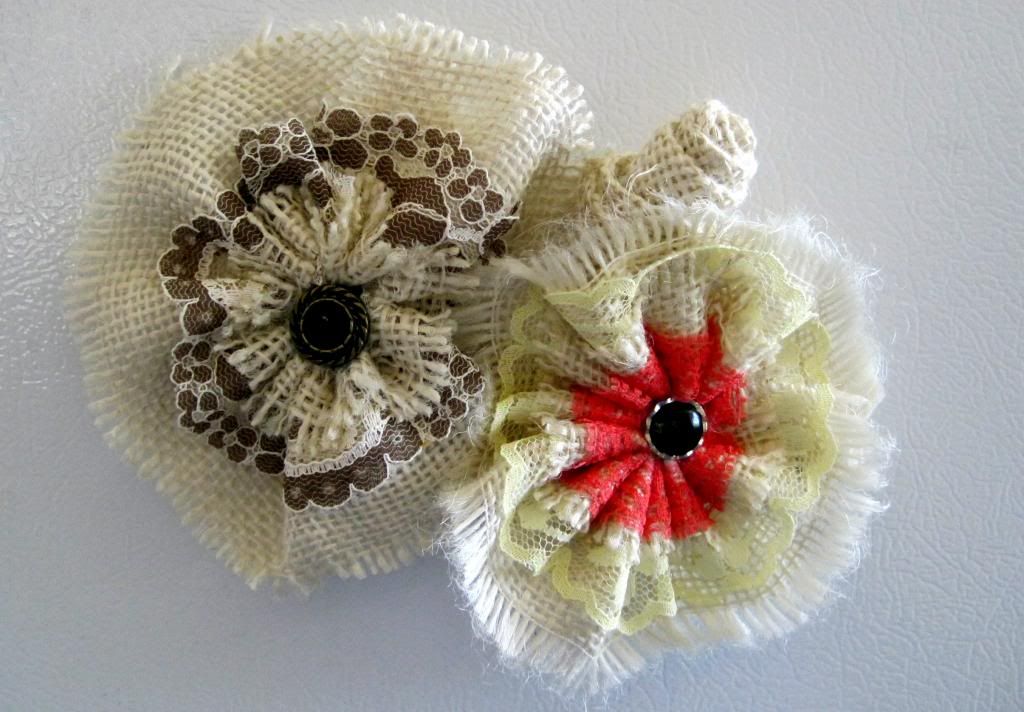
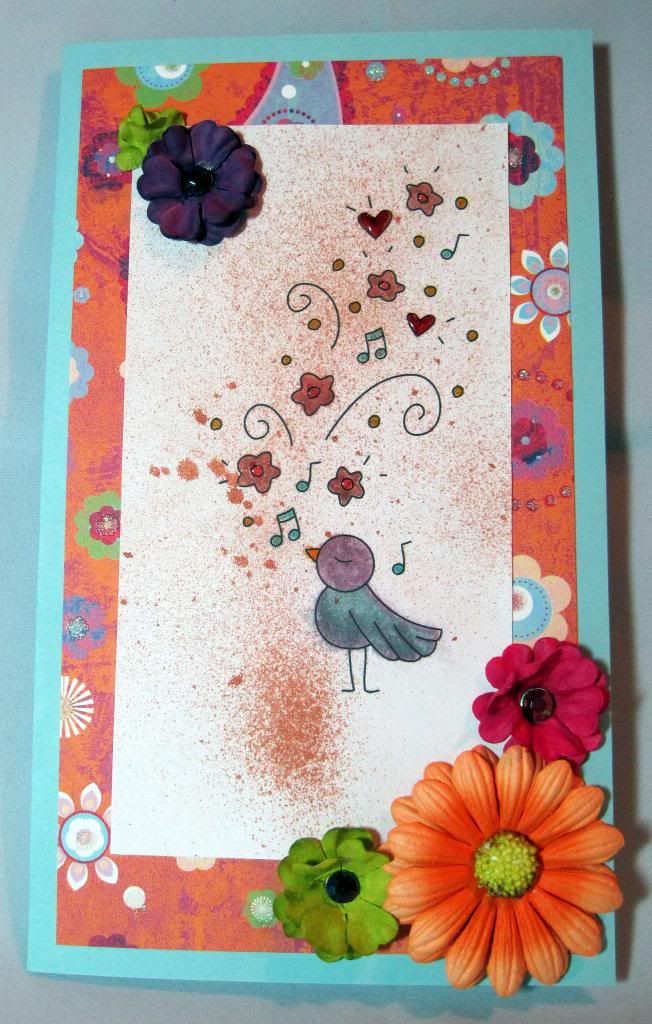
7 No Housework Day - Jearise - Vicky
8 Draw a Picture of a Bird Day ~ Janet
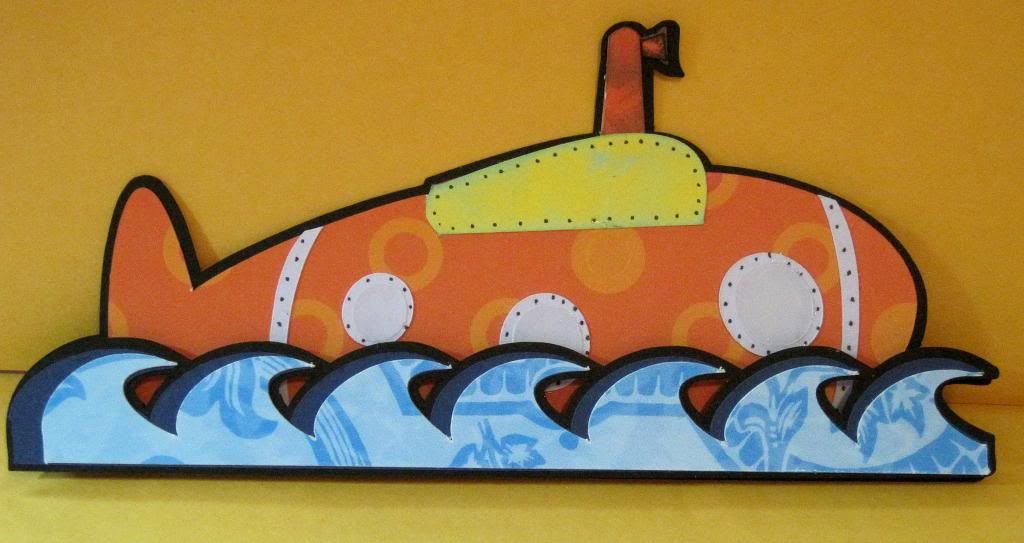
11 National Submarine Day - Jearise
13 Scrabble Day - Lynne
14 Look Up at The Sky Day - Laura
15 Titanic Remembrance Day-Amanda, Anita
18 International Juggler's Day ~ Lynne
22 National Jelly Bean Day- Sandy
23 Lover's Day - Lynne
25 World Penguin Day ~Kimberly
26 National Pretzel Day
27 Tell a Story Day ~ Sandy
29 Greenery Day
30 Hairstyle Appreciation Day- Amanda
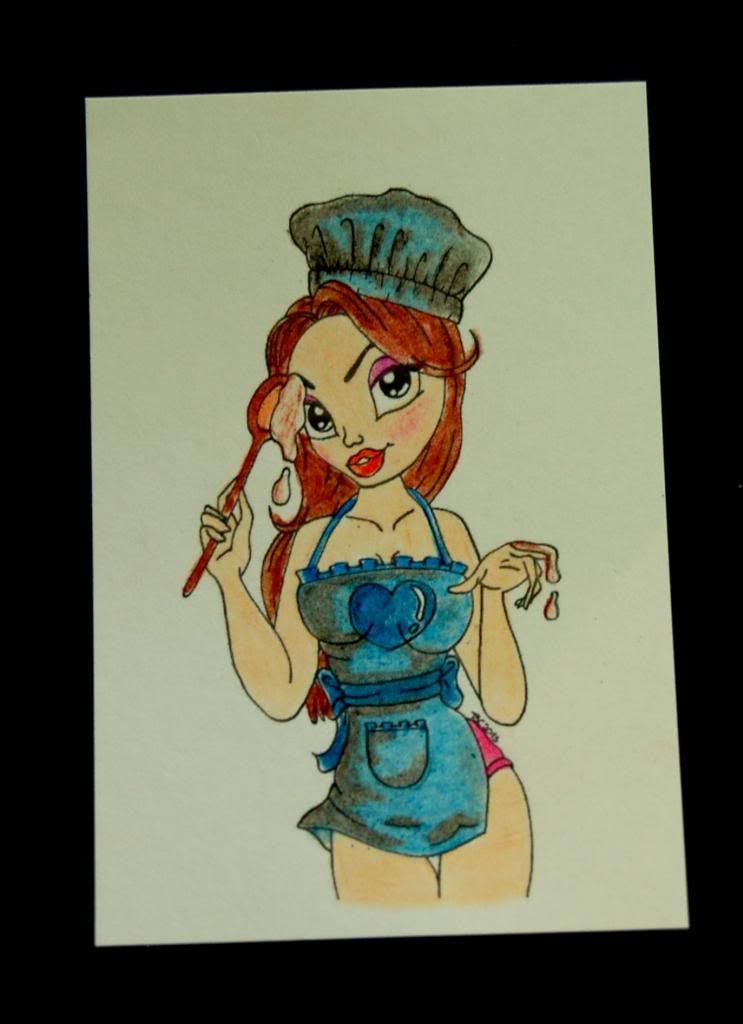
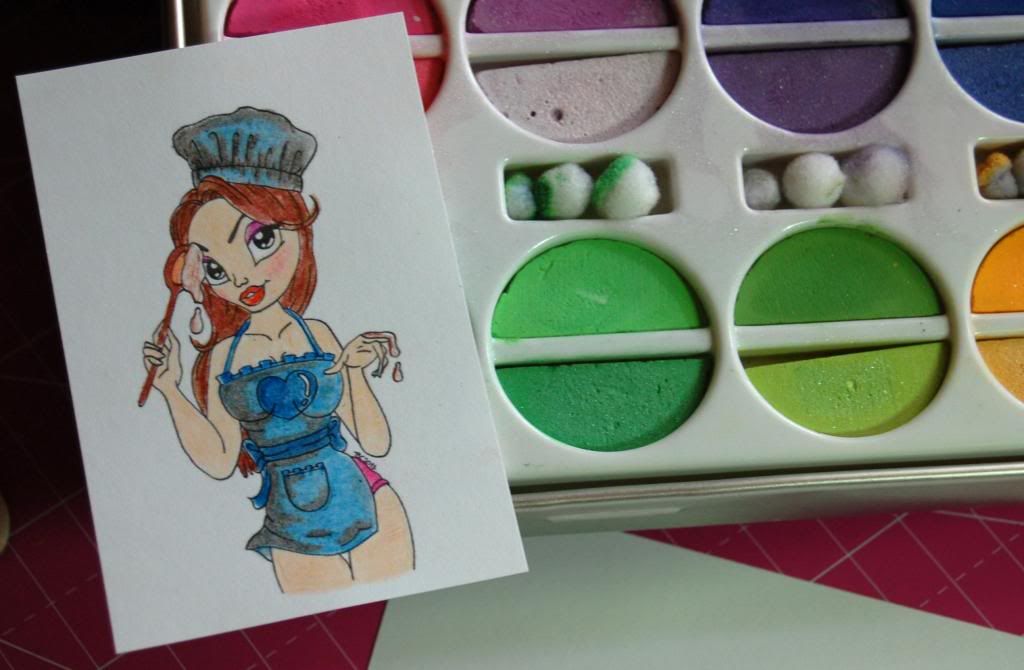
  
The Stamping Chefis our wonderful sponsor for today's blog hop and has designed at least 4 of the images that have been used in today's hop. She is offering 3 of her wonderful designs, winner's choice to one lucky blog hopper that responds on each of the Calendar Girls along with her facebook page, https://www.facebook.com/groups/TSCRecipes/, commenting that you hopped with the Calendar Girls.

Lynne will be going through her stash and sending one lucky winner a surprise package to someone that remarks and gives bloggie love on each of the participants. 

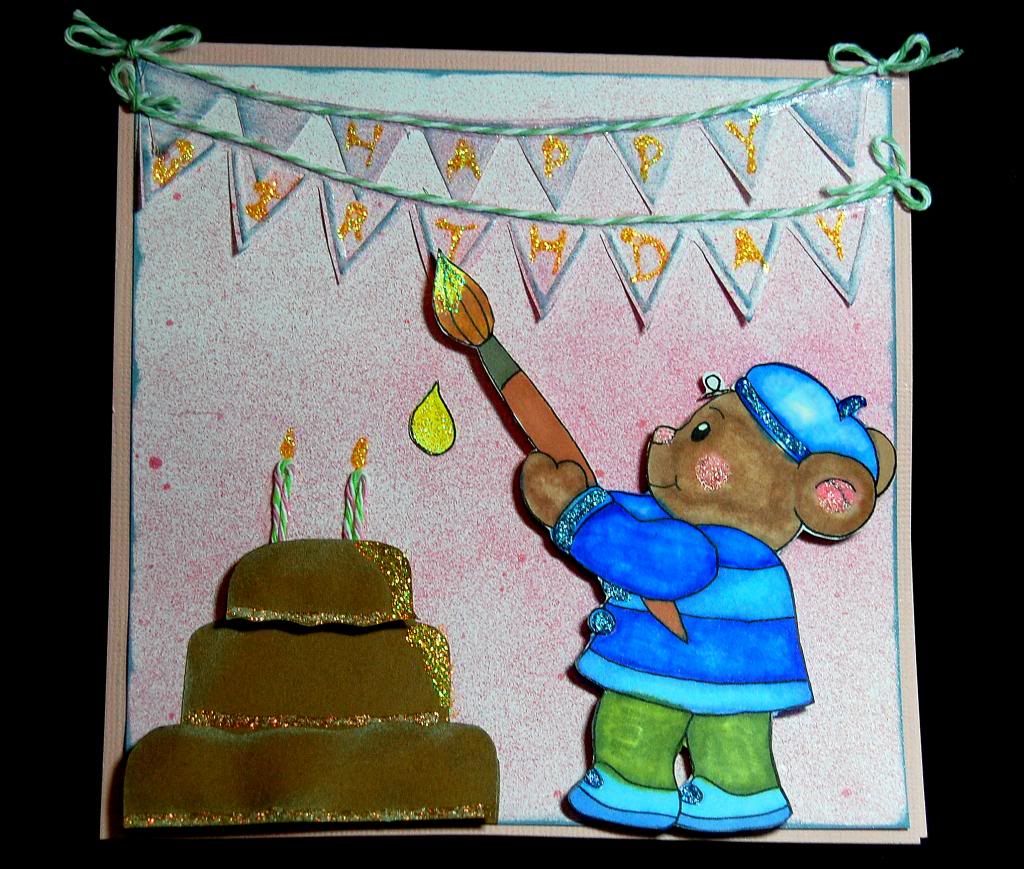
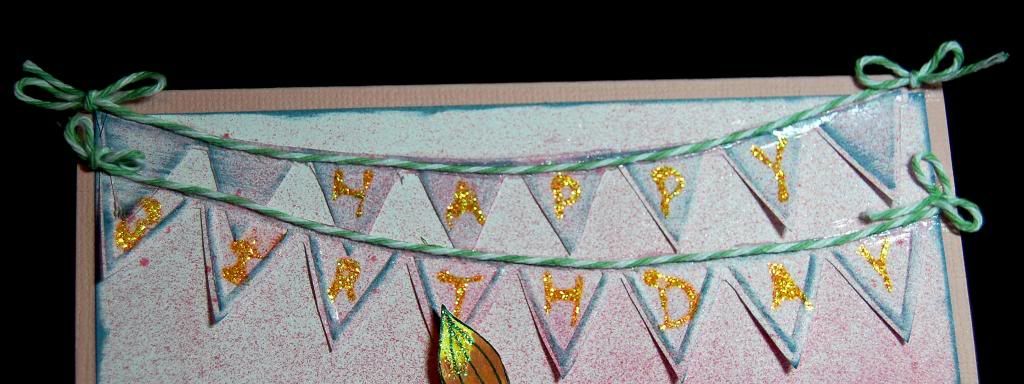
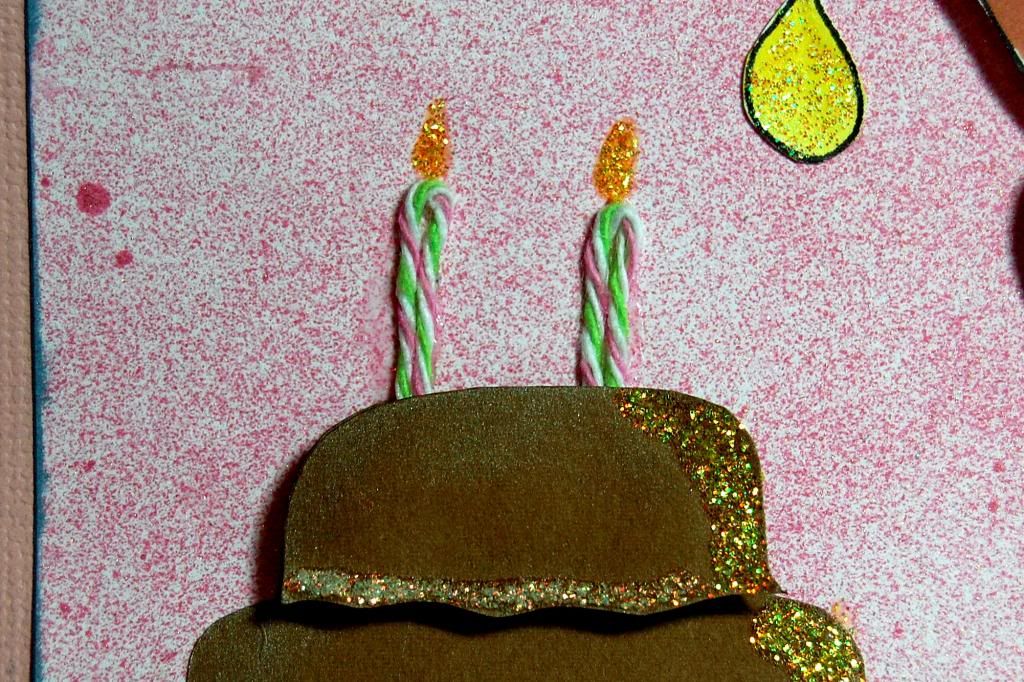
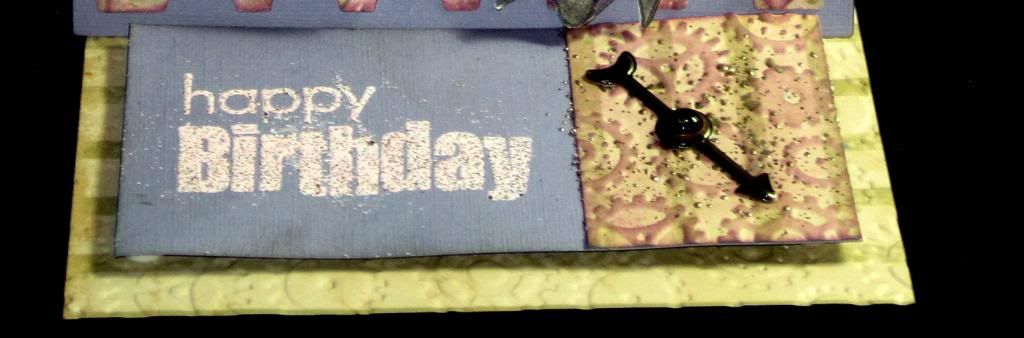
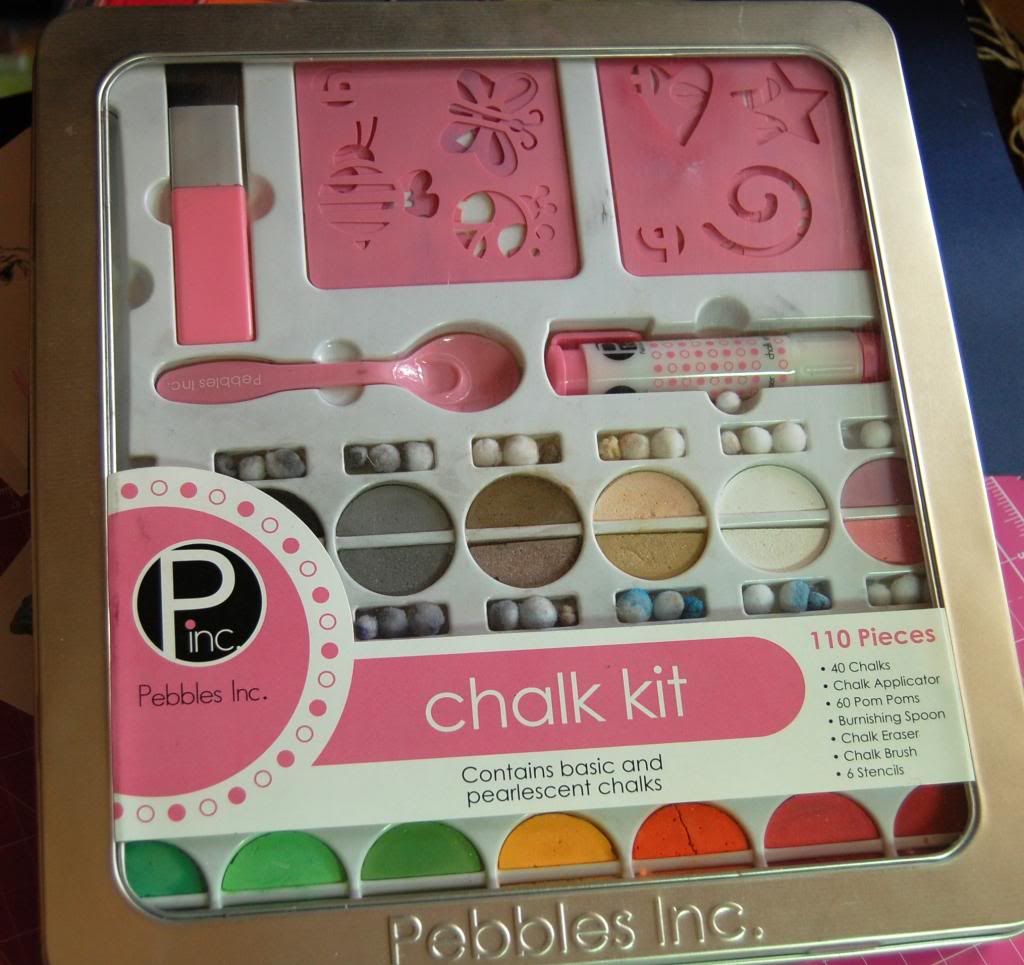
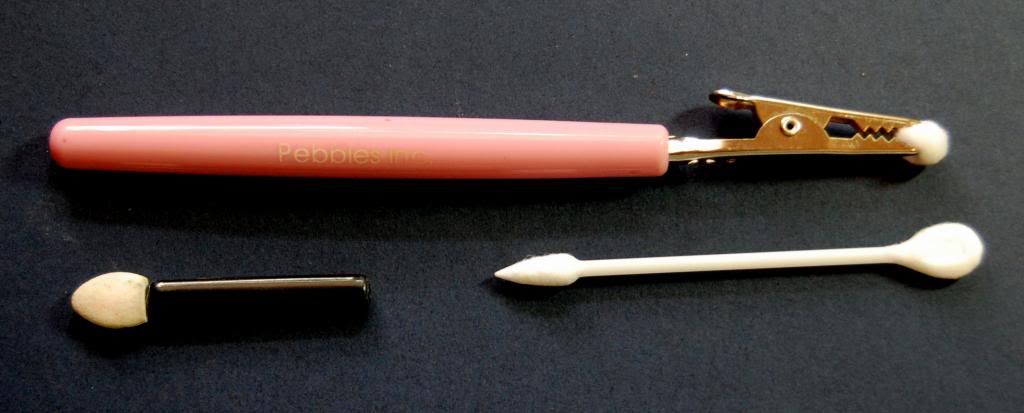
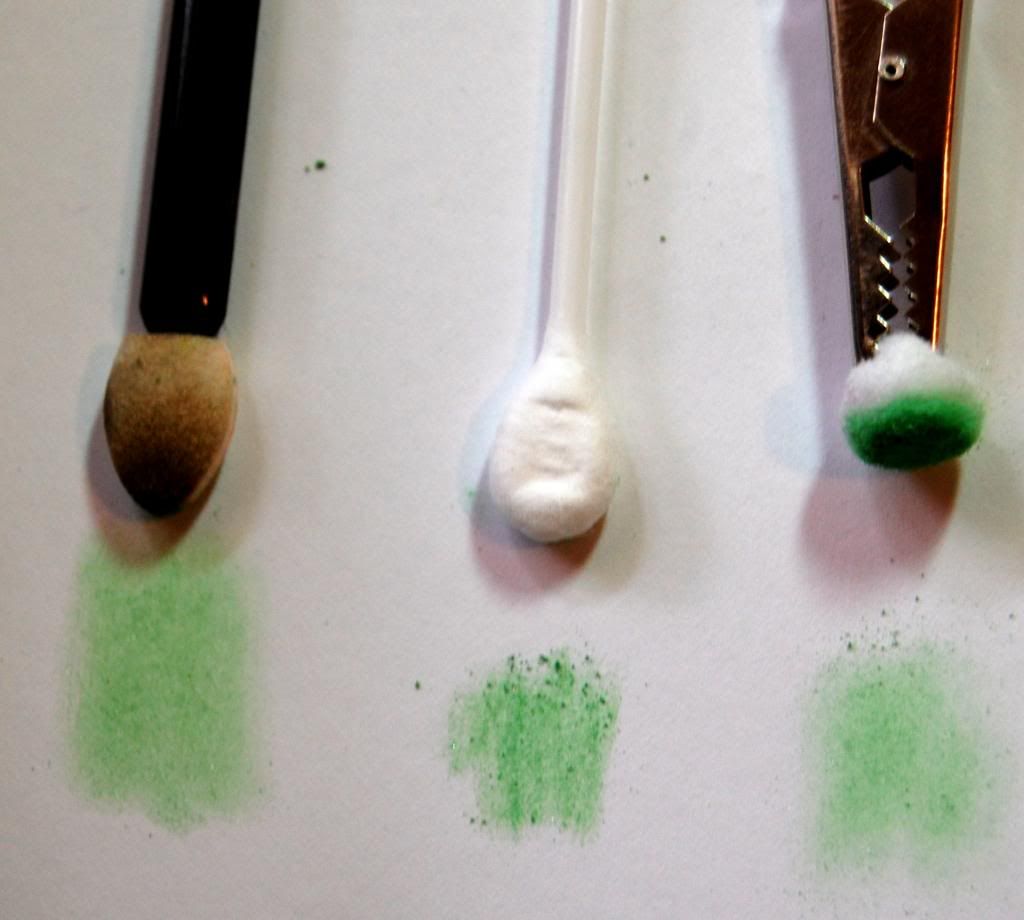
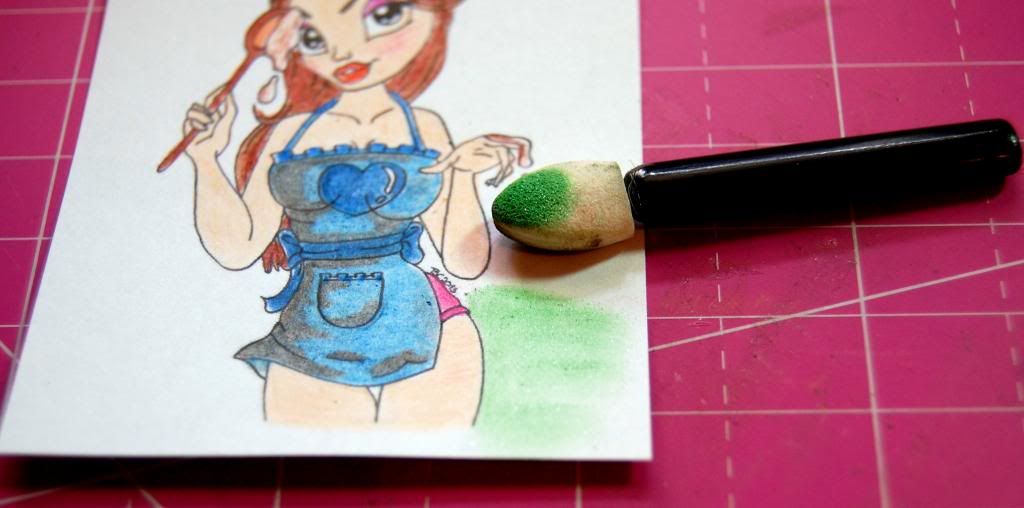
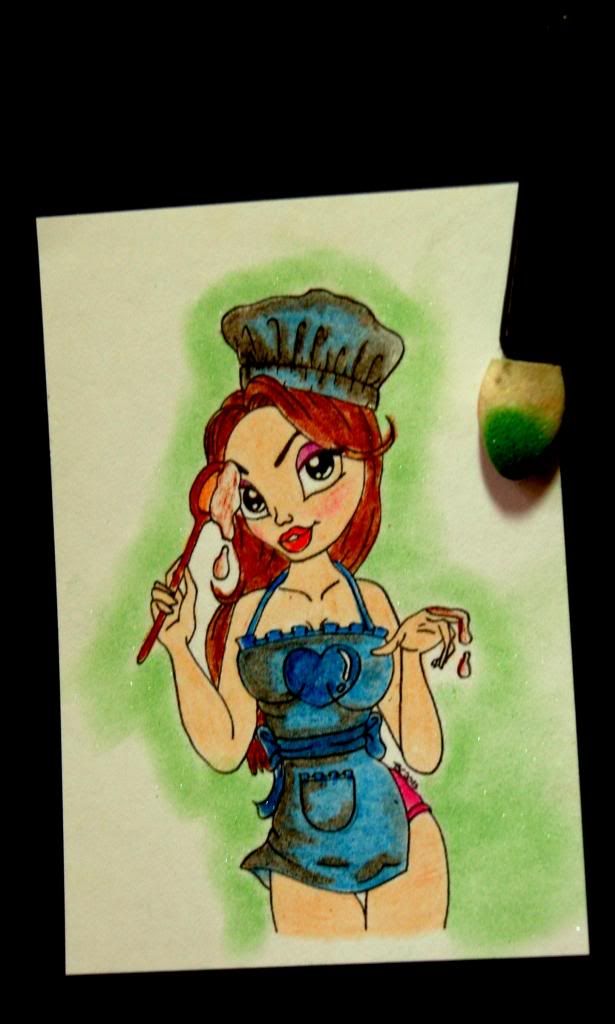
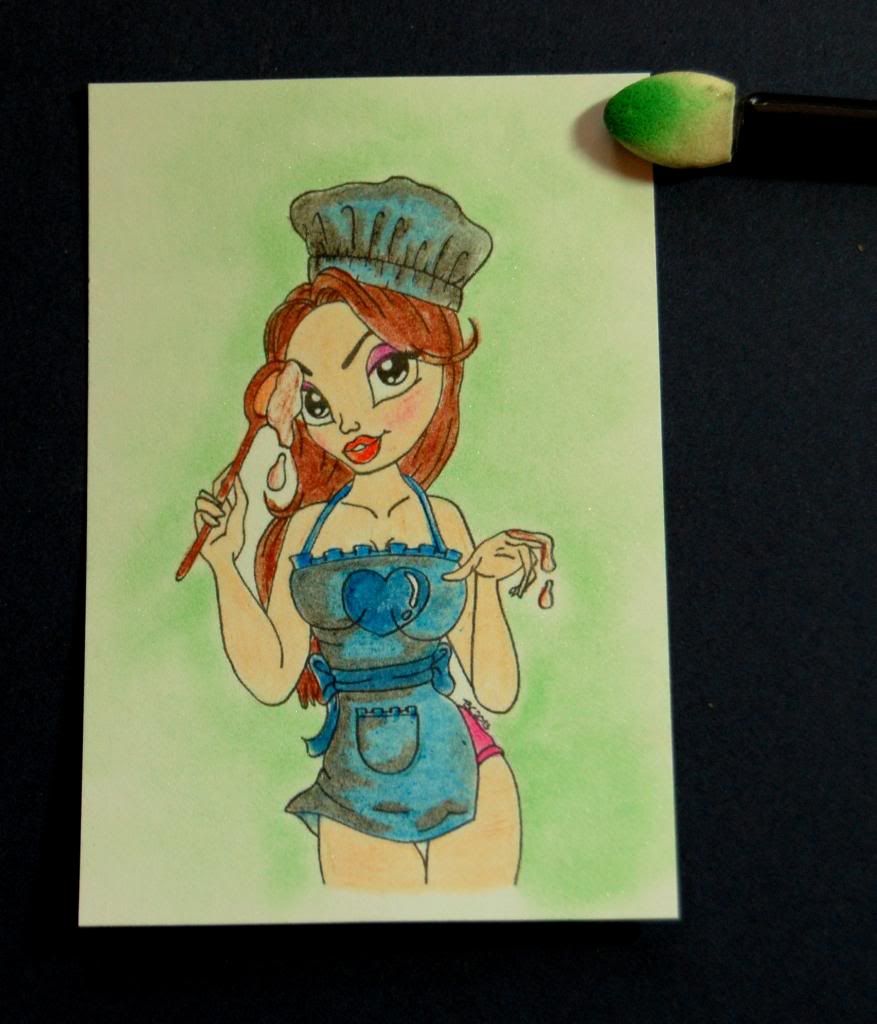
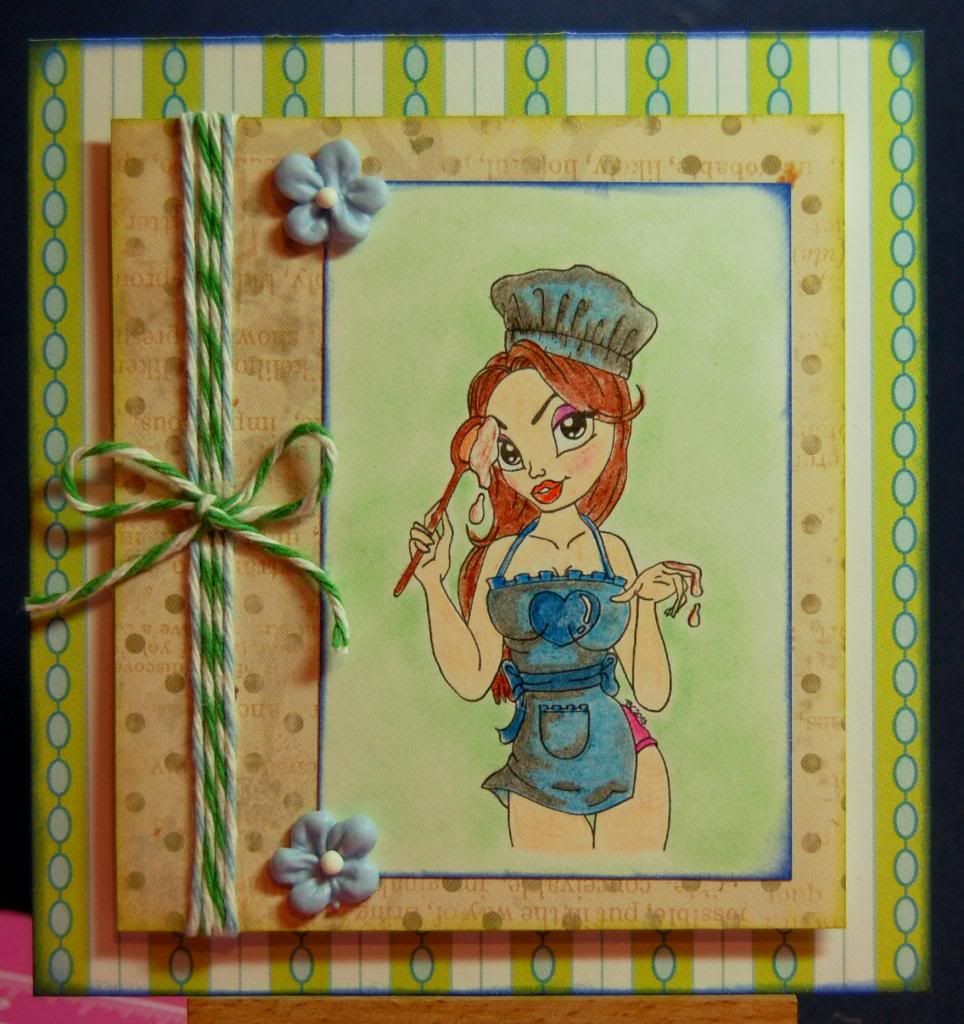
This one I did for No Housework Day. The digi is from Dearie Doll. I used my colored pencils to color her in.

I designed this submarine to use in my eClips. I got it cut out and assembled but have crafters blog on what type of card to make with it. That's another reason I got my blog up and running so late. Do you have an idea for a saying that could go along with this? If so, leave it in the comments below. Thanks.

Your next stop along the way of the calendar is Lynne. Thanks for stopping by and mark your calendar again next month to see what Holidays to Celebrate on May 11, 2013, for the next Calendar Girls Blog Hop!

Wednesday, April 10, 2013

The Stamping Chef Girly Girl Challenge

Our challenge at The Stamping Chef this week is Girly Girl. I felt that girly girl means more than ribbons and pink so I thought outside the box on this design post. I hope you like my girly girl steampunk hat and that it inspires you to join in our challenge at The Stamping Chef and show off your girly girl side.

Paper from TPC Studio
gear embossing folder and clock embellishments from The Paper Studio
chalk ink from Color Box and was used to color the embossing (gears)
black jute from My Life in Arts N Crafts
embossing powder is Shabby Pink by Stampendous!

Thanks for stopping by today and hugs from Lorby's World.

Tuesday, April 9, 2013

My Life in Arts and Crafts DT

Welcome to another DT Tuesday for My Life in Arts N Crafts.

Today I am displaying my cross box that I made.

I used the jute ribbon behind the store bought flowers. This beautiful look was easy to accomplish.
I cut each piece of jute ribbon about three inches long and then I got out my hot glue gun and folded the jute and glued the ends together.

Here is the box from a slightly different angle.
                                                                                            cross box from SVG Attic

Thank you so much for stopping by today and don't forget to visit My Life in Arts N Crafts to see all the other wonderful stuff she has to offer such as twine and burlap.


Saturday, April 6, 2013

Altered Refrigerator Magnets Blog Hop

What could be more fun than decorating? Isn’t that what we all do in some form whether it is our photos or projects..
 
This month as you can see the Krazy Crafting Crew has gotten together and made inspiring refrigerator magnets! Spring clean means spring décor to me!
 
We all hope you find a little inspiration along the way today
Magnets can be done so many different ways… the sky is the limit!
 
Our hostess today is Cicily at
www.pinkdalmationscrapper.blogspot.com

If you have already been on the hop, and have arrived from Anita's blog, you are in the right place!
 
I bought these embellishments a while ago from Tuesday Mornings. They came in a pack of six for next to nothing and I figured someday I would do something crafty with them.
The set comes with two that are already done and can be used on a graduation decoration or card but the rest are just the little metal frames and the gel caps that fit on top of whatever you put inside them.
I made two different types of magnets using Graphic 45 paper and paper flowers with some bling.
 

This one I used a plastic fridge magnet and attached it to the back. The metal back was already sticky so it was easy.
The Grapic 45 cut outs had to be trimmed a little to fit in the square metal frame. I added the gel top and used a square magnet for the back. I cut the magnet to fit.
Here is how they all looked together on my fridge.
I also wanted to add some burlap and lace magnets that my good crafty friend L Miriam from Miriam's Craft Supply sent me. Pretty neat idea to do with burlap and lace I would say.
Before you head off, I would like to offer to one lucky winner a set of the embellishments I used to make my magnets. All you have to do is become a follower and leave comment below.
Your next stop is Lissa at So Many Crafts.
Thanks so much for hopping with us!
 
 Here is your line up for easy navigation…
Ciclily www.pinkdalmationscrapper.blogspot.com
Anita www.anitaandbugs.blogspot.com
Jearise www.lorbysworld.blogspot.com
Lissa www.somanycrafts.com
Pam www.scrappletree.com
Janet www.janetscreativeworld.blogspot.com
Robin www.scrapandchat.blogspot.com
Katina www.twochicsandacricut.blogspot.com
Liz www.tryin2craft.blogspot.com
Robin www.create-a-latte.blogspot.com
Lisa www.handmadewithlove-lisa.blogspot.com
 

Scrappy Frog Challenge - Think Spring

Welcome to another wonderful challenge at Scrappy Frog Challenge. This month's theme is " THINK SPRING." The snow is melting, the days are getting longer and warmer and the geese are heard honking overhead again so it's the perfect time to get the springtime crafty juices flowing and to join us at Scrappy Frog Challenge.

Here is a little inspiration from yours truly.

This is a digital stamp that I colored using my alcohol markers. I then spritzed it with some Angle Spritz. I added glossy accents to the hearts and middle of the flowers. The background paper is DCWV.

Thanks for stopping by and I look forward to seeing your "THINK SPRING" creation over at Scrappy Frogs Challenge.

Thursday, April 4, 2013

The Stamping Chef Tutorial Thursday

Hello and today for The Stamping Chef and Tutorial Thursday I am going to show you how I chalk the background on my cards.

I used the culinary Claire digital stamp for my project today.

There are five simple steps to chalk coloring a background. I have listed them and shown pictures of each step.

Color your image using whichever medium you prefer. If my digital stamp or ink stamp is a bigger design, I actually color it in with chalk too. I colored this digital stamp with colored pencil.


1.  Pick out the color you will be using for your background.


I am using Pebble chalks for this project.


2. Decide which tool you will use for coloring. I have three different types I choose from and it all depends on the look I want.


The pink handled tool comes in the Pebbles Inc. chalking kits and you use different sized mini cotton balls in the clip.

The other one is a good old fashioned eye shadow applicator. You can buy them for a drug store or you can by the craft kind. Both work pretty well.

The third applicator is the make up applicator (cotton swab) that you buy from the drug store.

The pink applicator and eye shadow applicator give the chalk a soft look whereas the swab applicator puts the chalk on darker.

I like to use the eye shadow applicator or the chalking applicator since they both give a softer look.


3. Start coloring close to the image since the chalk will go on darkest in that area.


4. Once you've framed the image,  pull out and swirl the chalk to give it a cloud appearance and make it lighter towards the end of your picture.


5. Finally, use the tip of the swab to go back in and color the areas that were too small for the bigger chalk applicators.


** I use my finger to rub the chalk into the paper so it doesn't rub off but I also use a quick spritz of hair spray to set the chalk.

Here is the finished card with the chalking completed.