Welcome to the Vinyl Décor blog hop
with our Krazy Crafting Crew. A whole new year of themes and more
specific projects to inspire you with. If you have just stumbled
upon the hop and would like to start at the beginning Lissa Marie is
your host at www.somanycrafts.com.
She has a video tutorial on how to apply the vinyl, and is
also doing a vinyl give away so you don’t want to miss out on that!
If you just came from Liz's blog you are in the right spot, so
let’s keep on hoppin’!
I have worked with vinyl before but that was a few years ago so to be honest, I forgot how to cut it and procrastinated on doing my project. The project came about even before the hop though so this hop was a motivator to get it done.
My 6 year old son made the coolest picture in art class about two months ago so I had to have it framed. The problem was that the picture didn't fit inside the frame like it should so I had to figure out what to do. It was my mother in law who came up with the idea to add the vinyl to the glass to cover the areas that needed covering.
I forgot to take the before picture. Silly me...
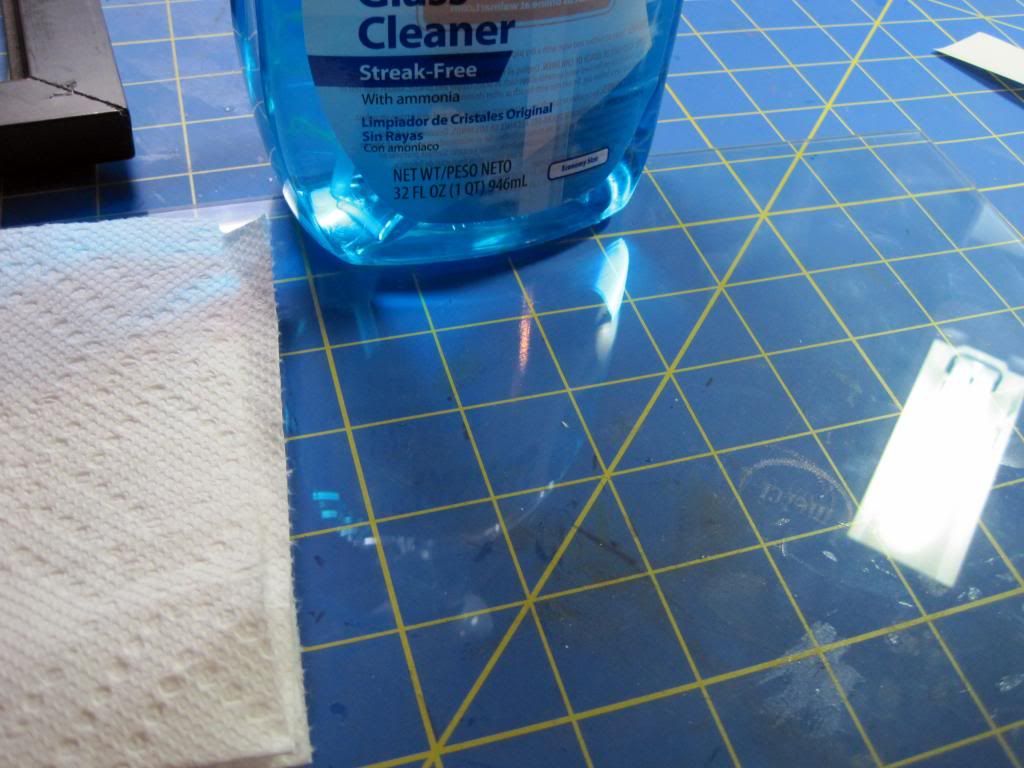
Before I started I prepped my glass by cleaning it with glass cleaner.
 I used transfer paper but at 1.5 inches by 6 inches but since I was working with such a small strip I found that I didn't need to really use it. I found the I could use the transfer strip over and over again saving on transfer paper. I'm cheap.
 I also had a little trouble with the ends wanting to come up even with the transfer paper. I found an exacto knife used gently will help bring up a corner of the vinyl.
Here is a picture of me using the vinyl cat at .25 inches. I found the perfect design on the Accent Essentials cartridge for my Circut Expression with blade depth set at 1 and speed at medium.
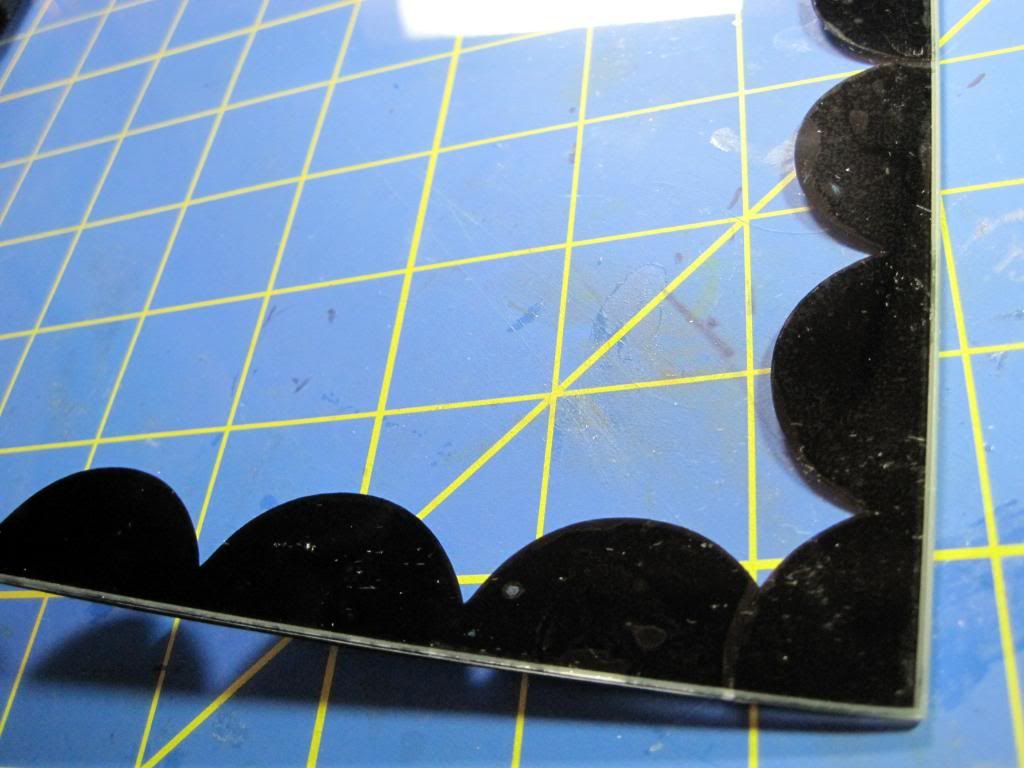
 As you can see this was too small a cut so I tried a one inch cut...
Before I started I prepped my glass by cleaning it with glass cleaner.
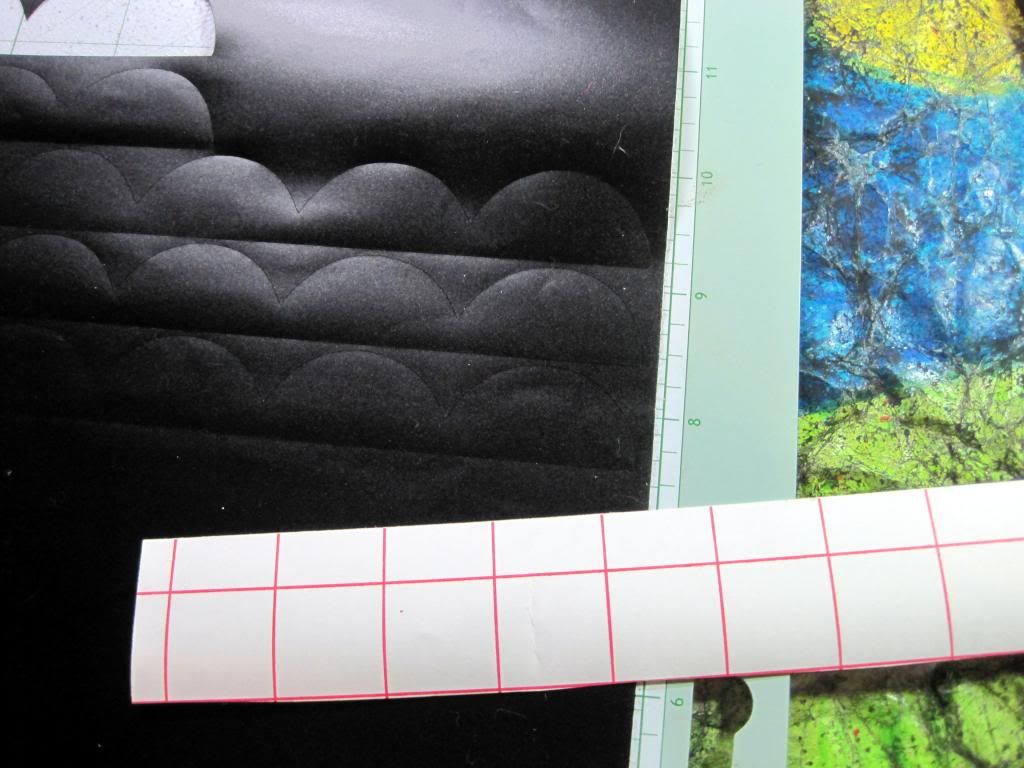
Here is a picture of me using the vinyl cat at .25 inches. I found the perfect design on the Accent Essentials cartridge for my Circut Expression with blade depth set at 1 and speed at medium.


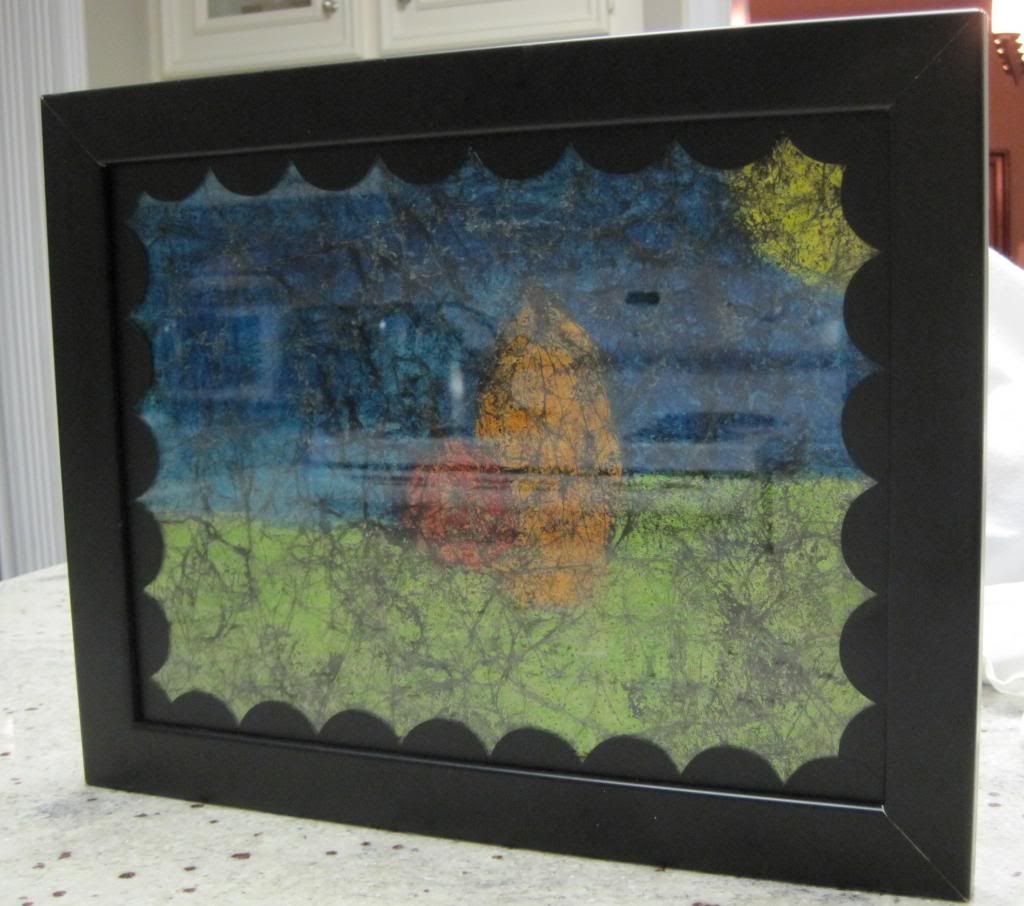
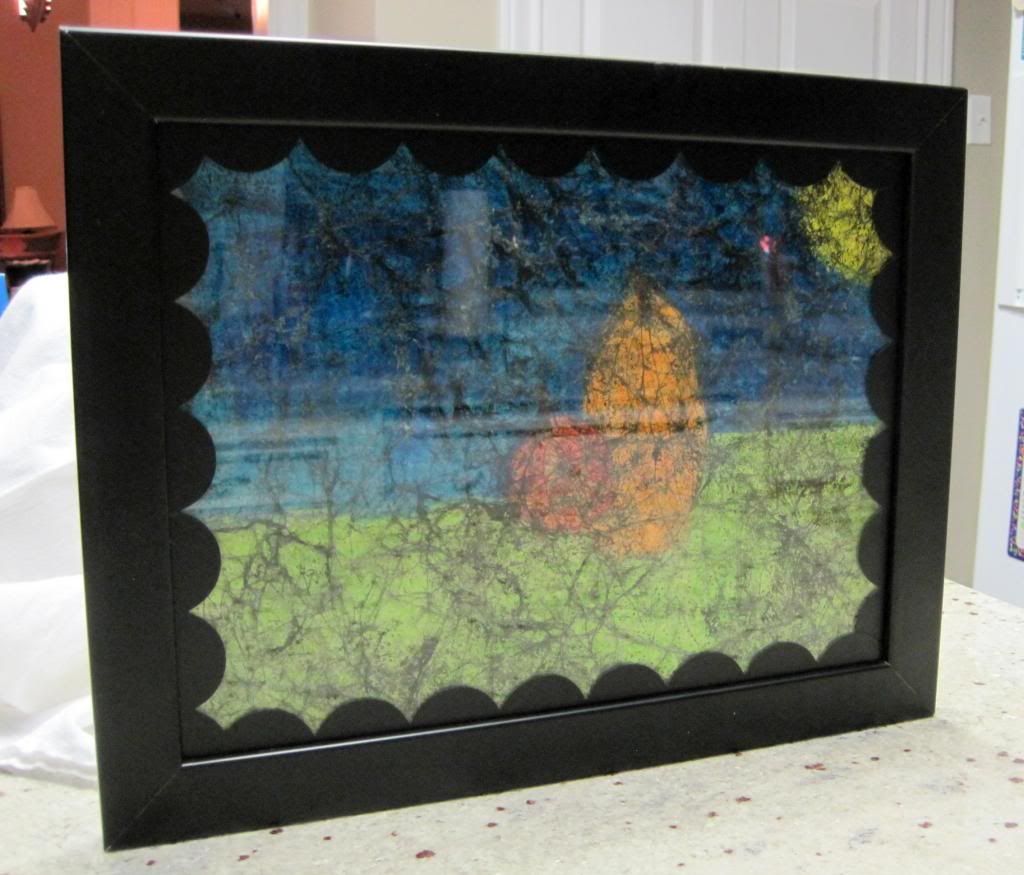
AFTER THE VINYL
You also don’t want to miss out on
the sponsor opportunity to win some free digis from Scrapbook Stamp
Society. One person who comments on ALL blogs will get 3 new digi’s
and an extra entry if you like the Scrapbook Stamp Society Facebook page
at https://www.facebook.com/ScrapbookStampSociety

Thank you for stopping by today and please continue on to Pam's blog.
Janet www.janetscreativeworld.blogspot.com
Cicily www.Pinkdalmationscrapper.blogspot.com
Robin www.scrapandchat.blogspot.com
Zenita www.scrappinwithz.blogspot.com
Anita www.anitaandbugs.blogspot.com
Liz www.tryin2craft.blogspot.com
Jearise www.lorbysworld.blogspot.com
Pam www.mzlavr2.blogspot.com
Jessi www.mylifeinartsncrafts.blogspot.com
That is awesome Jearise. It is original too I think. Most put words, you framed your frame :) Great job!
ReplyDeleteGreat idea! I love how crafty minds work to solve problems with materials at hand. :)
ReplyDeleteGreat job by your son and by you!! Thanks for showing us your work.
ReplyDeleteZ
This is great!!!! Fantastic project.
ReplyDeleteHugs, Anita
Turned out wonderful and great way to finish off his project:-) TFS
ReplyDeletevery creative!
ReplyDeleteGreat way to cover up that area on the frame where the artwork was not -- the artwork is great btw!
ReplyDeleteThanks for sharing!
Very cool! Christina
ReplyDeleteThis is ingenious, I would never have thought to use the vinyl to cover the edge. I usually put another piece of paper behind the picture, now I'm going through my house and pulling those frames down and vinyling the glass!
ReplyDeleteLiz
http://tryin2craft.blogspot.com
lizabratt@comcast.net
I always enjoy postings of your creativity! You do such beautiful work and it inspires my own thoughts! It was fun to see how you use vinyl! Thank You.
ReplyDeleteGreat idea! Thanks for sharing.
ReplyDeleteKerry
mommakcrafts at yahoo dot ca
Fabulous. Thanks for sharing!
ReplyDeleteGreat Idea to center a project that is a bit small for a frame. Thanks for the idea.
ReplyDeleteDebbie
what a great project and tutorial my dear friend!!! I always learn something new on your blog - thank you !!!
ReplyDeleteMuch love, hugs, and friendship
Lynne
What a great idea! I can see why you would want to save that lovely piece of art too!
ReplyDeleteTeresa
www.createenjoyshare.blogspot.com
Such an awesome idea, and it turned out great.
ReplyDeletekgprevost(at)sbcglobal(dot)net
kathyskraftsandmore.blogspot.com
Nice artwork. I like the idea of using the vinyl as a boarder.
ReplyDeleteWhat a great idea! TFS
ReplyDeleteRobin
scrapdiva2011@gmail.com
what a great idea! this is very clever. I'll have to remember this. TFS
ReplyDeleteThat is a wonderful idea to fix your framing issue. TFS.
ReplyDeletedmcardmaker (AOL)
Thank you for sharing your tips on how to maximize our frames!
ReplyDeleteFondly,
Ellen ♥ CardMonkey
http://cardmonkeyspaperjungle.com
E-mail: cardmonkey@comcast.net
Wonderful project! Great way to make things work for you!
ReplyDeleteLove your son's artwork!
<3 Pam
MzLavr2sCreations@live.com
What a wonderful project! Your son's artwork is amazing and this is a great way to showcase it.
ReplyDeleteA great idea for unique framing.
ReplyDeletesue
rolfe974@prodigy.net
much more fun an creative then adding a photo mat.. love it!
ReplyDelete